当前版本的文档还未经巡查,您可以查看最新的已查核版本。
你所需要的
-
这个步骤还没有翻译 帮忙翻译一下
-
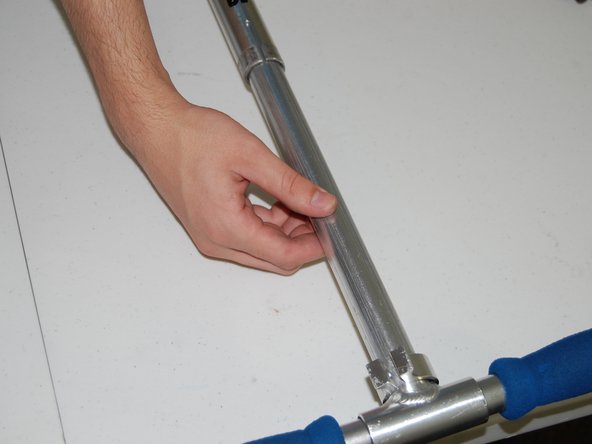
Take the top of the scooter and open the handlebar lock to expose the small screw underneath. (Picture 1)
-
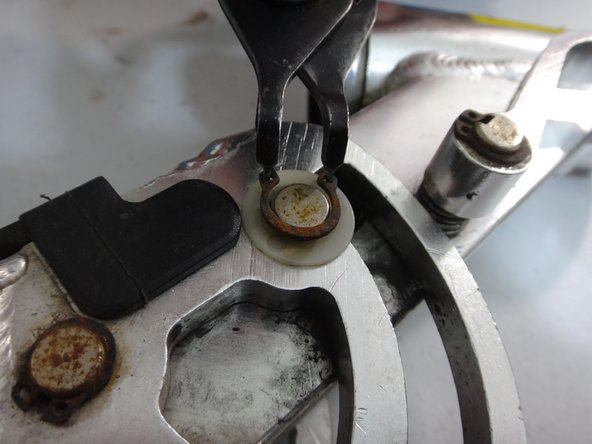
Using a 3mm allen key unscrew the single retaining screw. (Picture 2)
-
Once the screw is removed the clip tightening screw can be removed by hand freeing the whole retaining clip. (Picture 3)
-
-
这个步骤还没有翻译 帮忙翻译一下
-
Moving down the remaining scooter shaft, use a 5mm allen key to remove the lower retaining ring. (Picture 1)
-
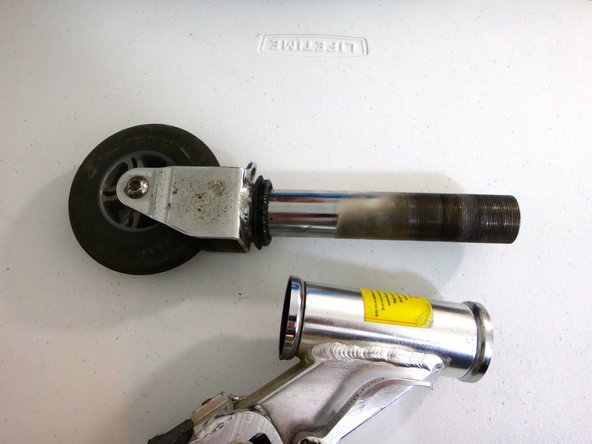
Now remove the remaining scooter shaft by unscrewing it from the the wheel and axle. (Picture 2)
-
Hint: Hold the front wheel while unscrewing the shaft to prevent the axle from spinning.
-
-
这个步骤还没有翻译 帮忙翻译一下
-
Using your hand unscrew the first nut on the axle. (Picture 1)
-
Note: This is the jam-nut used to stop the axle from falling apart.
-
Now using the Channel Lock Pliers remove the axle retaining nut. (Picture 2)
-
Hint: You may have to hold the front wheel to prevent the whole assembly from rotating.
-
-
-
这个步骤还没有翻译 帮忙翻译一下
-
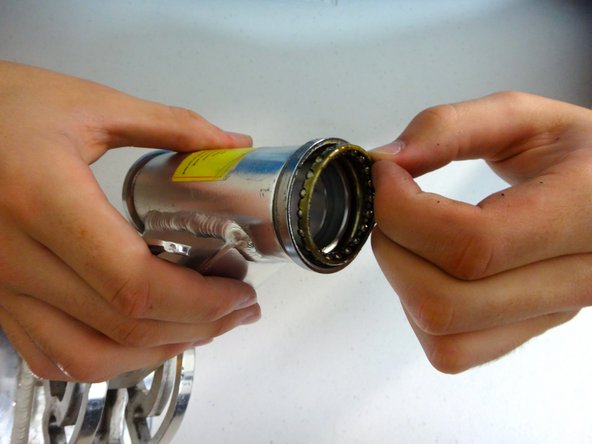
There will also be a bearing on the axle itself which can also be easily slid off. (Picture 1)
-
Now that the axle is free the front wheel can easily be removed using two 5mm allen keys. (Picture 2)
-
Hint: If you only have one 5mm allen key, the 5mm allen key and the pair of needle nose pliers can be used instead of two allen keys.
-
-
这个步骤还没有翻译 帮忙翻译一下
-
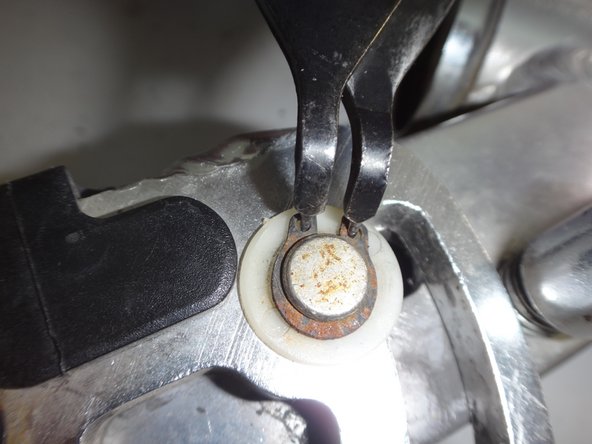
Remove all six snap rings from the pivoting assembly. The process for using snap ring pliers is shown in Pictures 1-3.
-
Hint: Three snap rings are shown in Picture 1. The remaining three are on the other side in the same location.
-
Note: It is recomended to wear eye protection during this step since snap rings have a tendency to spring all over the place.
-
-
这个步骤还没有翻译 帮忙翻译一下
-
Remove the spring from the inner workings of the pivoting mechanism with the needle nose piers.
-
To remove the spring: First, pull on the visible hook, then push the hook back into the mechanism to remove the tension on the second hook.
-
Leave the spring in the mechanism for now. It will be retrieved once the pins are removed.
-
-
这个步骤还没有翻译 帮忙翻译一下
-
Remove all three pins from the pivoting assembly.
-
Hint: We found it helpful to use the long bolt from the back wheel to hammer out these pins which were difficult to get out. (Picture 1)
-
Note: Once complete, the remaining pieces should fall out as the pivoting piece is removed from the base.
-


3等其他人完成本指南。
2条评论
aloha ue why not be following the guide introduction in the information is razor scooter not unable to work our ineeding be a chagering please I what to know to me I getting fasteration is my elecrtrical toys bluerazor please has a battery bottom.
Mark - would you be able to draw a simple diagram that shows how the springs and levers are oriented to enable the folding mechanism to work properly? I stupidly did not take a close look before tearing down my scooter.