跳转到主内容

Shark IQ AV993 Motherboard Replacement

你所需要的

  1. Shark IQ AV993 Motherboard Replacement, Battery: 步骤 1 中的图像 1,1
    • Unscrew the two 14 mm screws on the battery panel using a Phillips #1 screwdriver.

  2. Shark IQ AV993 Motherboard Replacement: 步骤 2 中的图像 1,1
    • Gently pull the white tabs on the battery straight upward.

    • There is a clip inserted into a plastic housing via wiring. Disconnect the battery by pressing in the clip.

    • Don't pull up on the battery too hard as a wire connects to the robot. Don't want to damage the wire here.

    • Remove the battery from the device.

  3. Shark IQ AV993 Motherboard Replacement, Bumper: 步骤 3 中的图像 1,2 Shark IQ AV993 Motherboard Replacement, Bumper: 步骤 3 中的图像 2,2
    • Remove the five 10 mm screws from the bottom of the device using a T15 Torx screwdriver.

  4. Shark IQ AV993 Motherboard Replacement: 步骤 4 中的图像 1,1
    • Pry both ends of the black piece to snap it out of place.

  5. Shark IQ AV993 Motherboard Replacement: 步骤 5 中的图像 1,1
    • Use both hands to lift the device.

    • The front bumper that is seated on the device will fall off.

    • This is completely normal, as the screws and the bottom holder are the only things holding the bumper in place.

  6. Shark IQ AV993 Motherboard Replacement, Wheels: 步骤 6 中的图像 1,2 Shark IQ AV993 Motherboard Replacement, Wheels: 步骤 6 中的图像 2,2
    • Flip over the vacuum so that the bottom is facing upwards.

    • Remove the five 14 mm screws using a T20 Torx screwdriver.

  7. Shark IQ AV993 Motherboard Replacement: 步骤 7 中的图像 1,1
    • Pull upward on the wheel to remove the wheel housing.

    • Carefully remove this as there is a clip connecting to the wheel.

    • Press the tab on the clip and slide the wires out of the housing.

    • Repeat this step and the previous step for the other wheel assembly.

  8. Shark IQ AV993 Motherboard Replacement, Roller Brush: 步骤 8 中的图像 1,1
    • Remove the dust bin from the device by pressing down on the release button and pulling out the tray.

  9. Shark IQ AV993 Motherboard Replacement: 步骤 9 中的图像 1,1
    • Turn the device over so the bottom is facing upwards.

    • Press on the release tabs located on the roller brush cover.

    • Remove the cover from the device.

  10. Shark IQ AV993 Motherboard Replacement: 步骤 10 中的图像 1,1
    • Use your hands to lift the roller brush out of the device.

  11. Shark IQ AV993 Motherboard Replacement, Motherboard: 步骤 11 中的图像 1,1
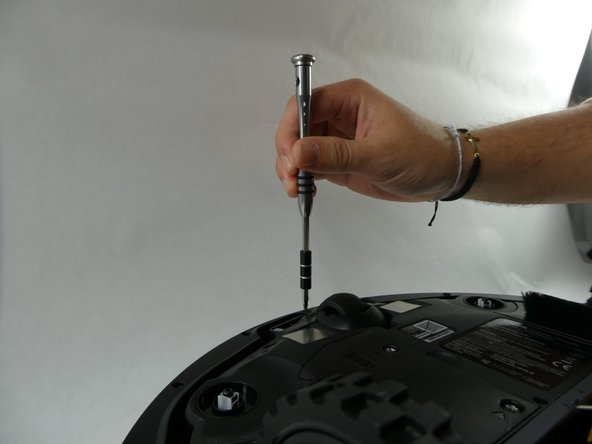
    • Remove the five 14 mm screws from the bottom of the device using a T20 Torx screwdriver.

  12. Shark IQ AV993 Motherboard Replacement: 步骤 12 中的图像 1,1
    • Use your hands to lift the bottom of the vacuum away from the top plastic cover.

    • To lift this section off, you may need to apply slight pressure to the top plastic cover. If not, the cover should fall right off as it just rests on guide pins.

  13. Shark IQ AV993 Motherboard Replacement: 步骤 13 中的图像 1,2 Shark IQ AV993 Motherboard Replacement: 步骤 13 中的图像 2,2
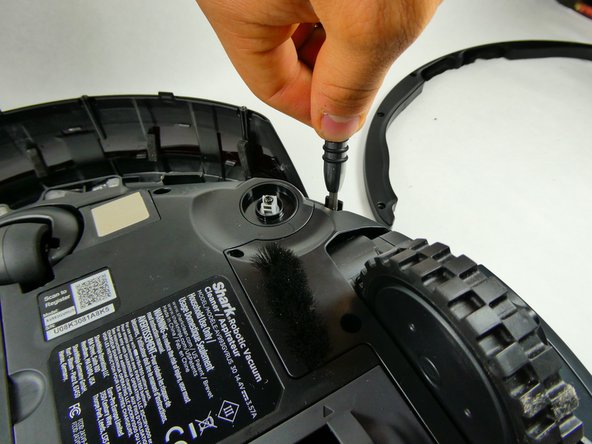
    • Remove the three 10 mm screws using a Phillips #1 screwdriver.

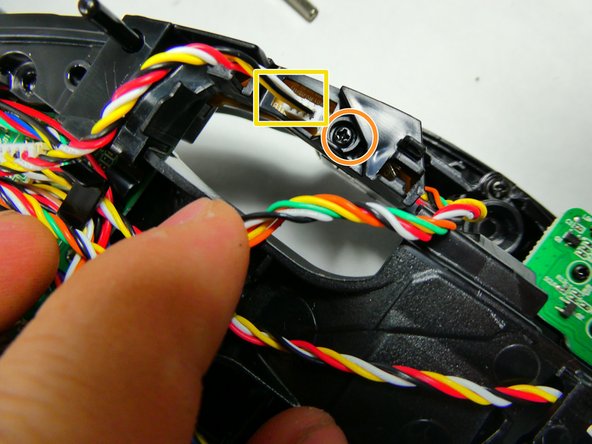
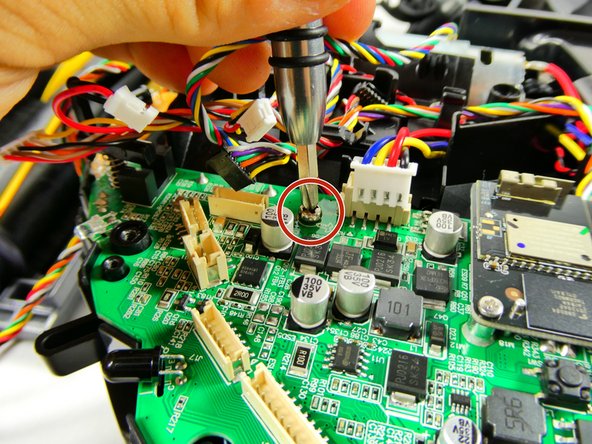
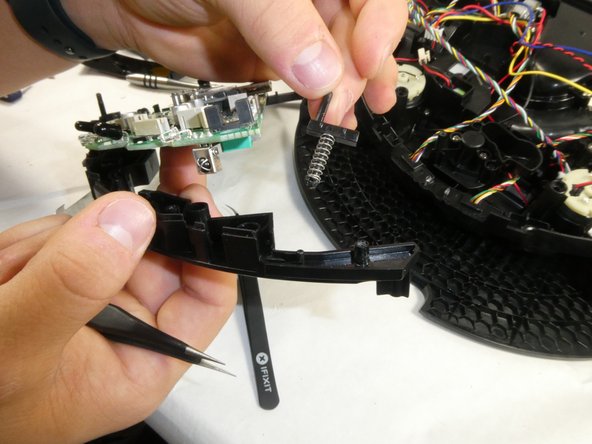
    • Off to the right and left sides of the robot you will find one clip leading to a smaller independent board. Remove the singular 9 mm screw using a T15 Torx screwdriver to free the edges of the plastic element holding the motherboard down. Repeat this for the other side.

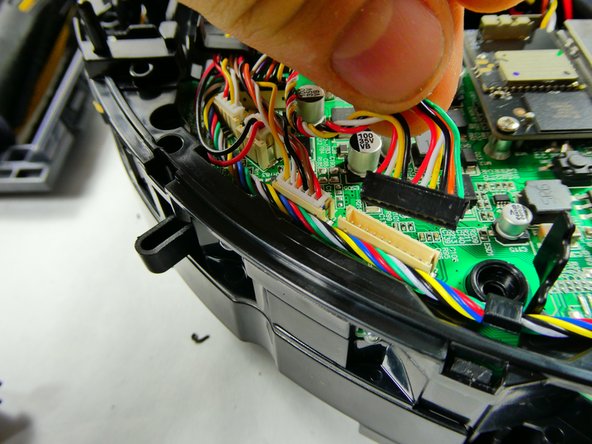
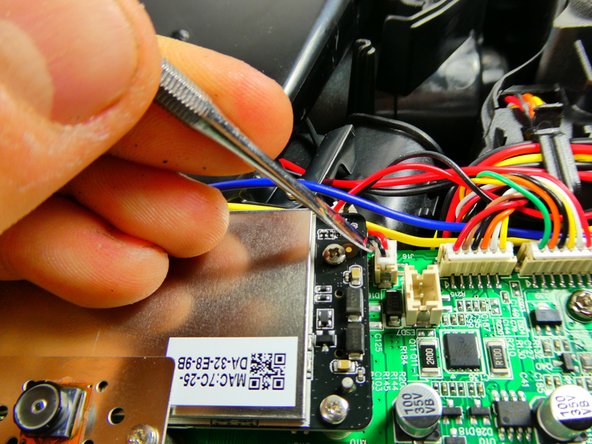
    • Detach the white connector from the plastic housing. Repeat this for the other side.

    • Do not pull on this housing element too hard, as they are not soldered onto the board very well. This could result ripping the housing clean off the board, rendering the device inoperable until reassembly.

  14. Shark IQ AV993 Motherboard Replacement: 步骤 14 中的图像 1,3 Shark IQ AV993 Motherboard Replacement: 步骤 14 中的图像 2,3 Shark IQ AV993 Motherboard Replacement: 步骤 14 中的图像 3,3
    • Unplug each of the thirteen connectors from their housings on the motherboard.

    • Using a spudger may be of assistance to leverage the smaller ones out.

    • Do not pull/pry on the connectors too hard, as they are not seated onto the motherboard very well. This could result in ripping one of the housings clean off the board, rendering the device inoperable until replacement.

  15. Shark IQ AV993 Motherboard Replacement: 步骤 15 中的图像 1,1
    • This clip holds all the wires in an organized manner and is a part of the plastic housing that needs to be removed.

    • Take the wires out of this clip so that the plastic cover can be free.

  16. Shark IQ AV993 Motherboard Replacement: 步骤 16 中的图像 1,3 Shark IQ AV993 Motherboard Replacement: 步骤 16 中的图像 2,3 Shark IQ AV993 Motherboard Replacement: 步骤 16 中的图像 3,3
    • As indicated this is the plastic cover we are trying to remove from the bot, clearly distinctive by the lip.

    • On either side of the bot, there are clips that insert into the upper plastic housing piece that hold the motherboard down. Popping these pieces off will free this covering, allowing the motherboard to be almost free.

  17. Shark IQ AV993 Motherboard Replacement: 步骤 17 中的图像 1,2 Shark IQ AV993 Motherboard Replacement: 步骤 17 中的图像 2,2
    • Remove the two 10 mm screws using a Phillips #1 screwdriver, freeing the motherboard from the plastic holdings below the board.

  18. Shark IQ AV993 Motherboard Replacement: 步骤 18 中的图像 1,2 Shark IQ AV993 Motherboard Replacement: 步骤 18 中的图像 2,2
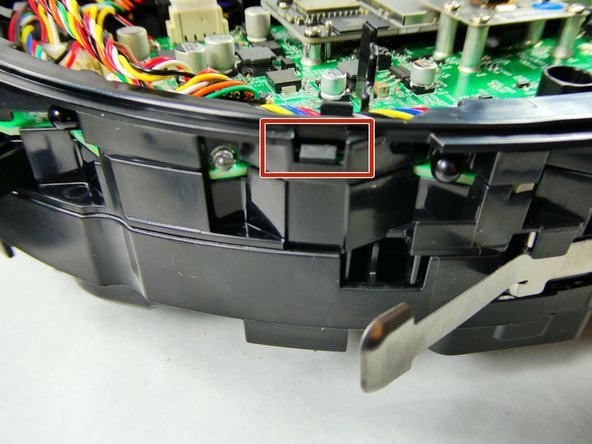
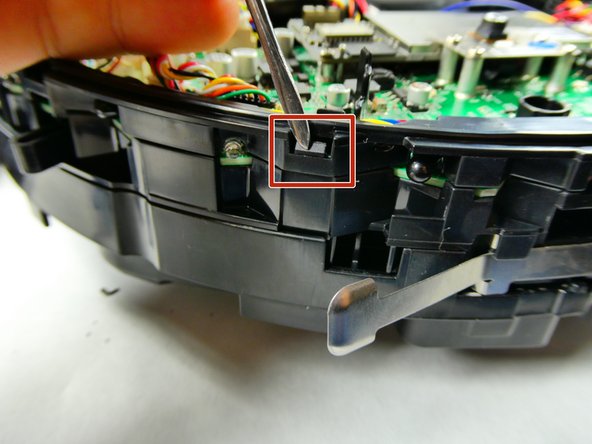
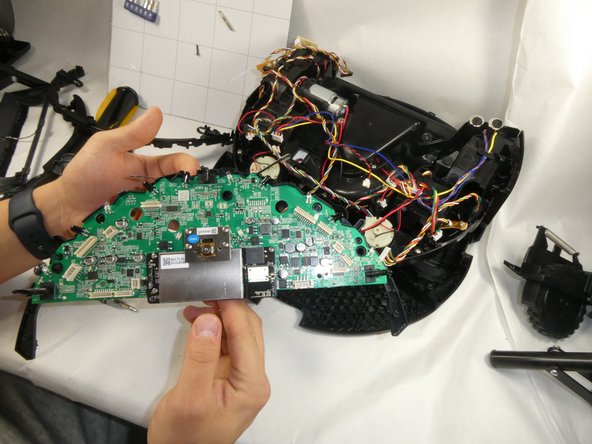
    • Upon lifting up the motherboard, which will lift straight up, there is a singular clip that connects the rest of the bot. Unclip this, where the clip is large enough to undo with a finger.

    • Once this is removed, the motherboard and the plastic it is clipped to can be removed from the rest of the bot.

  19. Shark IQ AV993 Motherboard Replacement: 步骤 19 中的图像 1,2 Shark IQ AV993 Motherboard Replacement: 步骤 19 中的图像 2,2
    • The board is attached to the plastic frame by these spring-loaded clips. Pinch the bottom of these with some tweezers and push the ends through the hole they bore to remove them.

    • Once these two clips, one on either side, are removed, the motherboard will be independent from the plastic framing, ready to be replaced.

结论

To reassemble your device, follow these instructions in reverse order.

2等其他人完成本指南。

Kyle Rhines

于10/26/22注册

558 声望

创作了4篇指南

团队

UMass Dartmouth, Team 3-3, Botvin Fall 2022 UMass Dartmouth, Team 3-3, Botvin Fall 2022 的会员

UMASSD-BOTVIN-F22S3G3

3 名成员

创作了6篇指南

0条评论

添加评论

浏览统计数据:

过去 24 小时: 2

过去 7 天: 9

过去 30 天: 40

总计 691