跳转到主内容
加入维修社区 - 创建账户

Shark Clean Sense HP102PET Shell Replacement

你所需要的

  1. Shark Clean Sense HP102PET Shell Replacement, Outer White Shell: 步骤 1 中的图像 1,3 Shark Clean Sense HP102PET Shell Replacement, Outer White Shell: 步骤 1 中的图像 2,3 Shark Clean Sense HP102PET Shell Replacement, Outer White Shell: 步骤 1 中的图像 3,3
    • Turn off and unplug the air purifier before beginning.

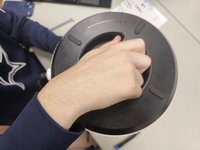
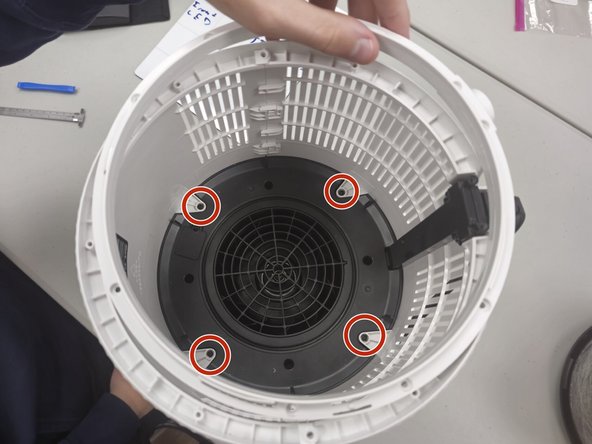
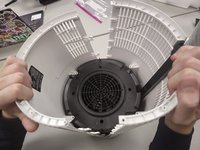
    • Unscrew the one 1.2 cm screw holding the grate at the top with a TR10 Torx screwdriver.

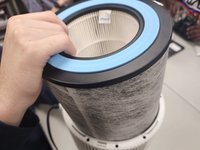
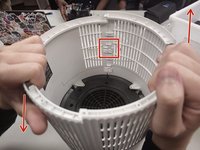
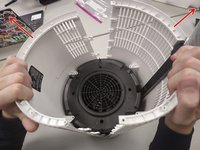
    • Use a prying tool to carefully pry along the outer edges to disengage the inner retaining clips.
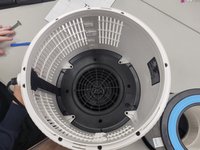
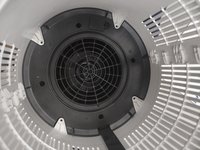
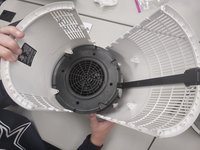
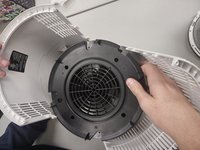
    • These retaining clips can be difficult to disengage, but releasing two clips on the same side should allow you to easily remove the grate.

    • Remove the grate.

  2. Shark Clean Sense HP102PET Shell Replacement: 步骤 2 中的图像 1,1
    • Remove the two 1.2 cm screws with a TR10 Torx screwdriver.

    • Almost all screws are the same length (around 1 cm). The main difference is the bit that's used to remove them.

  3. Shark Clean Sense HP102PET Shell Replacement: 步骤 3 中的图像 1,1
    • Use a Phillips #1 screwdriver to remove the four 1 cm screws.

    • This will make the fan holder slightly loose, but this will not be a problem until you open the case completely.

  4. Shark Clean Sense HP102PET Shell Replacement: 步骤 4 中的图像 1,3 Shark Clean Sense HP102PET Shell Replacement: 步骤 4 中的图像 2,3 Shark Clean Sense HP102PET Shell Replacement: 步骤 4 中的图像 3,3
    • Flip the device over and unscrew the bottom by turning it clockwise.

    • Remove the filter.

  5. Shark Clean Sense HP102PET Shell Replacement: 步骤 5 中的图像 1,2 Shark Clean Sense HP102PET Shell Replacement: 步骤 5 中的图像 2,2
    • Remove the five 1 cm a Phillips screwdriver.

    • Unscrew the four 1.2 cm screws with a TR10 Torx screwdriver.

    • The ring will not be hard to remove, but be careful on reassembly. Make sure that the power connector is properly seated when putting the ring back on.

  6. Shark Clean Sense HP102PET Shell Replacement: 步骤 6 中的图像 1,2 Shark Clean Sense HP102PET Shell Replacement: 步骤 6 中的图像 2,2
    • Remove the four 1 cm screws that secure the fan housing.

  7. Shark Clean Sense HP102PET Shell Replacement: 步骤 7 中的图像 1,3 Shark Clean Sense HP102PET Shell Replacement: 步骤 7 中的图像 2,3 Shark Clean Sense HP102PET Shell Replacement: 步骤 7 中的图像 3,3
    • Make sure that you are pulling up on the side that allows, as pictured in the red box.

    • Gently slide the cases up and down, or hold one and gently pull up on the opposite side (Down on the left, up on the right for this picture).

    • The whole case will start to separate and the black disc will come loose. This is normal.

  8. Shark Clean Sense HP102PET Shell Replacement: 步骤 8 中的图像 1,3 Shark Clean Sense HP102PET Shell Replacement: 步骤 8 中的图像 2,3 Shark Clean Sense HP102PET Shell Replacement: 步骤 8 中的图像 3,3
    • Gently open the case outwards as there are fragile electronics inside.

    • Remove the fan housing.

结论

To reassemble your device, follow these instructions in reverse order.

另外一个人完成了本指南。

1指南评论

Thank you for this! My air purifier was making noise and I couldn’t find any guides to take it apart. This helped me clean it out and get rid of the noise! :-)

Maddie D - 回复

添加评论

浏览统计数据:

过去 24 小时: 0

过去 7 天: 12

过去 30 天: 60

总计 426