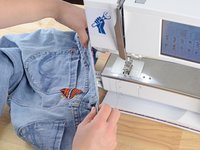
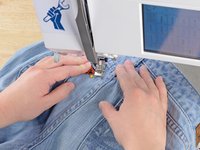
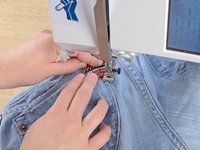
跳转到主内容

Sew-on Patch

你所需要的

  1. Sew-on Patch, Sew-on Patch: 步骤 1 中的图像 1,2 Sew-on Patch, Sew-on Patch: 步骤 1 中的图像 2,2
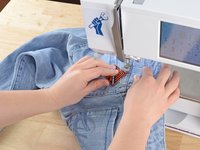
    • Examine the damage. Clip any loose threads and remove any debris from the tear.

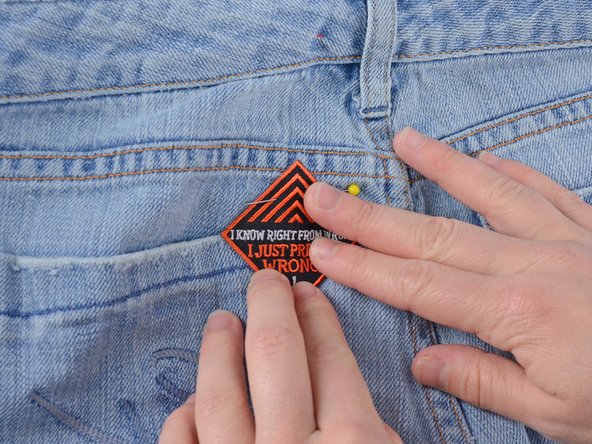
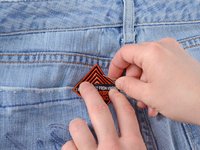
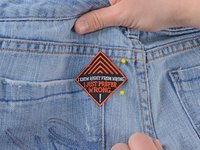
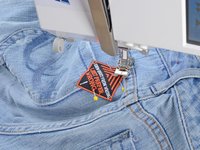
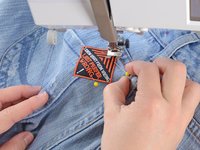
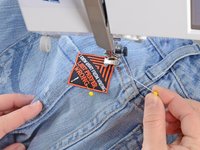
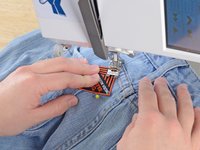
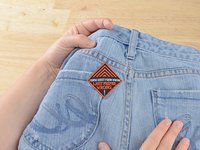
    • Grab a trendy patch.

  2. Sew-on Patch: 步骤 2 中的图像 1,2 Sew-on Patch: 步骤 2 中的图像 2,2
    • Position the patch over the hole.

    • Any patch you use should overlap the damage by at least 1/8".

  3. Sew-on Patch: 步骤 3 中的图像 1,3 Sew-on Patch: 步骤 3 中的图像 2,3 Sew-on Patch: 步骤 3 中的图像 3,3
    • Pin the patch to the jeans.

    • Be sure to only pin the patch to one layer of denim, or you will sew the pants shut.

  4. Sew-on Patch: 步骤 4 中的图像 1,3 Sew-on Patch: 步骤 4 中的图像 2,3 Sew-on Patch: 步骤 4 中的图像 3,3
    • Slide the jeans into the sewing machine, positioning the needle over the edge of the patch.

    • Be sure you only have one layer of the jeans between the needle and the sewing machine arm, or you will sew the pants shut.

  5. Sew-on Patch: 步骤 5 中的图像 1,2 Sew-on Patch: 步骤 5 中的图像 2,2
    • Lower the pressor foot.

    • Sew along the edge of the patch.

    • Remove the pins before you get to them.

    • Sewing over a pin can bend or break the needle.

  6. Sew-on Patch: 步骤 6 中的图像 1,2 Sew-on Patch: 步骤 6 中的图像 2,2
    • Continue sewing around the patch, lifting the pressor foot to turn at corners of the patch.

  7. Sew-on Patch: 步骤 7 中的图像 1,3 Sew-on Patch: 步骤 7 中的图像 2,3 Sew-on Patch: 步骤 7 中的图像 3,3
    • When you come all the way around, overlap the first two or three stitches.

    • Lift the needle and pressor foot.

    • Slide the jeans out of the sewing machine.

    • Clip any threads, and admire your work.

终点

4等其他人完成本指南。

Brittany McCrigler

于03/05/12注册

89,011 声望

创作了131篇指南

团队

iFixit iFixit 的会员

Staff

135 名成员

创作了16,732篇指南

0条评论

添加评论

浏览统计数据:

过去 24 小时: 7

过去 7 天: 29

过去 30 天: 126

总计 7,002