跳转到主内容

Sanyo-PM 8200 Motherboard Replacement

你所需要的

  1. Sanyo-PM 8200 Motherboard Replacement, Power Off Phone: 步骤 1 中的图像 1,1
    • Power down the phone by holding down the red "end" button.

  2. Sanyo-PM 8200 Motherboard Replacement, Remove Old Battery: 步骤 2 中的图像 1,1
    • Push and hold the button on the back toward the direction of the arrow to unlock the battery.

    • Lift and remove the battery from the back of the phone.

  3. Sanyo-PM 8200 Motherboard Replacement, Back Casing: 步骤 3 中的图像 1,1
    • Use a push pin or tweezers to remove the neoprene screw-cover located on the upper, left corner of the back casing.

  4. Sanyo-PM 8200 Motherboard Replacement: 步骤 4 中的图像 1,1
    • Unscrew all four, 5mm Tri-Wing screws.

  5. Sanyo-PM 8200 Motherboard Replacement: 步骤 5 中的图像 1,2 Sanyo-PM 8200 Motherboard Replacement: 步骤 5 中的图像 2,2
    • Pry the back casing off the device using a spudger. Work your way along the edges to completely separate the back casing from the device.

    • This step may require extra force. But too much force could break the back casing.

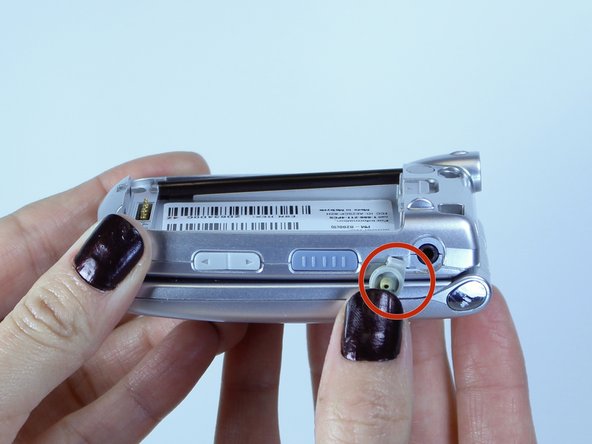
    • Remove the headphone jack cover when separating the back casing. The headphone jack is located on the opposite side of the antenna.

  6. Sanyo-PM 8200 Motherboard Replacement, Lift the Motherboard: 步骤 6 中的图像 1,1
    • Gently lift up the motherboard. The keypad should now be exposed.

  7. Sanyo-PM 8200 Motherboard Replacement, Disconnect the Flex Ribbon: 步骤 7 中的图像 1,1
    • Using tweezers, pull on the silver flex ribbon to disconnect it from the motherboard.

  8. Sanyo-PM 8200 Motherboard Replacement, Remove the Motherboard: 步骤 8 中的图像 1,1
    • Remove the motherboard from the back of the phone.

结论

To reassemble your device, follow these instructions in reverse order.

Michaella

于10/07/14注册

101 声望

撰写一个指南

团队

USF Tampa, Team 1-6, Leahy Fall 2014 USF Tampa, Team 1-6, Leahy Fall 2014 的会员

USFT-LEAHY-F14S1G6

6 名成员

创作了10篇指南

0条评论

添加评论

浏览统计数据:

过去 24 小时: 0

过去 7 天: 2

过去 30 天: 3

总计 359