跳转到主内容

Sanyo VPC-X1200 Button Plate Replacement

你所需要的

  1. Sanyo VPC-X1200 Button Plate Replacement, Back Case: 步骤 1 中的图像 1,3 Sanyo VPC-X1200 Button Plate Replacement, Back Case: 步骤 1 中的图像 2,3 Sanyo VPC-X1200 Button Plate Replacement, Back Case: 步骤 1 中的图像 3,3
    • Remove the five case screws with a Phillips #00 Screwdriver.

    • Five 3.5mm Phillips Screws

  2. Sanyo VPC-X1200 Button Plate Replacement: 步骤 2 中的图像 1,1
    • Gently lift up the back cover and set aside.

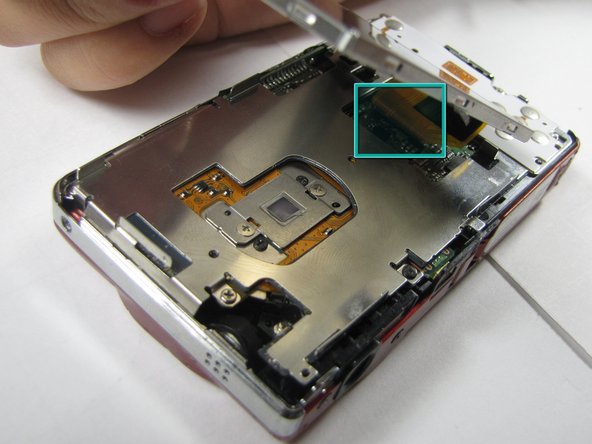
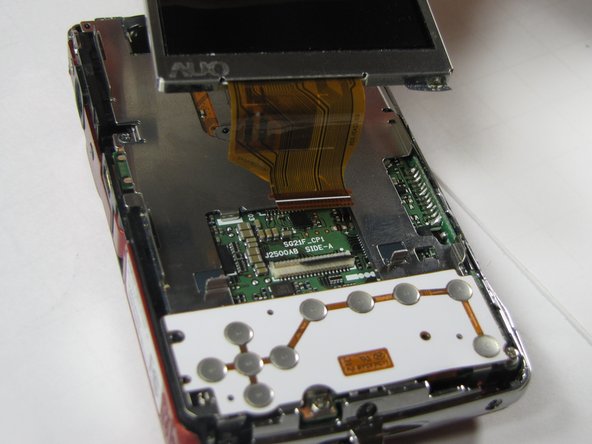
  3. Sanyo VPC-X1200 Button Plate Replacement, LCD Screen: 步骤 3 中的图像 1,2 Sanyo VPC-X1200 Button Plate Replacement, LCD Screen: 步骤 3 中的图像 2,2
    • Gently lift up on the left side of the LCD and slowly pull it to the left side of the camera but do not remove entirely, there is a ribbon connector.

    • Be careful not to rip out the ribbon connector.

  4. Sanyo VPC-X1200 Button Plate Replacement: 步骤 4 中的图像 1,2 Sanyo VPC-X1200 Button Plate Replacement: 步骤 4 中的图像 2,2
    • To clear the ribbon connection underneath the screen, lift up the black ribbon gate with the spudger.

    • Gently lift ribbon out of the gate and set screen aside.

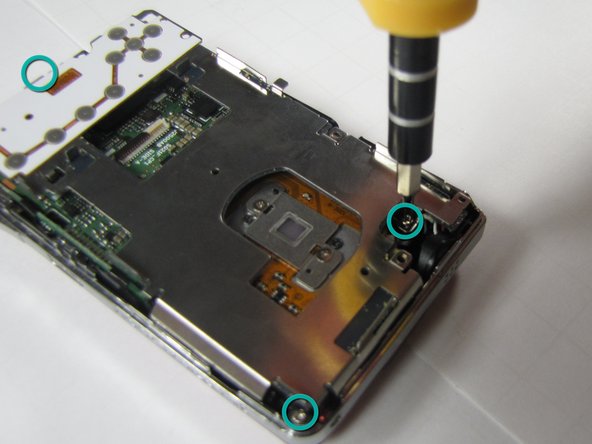
  5. Sanyo VPC-X1200 Button Plate Replacement, Button Plate: 步骤 5 中的图像 1,2 Sanyo VPC-X1200 Button Plate Replacement, Button Plate: 步骤 5 中的图像 2,2
    • There are five screws of three different sizes which need removal.

    • One 4.5mm screw

    • Four 3.5mm screws, one on the button side

    • One 5.5mm screws

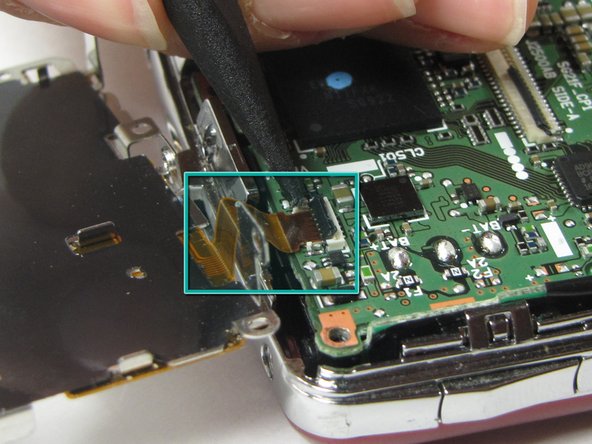
  6. Sanyo VPC-X1200 Button Plate Replacement: 步骤 6 中的图像 1,2 Sanyo VPC-X1200 Button Plate Replacement: 步骤 6 中的图像 2,2
    • Slowly lift metal tray to the right.

    • Be careful not to bend the screw tabs or rip out the ribbon cable.

    • Remove ribbon cable by using the spudger to lift up the black ribbon gate to release the ribbon

结论

To reassemble your device, follow these instructions in reverse order.

团队

Cal Poly, Team 7-10, Maness Spring 2010 Cal Poly, Team 7-10, Maness Spring 2010 的会员

CPSU-MANESS-S10S7G10

4 名成员

创作了14篇指南

0条评论

添加评论

浏览统计数据:

过去 24 小时: 1

过去 7 天: 1

过去 30 天: 2

总计 2,213