当前版本的文档还未经巡查,您可以查看最新的已查核版本。
这个步骤还没有翻译 帮忙翻译一下
Place your thumb on the right side of the camera over the battery door.
Slide the battery door to the right until the door lifts up.
Remove and recycle old batteries.
Remove the following six screws using the Phillips #00 screwdriver:
Two screws on the left side of the camera.
Two screws on the right side of the camera.
Two screws on the bottom of the camera.
Open the battery slot on the bottom of the camera by sliding the door to the right.
Remove the single 4 mm screw on the bottom right using the Phillips #00 screwdriver.
Insert a spudger in the seam at the bottom of the camera.
Gently separate the rear case from the front of the camera.
This step is only needed for the case and logic board replacement
Using the Phillips #00 screwdriver, remove the single screw attached to the front casing in the top left corner. The front case should easily separate.
This step is only needed for the case replacement.
Using the Phillips #00 screwdriver, remove the screw on the inside of the battery door.
Slide the battery door off of the hinge.
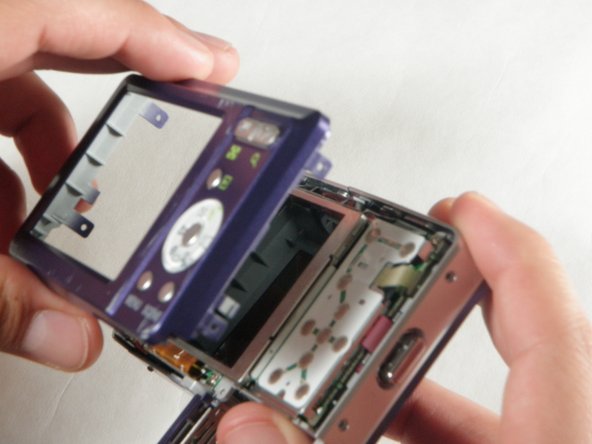
Using the spudger, carefully lift up the LCD screen, making sure to keep the ribbon cable intact.
Place the LCD screen on a non-abrasive surface.
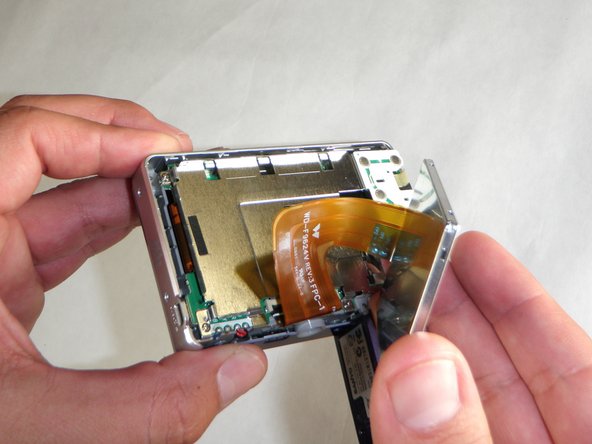
Using the spudger lift the black flap up to release the ribbon cable.
The LCD screen will now be completely detached from the camera.
取消:我没有完成这个指南。
与6其他贡献者
于04/15/10注册
19 声望
创作了2篇指南
徽章: 9
+ 6更多徽章
CPSU-REGAN-S10S24G24
4 名成员
创作了12篇指南
选择一个尺寸并复制下面的代码,将本指南作为一个小插件嵌入到你的网站/论坛中。
过去 24 小时: 1
过去 7 天: 3
过去 30 天: 8
总计 3,076