当前版本的文档还未经巡查,您可以查看最新的已查核版本。
你所需要的


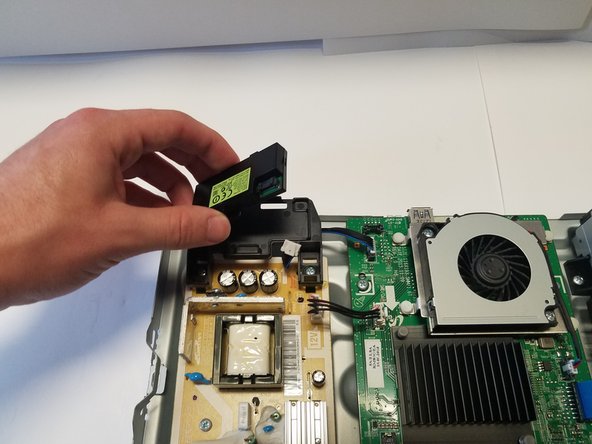
即将完成!
终点
另外一个人完成了本指南。
团队

Baylor, Team S2-G1, Johnson Spring 2018 Baylor, Team S2-G1, Johnson Spring 2018 的会员
BU-JOHNSON-S18S2G1
3 名成员
创作了6篇指南