跳转到主内容

Samsung Series 5 3G Chromebook 16 GB SanDisk Replacement

你所需要的

  1. Samsung Series 5 3G Chromebook 16 GB SanDisk Replacement, Back Cover: 步骤 1 中的图像 1,2 Samsung Series 5 3G Chromebook 16 GB SanDisk Replacement, Back Cover: 步骤 1 中的图像 2,2
    • Place the laptop on a flat surface with the bottom side facing up.

    • Remove the rubber feet from the bottom of the panel using your fingernails.

    • Remove all the seven screws from the bottom panel.

  2. Samsung Series 5 3G Chromebook 16 GB SanDisk Replacement: 步骤 2 中的图像 1,2 Samsung Series 5 3G Chromebook 16 GB SanDisk Replacement: 步骤 2 中的图像 2,2
    • Loosen the back cover panel using a spudger.

  3. Samsung Series 5 3G Chromebook 16 GB SanDisk Replacement: 步骤 3 中的图像 1,2 Samsung Series 5 3G Chromebook 16 GB SanDisk Replacement: 步骤 3 中的图像 2,2
    • Once you work your way around, you can remove the panel.

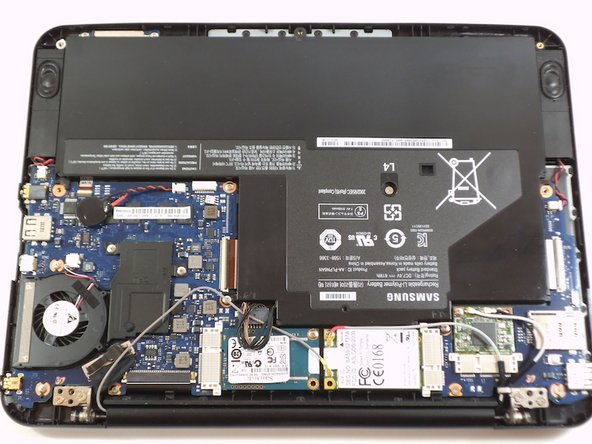
  4. Samsung Series 5 3G Chromebook 16 GB SanDisk Replacement, 16 GB SanDisk: 步骤 4 中的图像 1,3 Samsung Series 5 3G Chromebook 16 GB SanDisk Replacement, 16 GB SanDisk: 步骤 4 中的图像 2,3 Samsung Series 5 3G Chromebook 16 GB SanDisk Replacement, 16 GB SanDisk: 步骤 4 中的图像 3,3
    • Remove the single screw.

    • use the plastic tool to disconnect the WWAN antennas from the board.

    • After removing its mounting screw, the 16 GB SanDisk can be removed from the motherboard.

结论

To reassemble your device, follow these instructions in reverse order.

2等其他人完成本指南。

0条评论

添加评论

浏览统计数据:

过去 24 小时: 0

过去 7 天: 0

过去 30 天: 1

总计 1,143