跳转到主内容

当前版本的文档还未经巡查,您可以查看最新的已查核版本

你所需要的

  1. 这个步骤还没有翻译 帮忙翻译一下

    : 步骤 1 中的图像 1,1
    • Turn the emergency switch off.

  2. 这个步骤还没有翻译 帮忙翻译一下

    : 步骤 2 中的图像 1,2 : 步骤 2 中的图像 2,2
    • Remove the two exposed screws on the top right of the device.

  3. 这个步骤还没有翻译 帮忙翻译一下

    : 步骤 3 中的图像 1,1
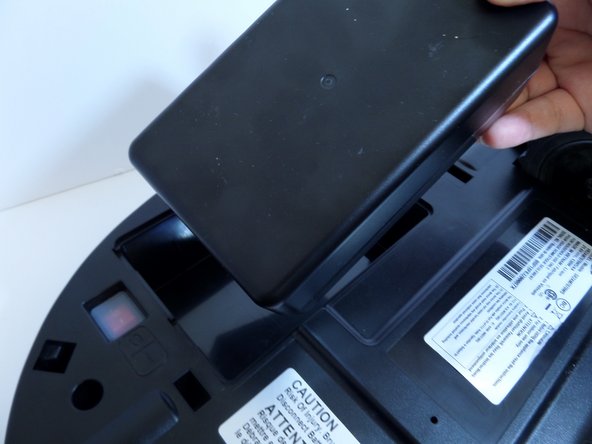
    • Lift the cover plate to expose the battery.

  4. 这个步骤还没有翻译 帮忙翻译一下

    : 步骤 4 中的图像 1,2 : 步骤 4 中的图像 2,2
    • Using one hand, pinch the white plastic connector where the battery's wiring connects the POWERbot. Pull up to disconnect.

  5. 这个步骤还没有翻译 帮忙翻译一下

    : 步骤 5 中的图像 1,2 : 步骤 5 中的图像 2,2
    • Lift the battery from the right side, up and out of its compartment.

  6. 这个步骤还没有翻译 帮忙翻译一下

    : 步骤 6 中的图像 1,2 : 步骤 6 中的图像 2,2
    • Unscrew the two silver 1.5 cm screws on the left and right side of the battery compartment.

    • Remove the two 1.5 cm screws above the yellow sliding lock tabs.

    • Remove the two 1.2 cm screws in the brush compartment.

  7. 这个步骤还没有翻译 帮忙翻译一下

    : 步骤 7 中的图像 1,2 : 步骤 7 中的图像 2,2
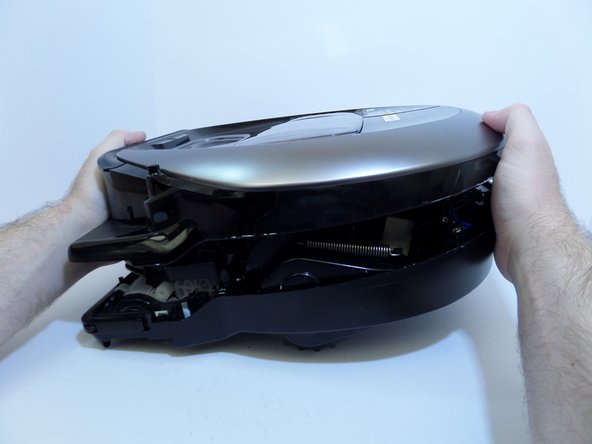
    • With moderate force, separate the silver top from the black bottom of the vacuum.

    • The cover will only separate a few inches as the two halves are connected by wires.

  8. 这个步骤还没有翻译 帮忙翻译一下

    : 步骤 8 中的图像 1,1
    • Disconnect the white and red wired connector attached to the top half of the base of the vacuum by squeezing the connector and pulling up.

  9. 这个步骤还没有翻译 帮忙翻译一下

    : 步骤 9 中的图像 1,1
    • Pinching the top and bottom of the black wired connector, pull outward, fully detaching the top from the bottom of the device.

  10. 这个步骤还没有翻译 帮忙翻译一下

    : 步骤 10 中的图像 1,1
    • Detach the wide circuit connector on the left side by pinching and pressing down on the right and left side of the clip, pulling the connector out.

    • Pull the connector out by the left and right side of the white clip and not by the wires.

  11. 这个步骤还没有翻译 帮忙翻译一下

    : 步骤 11 中的图像 1,2 : 步骤 11 中的图像 2,2
    • Remove the four 1.2 cm screws.

    • Remove the single 0.8 cm screw.

  12. 这个步骤还没有翻译 帮忙翻译一下

    : 步骤 12 中的图像 1,1
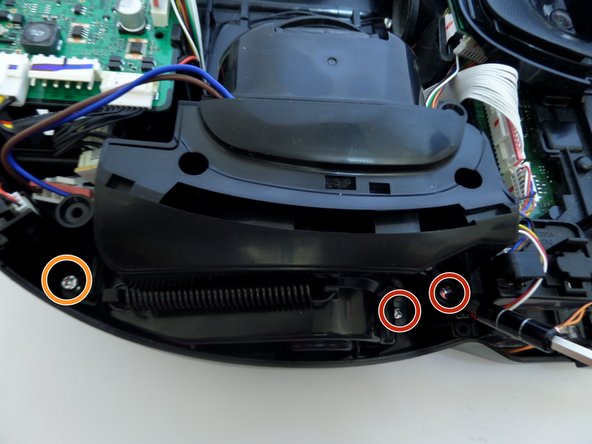
    • Remove the two 1.5 cm screws on the motor chamber.

  13. 这个步骤还没有翻译 帮忙翻译一下

    : 步骤 13 中的图像 1,2 : 步骤 13 中的图像 2,2
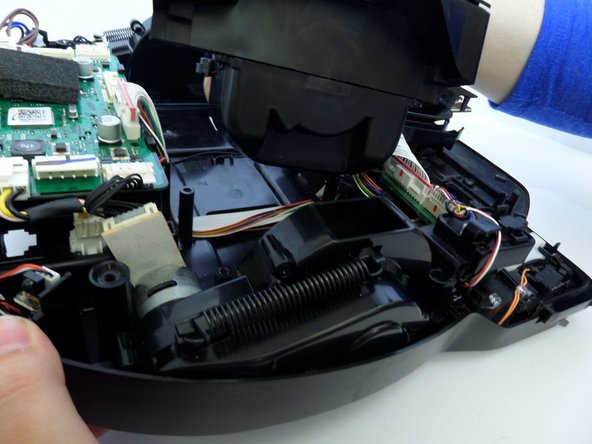
    • Lift the motor by grabbing the body of the motor, lifting upward.

    • With the screws removed from the motor chamber the top of the motor chamber will pop open.

终点

8等其他人完成本指南。

Eric Anderson

于09/11/17注册

465 声望

创作了2篇指南

团队

CSU Fullerton, Team S2-G8, Bruce Fall 2017 CSU Fullerton, Team S2-G8, Bruce Fall 2017 的会员

CSUF-BRUCE-F17S2G8

3 名成员

创作了10篇指南

6条评论

Anybody know where I can get the motor?

donstatus87 - 回复

I'm getting a Power brush error. Does the motor contain the power brush square socket and gearing?

Steve.

Steven Nicholas - 回复

One can actually open up the motor housing and take out the metal motor. Be careful not to break the clips when opening the housing… because I did…. but duct tape will prolly hold it together again. Anyway , the motor bears the following markings in my R7040: VCM-140CLDA DC21.6V 145W 2018.5.22-12.50

Have fun!

websites140 - 回复

Easy to replace and found a refurbished motor on eBay.

David Trinkle - 回复

Thanks for this guide! My motor was making a high pitched whine and grind - bought a replacement refurb motor on eBay for $39; hope it works.

joey - 回复

添加评论

浏览统计数据:

过去 24 小时: 1

过去 7 天: 10

过去 30 天: 28

总计 4,038