跳转到主内容

Samsung Odyssey NP800G5M Screen Replacement

你所需要的

  1. Samsung Odyssey NP800G5M Screen Replacement, Battery: 步骤 1 中的图像 1,1
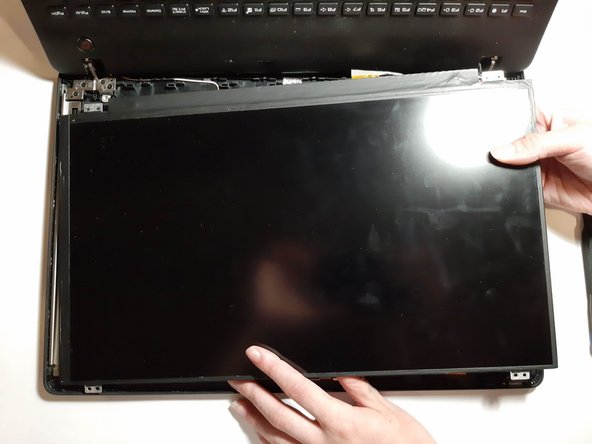
    • Remove the eleven 6.6 mm screws on the back of the computer using the Phillips #0 screwdriver.

  2. Samsung Odyssey NP800G5M Screen Replacement: 步骤 2 中的图像 1,2 Samsung Odyssey NP800G5M Screen Replacement: 步骤 2 中的图像 2,2
    • Using the opening tool, gently pry apart the back corners until the plastic separates from the body of the laptop.

    • Work your way around the body of the laptop until the back cover is completely separated.

    • Remove the back casing.

  3. Samsung Odyssey NP800G5M Screen Replacement: 步骤 3 中的图像 1,2 Samsung Odyssey NP800G5M Screen Replacement: 步骤 3 中的图像 2,2
    • Disconnect the battery connector cable.

    • Working on the device without removing the battery connector cable can damage major components of the device.

  4. Samsung Odyssey NP800G5M Screen Replacement: 步骤 4 中的图像 1,3 Samsung Odyssey NP800G5M Screen Replacement: 步骤 4 中的图像 2,3 Samsung Odyssey NP800G5M Screen Replacement: 步骤 4 中的图像 3,3
    • Remove the four 6.6 mm screws using the Phillips #0 screwdriver.

    • Remove the battery from the device.

  5. Samsung Odyssey NP800G5M Screen Replacement, Screen: 步骤 5 中的图像 1,3 Samsung Odyssey NP800G5M Screen Replacement, Screen: 步骤 5 中的图像 2,3 Samsung Odyssey NP800G5M Screen Replacement, Screen: 步骤 5 中的图像 3,3
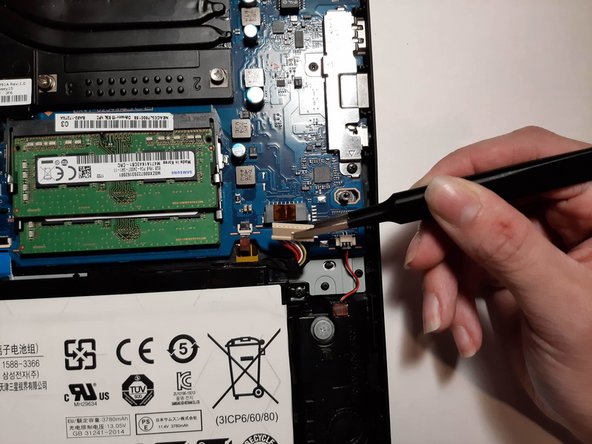
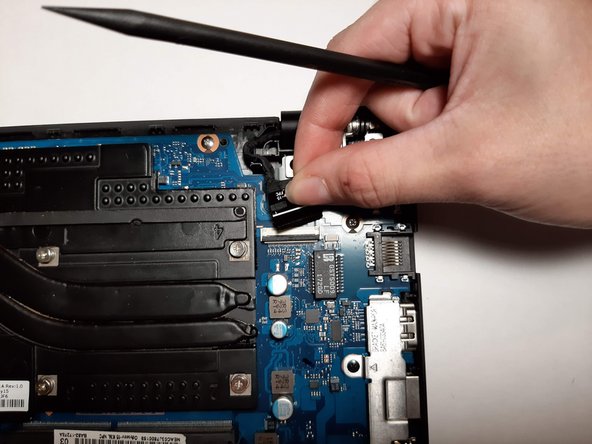
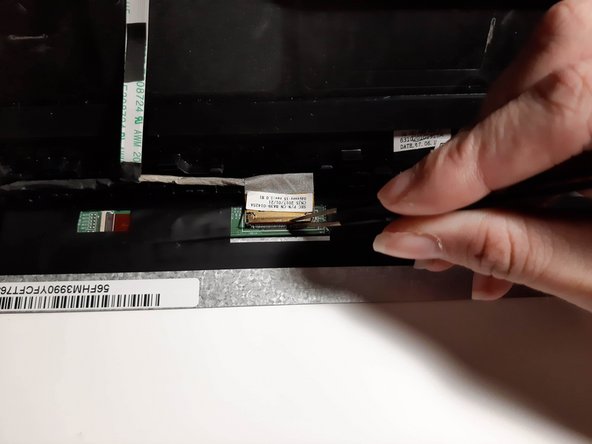
    • Take the flat end of spudger and flip up the LCD wire connection locking mechanism.

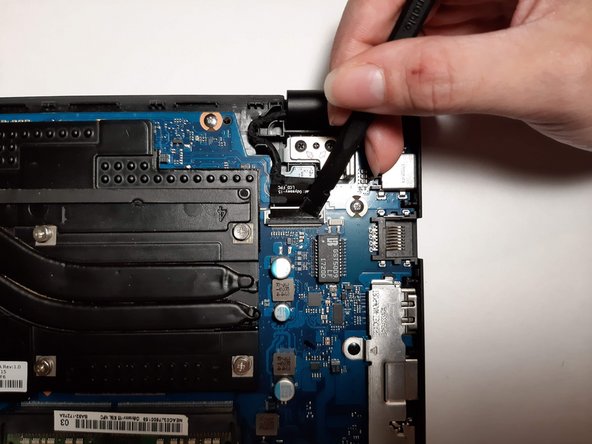
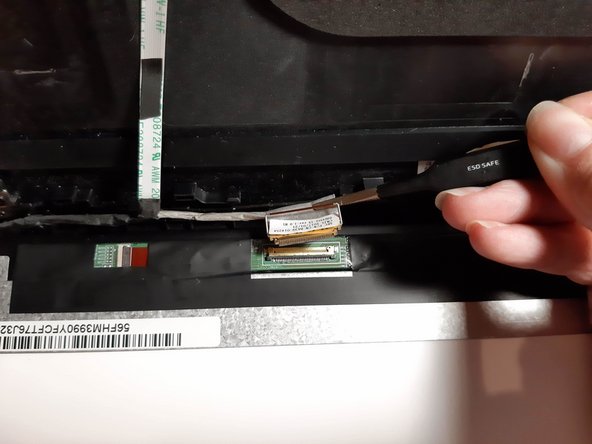
    • Remove the LCD wire connection by pulling up on the tab until the cable is free.

  6. Samsung Odyssey NP800G5M Screen Replacement: 步骤 6 中的图像 1,3 Samsung Odyssey NP800G5M Screen Replacement: 步骤 6 中的图像 2,3 Samsung Odyssey NP800G5M Screen Replacement: 步骤 6 中的图像 3,3
    • Take the spudger and carefully wedge it in between the screen casing and bezel.

    • Continue working the bezel around the edge of the screen until the bezel separates from the screen.

    • This step is very similar to removing the back casing.

    • Although it is easier to remove the bezel by inserting the spudger on the screen side, we strongly advise against this as it may scratch the screen.

  7. Samsung Odyssey NP800G5M Screen Replacement: 步骤 7 中的图像 1,3 Samsung Odyssey NP800G5M Screen Replacement: 步骤 7 中的图像 2,3 Samsung Odyssey NP800G5M Screen Replacement: 步骤 7 中的图像 3,3
    • Using the Phillips #0 Screwdriver, remove the four screws holding the screen in place.

    • At this point, the screen will be free to move around.

    • The LCD LVDS cable is still connected. Be sure to not damage this by keeping the screen still.

    • Turn the device over (right side up) and let the screen lie face down on the keyboard.

  8. Samsung Odyssey NP800G5M Screen Replacement: 步骤 8 中的图像 1,3 Samsung Odyssey NP800G5M Screen Replacement: 步骤 8 中的图像 2,3 Samsung Odyssey NP800G5M Screen Replacement: 步骤 8 中的图像 3,3
    • Remove the LCD LVDS cable.

    • Using the spudger, lift the brown lock up.

    • Pull the brown lock away from you until the mechanism separates.

    • Do not force this mechanism. If it does not come apart easily, you may be pulling up and not away.

    • Remove the screen from the device.

结论

To reassemble your device, follow these instructions in reverse order.

5等其他人完成本指南。

0条评论

添加评论

浏览统计数据:

过去 24 小时: 0

过去 7 天: 4

过去 30 天: 23

总计 2,585