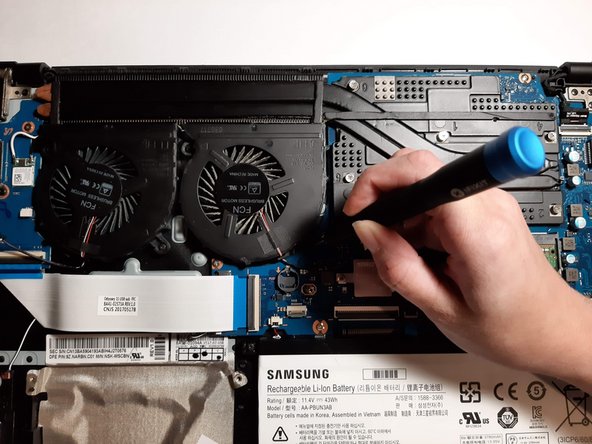
跳转到主内容

Samsung Odyssey NP800G5M Fan Replacement

你所需要的

  1. Samsung Odyssey NP800G5M Fan Replacement, Battery: 步骤 1 中的图像 1,1
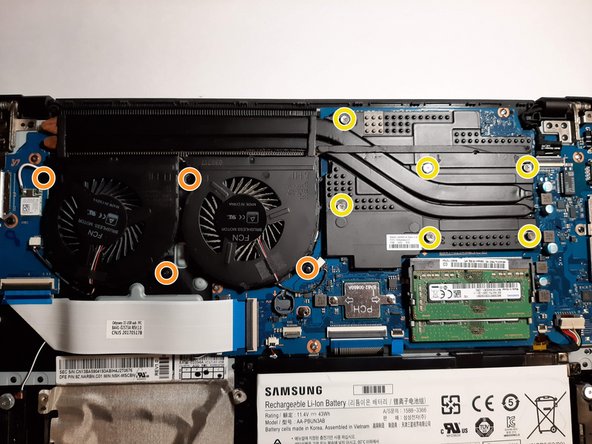
    • Remove the eleven 6.6 mm screws on the back of the computer using the Phillips #0 screwdriver.

  2. Samsung Odyssey NP800G5M Fan Replacement: 步骤 2 中的图像 1,2 Samsung Odyssey NP800G5M Fan Replacement: 步骤 2 中的图像 2,2
    • Using the opening tool, gently pry apart the back corners until the plastic separates from the body of the laptop.

    • Work your way around the body of the laptop until the back cover is completely separated.

    • Remove the back casing.

  3. Samsung Odyssey NP800G5M Fan Replacement: 步骤 3 中的图像 1,2 Samsung Odyssey NP800G5M Fan Replacement: 步骤 3 中的图像 2,2
    • Disconnect the battery connector cable.

    • Working on the device without removing the battery connector cable can damage major components of the device.

  4. Samsung Odyssey NP800G5M Fan Replacement: 步骤 4 中的图像 1,3 Samsung Odyssey NP800G5M Fan Replacement: 步骤 4 中的图像 2,3 Samsung Odyssey NP800G5M Fan Replacement: 步骤 4 中的图像 3,3
    • Remove the four 6.6 mm screws using the Phillips #0 screwdriver.

    • Remove the battery from the device.

  5. Samsung Odyssey NP800G5M Fan Replacement, Fan: 步骤 5 中的图像 1,3 Samsung Odyssey NP800G5M Fan Replacement, Fan: 步骤 5 中的图像 2,3 Samsung Odyssey NP800G5M Fan Replacement, Fan: 步骤 5 中的图像 3,3
    • Disconnect the fans from the motherboard by pulling the plugs away from their connectors.

    • Using the Phillips #0 screwdriver, remove the four 4.6mm screws.

    • Using the same screwdriver, unscrew the six screws surrounding the heat sink.

    • These screws cannot be removed from the device.

    • Remove the fan assembly from the device.

结论

To reassemble your device, follow these instructions in reverse order.

4等其他人完成本指南。

0条评论

添加评论

浏览统计数据:

过去 24 小时: 0

过去 7 天: 3

过去 30 天: 16

总计 1,220