跳转到主内容

Samsung Notebook 7 Spin NP740U3MK01US Touch Screen Replacement

你所需要的

  1. Samsung Notebook 7 Spin NP740U3MK01US Touch Screen Replacement, Battery: 步骤 1 中的图像 1,1
    • Flip your laptop over so that the back is face up.

  2. Samsung Notebook 7 Spin NP740U3MK01US Touch Screen Replacement: 步骤 2 中的图像 1,2 Samsung Notebook 7 Spin NP740U3MK01US Touch Screen Replacement: 步骤 2 中的图像 2,2
    • Use a Phillips #00 screwdriver to remove the four 6.5mm screws and the six 4.5mm screws that secure the back plate.

  3. Samsung Notebook 7 Spin NP740U3MK01US Touch Screen Replacement: 步骤 3 中的图像 1,2 Samsung Notebook 7 Spin NP740U3MK01US Touch Screen Replacement: 步骤 3 中的图像 2,2
    • Use a plastic opening tool to remove the back plate from the laptop.

    • It is recommended that you start from a corner then run the tool along the edge of the back plate.

  4. Samsung Notebook 7 Spin NP740U3MK01US Touch Screen Replacement: 步骤 4 中的图像 1,2 Samsung Notebook 7 Spin NP740U3MK01US Touch Screen Replacement: 步骤 4 中的图像 2,2
    • Use a Phillips #00 screwdriver to remove the three 4.5 mm screws holding the battery in place.

  5. Samsung Notebook 7 Spin NP740U3MK01US Touch Screen Replacement: 步骤 5 中的图像 1,3 Samsung Notebook 7 Spin NP740U3MK01US Touch Screen Replacement: 步骤 5 中的图像 2,3 Samsung Notebook 7 Spin NP740U3MK01US Touch Screen Replacement: 步骤 5 中的图像 3,3
    • Use a spudger to pry the battery connecting cable from the laptop and remove the battery.

    • Using the metal spudger may severely damage the internal components in your device.

  6. Samsung Notebook 7 Spin NP740U3MK01US Touch Screen Replacement, Touch Screen: 步骤 6 中的图像 1,3 Samsung Notebook 7 Spin NP740U3MK01US Touch Screen Replacement, Touch Screen: 步骤 6 中的图像 2,3 Samsung Notebook 7 Spin NP740U3MK01US Touch Screen Replacement, Touch Screen: 步骤 6 中的图像 3,3
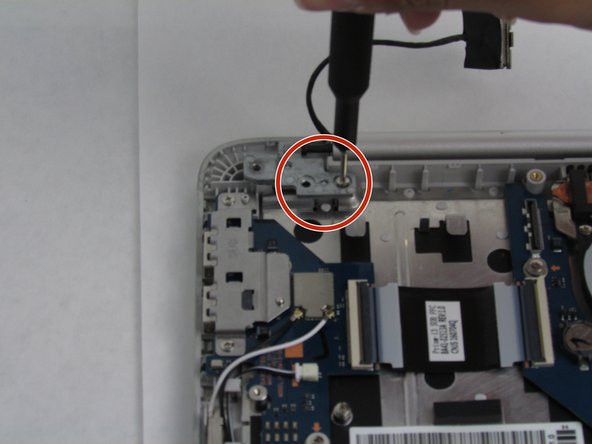
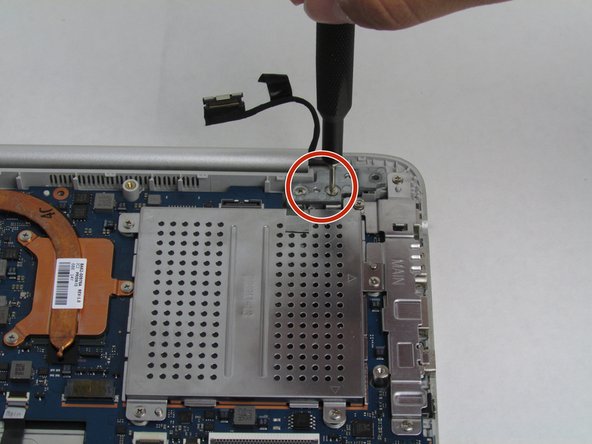
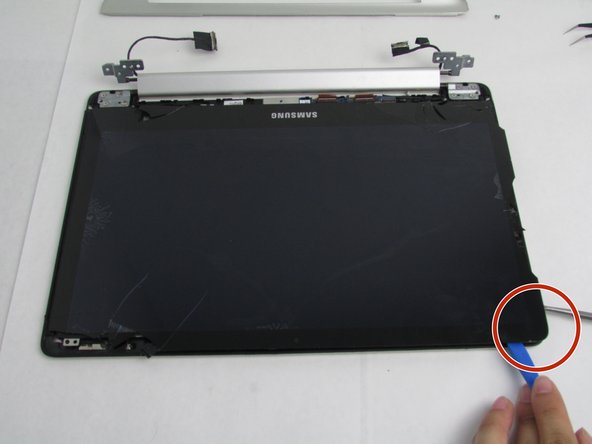
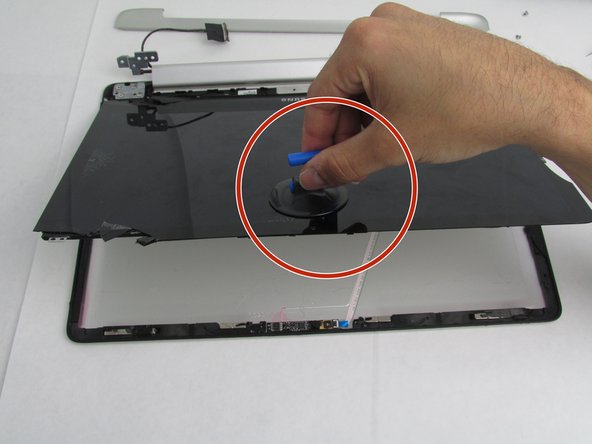
    • Remove the connections for the screen using a pair of tweezers or your fingers.

  7. Samsung Notebook 7 Spin NP740U3MK01US Touch Screen Replacement: 步骤 7 中的图像 1,3 Samsung Notebook 7 Spin NP740U3MK01US Touch Screen Replacement: 步骤 7 中的图像 2,3 Samsung Notebook 7 Spin NP740U3MK01US Touch Screen Replacement: 步骤 7 中的图像 3,3
    • Remove the four 4.5mm screws using a Phillips #00 screwdriver that connect the top and bottom of the computer through the hinge.

  8. Samsung Notebook 7 Spin NP740U3MK01US Touch Screen Replacement: 步骤 8 中的图像 1,1
    • Separate the top and bottom of the computer.

  9. Samsung Notebook 7 Spin NP740U3MK01US Touch Screen Replacement: 步骤 9 中的图像 1,1
    • Gently remove the screen guard on the front end using the plastic opening tool.

  10. Samsung Notebook 7 Spin NP740U3MK01US Touch Screen Replacement: 步骤 10 中的图像 1,2 Samsung Notebook 7 Spin NP740U3MK01US Touch Screen Replacement: 步骤 10 中的图像 2,2
    • Heat the iFixit iOpener in the microwave for 30-45 seconds and apply it to the edges of the screen to loosen the adhesive.

    • iOpener will be HOT. Exercise caution.

  11. Samsung Notebook 7 Spin NP740U3MK01US Touch Screen Replacement: 步骤 11 中的图像 1,2 Samsung Notebook 7 Spin NP740U3MK01US Touch Screen Replacement: 步骤 11 中的图像 2,2
    • Once enough heat has been applied, use the plastic opening tool and the metal spudger to separate the screen from the backing.

    • Using the metal spudger may severely damage the internal components of your device. Using the metal spudger to remove any glass component is especiallydangerous and may cause harm to the device and the user.

    • The adhesive is thickest in the corners.

  12. Samsung Notebook 7 Spin NP740U3MK01US Touch Screen Replacement: 步骤 12 中的图像 1,3 Samsung Notebook 7 Spin NP740U3MK01US Touch Screen Replacement: 步骤 12 中的图像 2,3 Samsung Notebook 7 Spin NP740U3MK01US Touch Screen Replacement: 步骤 12 中的图像 3,3
    • Use the suction cup to raise the screen backing with care. Do not remove the screen from the device yet as there are cables connected along the bottom.

  13. Samsung Notebook 7 Spin NP740U3MK01US Touch Screen Replacement: 步骤 13 中的图像 1,3 Samsung Notebook 7 Spin NP740U3MK01US Touch Screen Replacement: 步骤 13 中的图像 2,3 Samsung Notebook 7 Spin NP740U3MK01US Touch Screen Replacement: 步骤 13 中的图像 3,3
    • Use tweezers to detach the cables connecting to the back of the screen.

  14. Samsung Notebook 7 Spin NP740U3MK01US Touch Screen Replacement: 步骤 14 中的图像 1,1
    • Remove the screen and use tweezers to remove any shards of glass.

结论

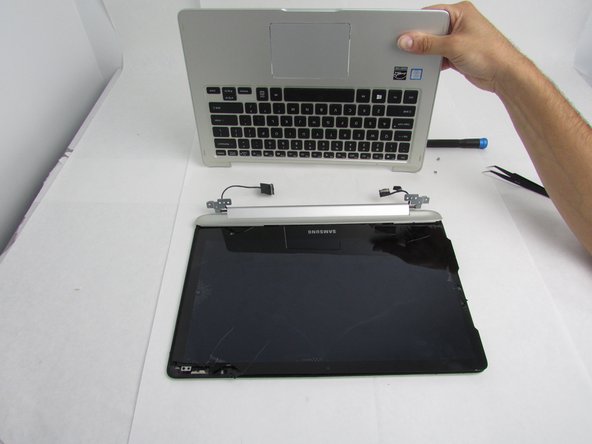
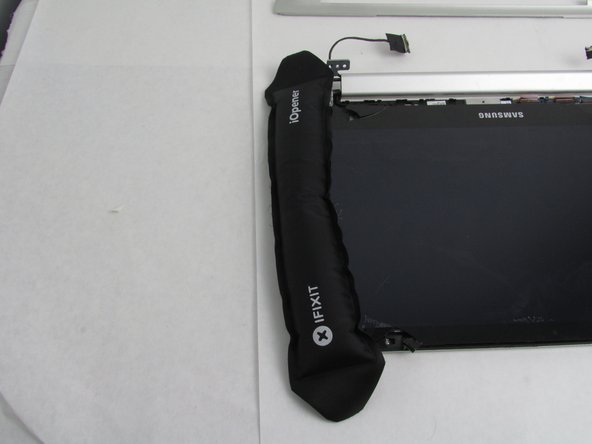
To reassemble your device, follow these instructions in reverse order.

2等其他人完成本指南。

0条评论

添加评论

浏览统计数据:

过去 24 小时: 1

过去 7 天: 4

过去 30 天: 30

总计 2,780