跳转到主内容

Samsung NX300 CMOS Sensor Assembly Replacement

你所需要的

  1. Samsung NX300 CMOS Sensor Assembly Replacement, Unscrew the Back Panel: 步骤 1 中的图像 1,2 Samsung NX300 CMOS Sensor Assembly Replacement, Unscrew the Back Panel: 步骤 1 中的图像 2,2
    • Using a Phillips #00 precision screwdriver, remove the seven 4mm screws (5 on the bottom of the device and 1 on each of the two sides) holding the back panel to the camera.

    • On the NX300M model, there is an additional screw under the text AMOLED behind display which should be removed before detaching the back panel of the camera.

  2. Samsung NX300 CMOS Sensor Assembly Replacement, Remove the Input Port Screw: 步骤 2 中的图像 1,1
    • Using a Phillips #00 precision screwdriver, remove the last 4 mm screw located inside the input ports' compartment.

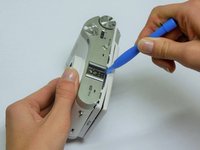
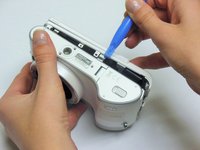
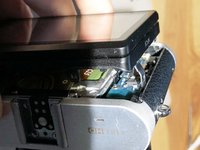
  3. Samsung NX300 CMOS Sensor Assembly Replacement, Open the Camera Casing: 步骤 3 中的图像 1,3 Samsung NX300 CMOS Sensor Assembly Replacement, Open the Camera Casing: 步骤 3 中的图像 2,3 Samsung NX300 CMOS Sensor Assembly Replacement, Open the Camera Casing: 步骤 3 中的图像 3,3
    • Place a plastic opening tool into the gap between the back panel and camera body, from both the top and the bottom of camera. Carefully pry open the camera and separate the back panel.

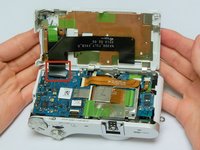
  4. Samsung NX300 CMOS Sensor Assembly Replacement, Remove the Back Panel: 步骤 4 中的图像 1,3 Samsung NX300 CMOS Sensor Assembly Replacement, Remove the Back Panel: 步骤 4 中的图像 2,3 Samsung NX300 CMOS Sensor Assembly Replacement, Remove the Back Panel: 步骤 4 中的图像 3,3
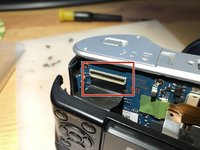
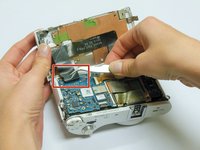
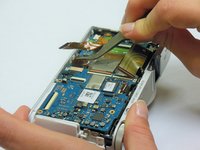
    • Using tweezers or your fingers, pull the display's black ribbon from the motherboard. This frees the back panel altogether.

    • To safely remove ribbons, you would need to first unlock the holding mechanism by lifting up the black strip atop the ribbon adapter.

  5. Samsung NX300 CMOS Sensor Assembly Replacement, Unscrew the Motherboard: 步骤 5 中的图像 1,1
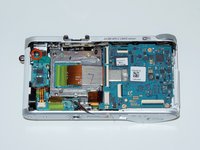
    • Using a Phillips #00 precision screwdriver, remove the three 4mm screws holding the motherboard in place.

  6. Samsung NX300 CMOS Sensor Assembly Replacement, Detach the Ribbons: 步骤 6 中的图像 1,3 Samsung NX300 CMOS Sensor Assembly Replacement, Detach the Ribbons: 步骤 6 中的图像 2,3 Samsung NX300 CMOS Sensor Assembly Replacement, Detach the Ribbons: 步骤 6 中的图像 3,3
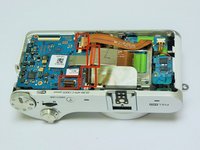
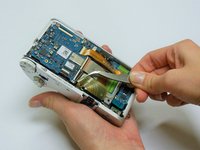
    • Using tweezers or a plastic opening tool, release the locks on the ribbon receptors by flicking up the black bars on the holds. Pull the five ribbons away from the motherboard (one hidden from view). This will free the motherboard completely from the device.

    • To safely remove ribbons, you would need to first unlock the holding mechanism by lifting up the black strip atop the ribbon adapter.

  7. Samsung NX300 CMOS Sensor Assembly Replacement: 步骤 7 中的图像 1,1
    • The motherboard is now free. Pull the motherboard up and slightly away from the input compartment; it will lift out easily.

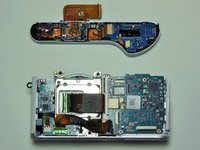
  8. Samsung NX300 CMOS Sensor Assembly Replacement, Remove the Top Panel: 步骤 8 中的图像 1,2 Samsung NX300 CMOS Sensor Assembly Replacement, Remove the Top Panel: 步骤 8 中的图像 2,2
    • Using a Phillips #00 screwdriver, remove the last 4mm screw attaching the top panel to the rest of the camera.

    • With the assistance of plastic opening tools, carefully unsnap the top panel, which contains the power switch, out of place.

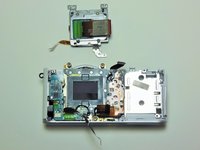
  9. Samsung NX300 CMOS Sensor Assembly Replacement, Remove the Sensor Assembly: 步骤 9 中的图像 1,1
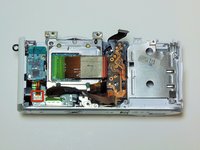
    • Using a 1.5mm HEX screwdriver, remove the three 5mm black screws located on the extensions of the metal housing assembly.

  10. Samsung NX300 CMOS Sensor Assembly Replacement, Pull the Data Ribbon: 步骤 10 中的图像 1,2 Samsung NX300 CMOS Sensor Assembly Replacement, Pull the Data Ribbon: 步骤 10 中的图像 2,2
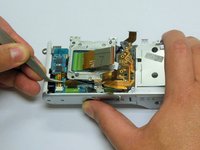
    • With the assistance of tweezers, pull out the last data ribbon connecting the sensor to the sound board. This ribbon must be pulled away from the board that houses the sound speaker.

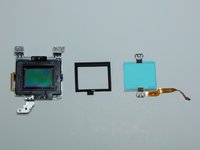
  11. Samsung NX300 CMOS Sensor Assembly Replacement, Free the CMOS Sensor: 步骤 11 中的图像 1,3 Samsung NX300 CMOS Sensor Assembly Replacement, Free the CMOS Sensor: 步骤 11 中的图像 2,3 Samsung NX300 CMOS Sensor Assembly Replacement, Free the CMOS Sensor: 步骤 11 中的图像 3,3
    • The entire CMOS sensor assembly is now free.

    • To replace the assembly's low-pass filter, infrared-absorption glass and/or the piezoelectric element only, use a Phillips #00 screwdriver to remove the two 4mm screws on the top and bottom sides of the sensor assembly.

结论

To reassemble your device, follow these instructions in reverse order.

3等其他人完成本指南。
Andres Perez

于01/21/15注册

951 声望

创作了5篇指南

团队

USF Tampa, Team 9-6, Blackwell Winter 2015 USF Tampa, Team 9-6, Blackwell Winter 2015 的会员

USFT-BLACKWELL-W15S9G6

4 名成员

创作了10篇指南

一条评论

Where can I find a replacement cmos though?

Nibbles McMeow - 回复

添加评论

浏览统计数据:

过去 24 小时: 0

过去 7 天: 3

过去 30 天: 36

总计 5,710