跳转到主内容

Samsung N150 Plus RAM Replacement

你所需要的

  1. Samsung N150 Plus RAM Replacement, Battery: 步骤 1 中的图像 1,1
    • Turn off the computer.

    • Disconnect the charging cable from the laptop.

    • Failure to unplug the cable could result in electric shock.

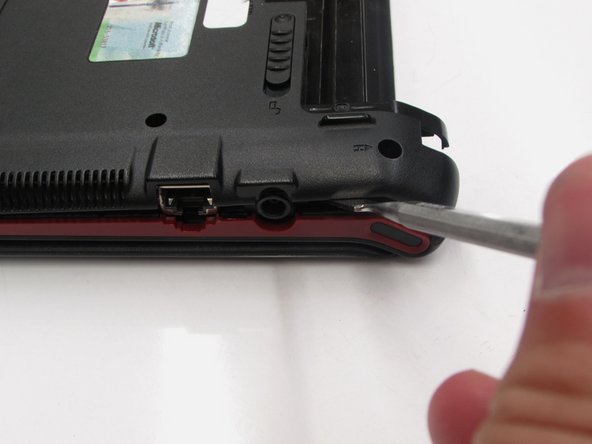
    • Flip the laptop upside down with the front face down on a flat surface.

  2. Samsung N150 Plus RAM Replacement: 步骤 2 中的图像 1,2 Samsung N150 Plus RAM Replacement: 步骤 2 中的图像 2,2
    • Slide the left and right switch to the "unlocked" position.

  3. Samsung N150 Plus RAM Replacement: 步骤 3 中的图像 1,2 Samsung N150 Plus RAM Replacement: 步骤 3 中的图像 2,2
    • While holding the left and right hand switches in the "unlocked" position, push the battery away from the computer.

  4. Samsung N150 Plus RAM Replacement, Back Panel: 步骤 4 中的图像 1,1
    • Using the Phillip's 00 screwdriver, unscrew the fourteen 7mm screws until the back panel comes loose.

  5. Samsung N150 Plus RAM Replacement: 步骤 5 中的图像 1,1
    • Using either the blue plastic opening tools or spudger tool, wedge one in between the back panel and the laptop.

    • Apply pressure upwards till the back panel pops off.

    • If the back panel is difficult to remove and feels like it is going to break, DO NOT force it. Check to confirm that all the screws are removed before attempting again.

  6. Samsung N150 Plus RAM Replacement: 步骤 6 中的图像 1,2 Samsung N150 Plus RAM Replacement: 步骤 6 中的图像 2,2
    • The computer should be open with the motherboard exposed and internal components exposed. You should now be able to access the Fan and RAM. There are more necessary steps to follow before accessing the screen and keyboard.

  7. Samsung N150 Plus RAM Replacement, RAM: 步骤 7 中的图像 1,2 Samsung N150 Plus RAM Replacement, RAM: 步骤 7 中的图像 2,2
    • Using your hands, push the two metal clip holders on each side away from the RAM till you hear a clicking sound.

    • If you push the metal rods away from the RAM as directed, the RAM will pop up at an angle.

  8. Samsung N150 Plus RAM Replacement: 步骤 8 中的图像 1,1
    • Gently pull out the stick of RAM.

结论

To reassemble your device, follow these instructions in reverse order.

另外一个人完成了本指南。

一条评论

There is no need to open the entire casing. There is a special lid on the back that covers the SODIMM for easy access. It can be replaced removing only one screw.

Fred - 回复

添加评论

浏览统计数据:

过去 24 小时: 1

过去 7 天: 3

过去 30 天: 16

总计 1,562