跳转到主内容

Samsung Galaxy Tab A Rear Facing Camera Replacement

你所需要的

  1. Samsung Galaxy Tab A Rear Facing Camera Replacement, Rear Facing Camera: 步骤 1 中的图像 1,1
    • Make sure the device is turned off before attempting to disassemble it.

    • At the top portion of the memory card slot, use the small metal spudger to create separation between the back cover and the rest of the device.

    • The small metal spudger is only used to create separation between the back cover and the rest of the device, not to remove the back cover.

  2. Samsung Galaxy Tab A Rear Facing Camera Replacement: 步骤 2 中的图像 1,2 Samsung Galaxy Tab A Rear Facing Camera Replacement: 步骤 2 中的图像 2,2
    • Use the intermediate metal spudger in place of the small metal spudger to remove the back cover. This is done by sliding the intermediate metal spudger around the perimeter of the device, beginning at the top portion of the memory card slot.

    • The second picture shows the internal portion of the device once the back cover is removed.

  3. Samsung Galaxy Tab A Rear Facing Camera Replacement: 步骤 3 中的图像 1,2 Samsung Galaxy Tab A Rear Facing Camera Replacement: 步骤 3 中的图像 2,2
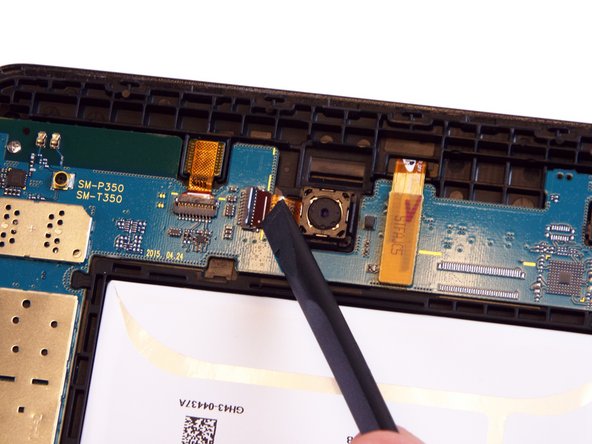
    • Use the spudger to disconnect the camera from the motherboard.

    • This step should be done at the yellow rubber portion of the camera.

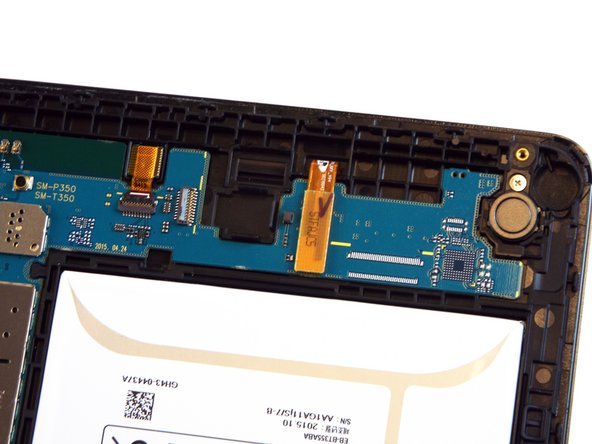
    • The first and second pictures show what the camera looks like when it is still connected to the motherboard and once it is disconnected, respectively.

  4. Samsung Galaxy Tab A Rear Facing Camera Replacement: 步骤 4 中的图像 1,1
    • Use the spudger to remove the main body of the camera from the rest of the device. This should be done anywhere around the black-framed perimeter of the camera.

  5. Samsung Galaxy Tab A Rear Facing Camera Replacement: 步骤 5 中的图像 1,3 Samsung Galaxy Tab A Rear Facing Camera Replacement: 步骤 5 中的图像 2,3 Samsung Galaxy Tab A Rear Facing Camera Replacement: 步骤 5 中的图像 3,3
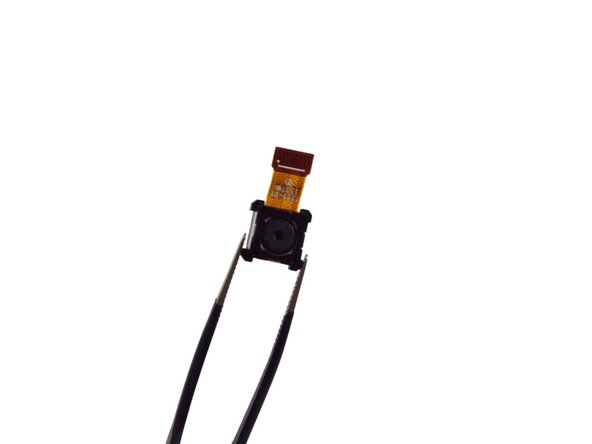
    • Use the tweezers to fully remove the camera from the rest of the device. The camera should be pulled out and away from where the device was connected to the motherboard in Step 3.

    • The second picture illustrates what the device should look like once the camera is removed.

结论

To reassemble your device, follow these instructions in reverse order.

2等其他人完成本指南。

Michael Wozny

于02/04/16注册

3,690 声望

创作了5篇指南

团队

USF Tampa, Team 17-4, Blackwell Winter 2016 USF Tampa, Team 17-4, Blackwell Winter 2016 的会员

USFT-BLACKWELL-W16S17G4

4 名成员

创作了11篇指南

0条评论

添加评论

浏览统计数据:

过去 24 小时: 0

过去 7 天: 2

过去 30 天: 13

总计 2,242