跳转到主内容

Samsung Galaxy Tab 7.0 Sprint Camera Replacement

你所需要的

  1. Samsung Galaxy Tab 7.0 Sprint Camera Replacement, Front Panel: 步骤 1 中的图像 1,1
    • Fully power off the device.

    • Disconnect and remove any cables that are connected to the device (i.e. chargers or headphones).

    • Place the device on a flat, stable, and clean surface.

  2. Samsung Galaxy Tab 7.0 Sprint Camera Replacement: 步骤 2 中的图像 1,3 Samsung Galaxy Tab 7.0 Sprint Camera Replacement: 步骤 2 中的图像 2,3 Samsung Galaxy Tab 7.0 Sprint Camera Replacement: 步骤 2 中的图像 3,3
    • Remove the plastic tabs on the bottom of the device using the metal spudger, as shown in the pictures.

    • Make sure you have a place to store small parts like this where they are easily accessible but hard to lose.

  3. Samsung Galaxy Tab 7.0 Sprint Camera Replacement: 步骤 3 中的图像 1,3 Samsung Galaxy Tab 7.0 Sprint Camera Replacement: 步骤 3 中的图像 2,3 Samsung Galaxy Tab 7.0 Sprint Camera Replacement: 步骤 3 中的图像 3,3
    • Using a Tri-Point YO Screwdriver, remove the two 4.1mm Tri-Wing screws.

    • Place the removed screws in a location similar to where you placed the pads that you removed in the previous step.

  4. Samsung Galaxy Tab 7.0 Sprint Camera Replacement: 步骤 4 中的图像 1,2 Samsung Galaxy Tab 7.0 Sprint Camera Replacement: 步骤 4 中的图像 2,2
    • Wedge a plastic opening tool between the front and back panel, on the bottom right corner.

    • Slowly push the tool down to make a small gap between the front panel and the back panel.

    • Holding the tool steady, run the tool along the bottom part of the device from right to left. This will make the gap between the front panel and the back panel bigger.

    • When wedging your tool into the device, make sure to apply the pressure to the screen and device at a slow but steady speed to the screen. Too much pressure too fast can crack the screen.

  5. Samsung Galaxy Tab 7.0 Sprint Camera Replacement: 步骤 5 中的图像 1,2 Samsung Galaxy Tab 7.0 Sprint Camera Replacement: 步骤 5 中的图像 2,2
    • Leave the previously used tool wedged in the device.

    • Insert another plastic opening tool into the bottom of the left side, as shown.

    • Using a similar procedure to the last step, run the tool along the side and widen the front panel-back panel gap. This time, run the device from bottom to top.

    • Repeat this process for the right side of the device, starting at the bottom of the right side.

    • Some of the other tools that you wedged in may pop out. Simply wedge them back in where they were previously, and continue.

  6. Samsung Galaxy Tab 7.0 Sprint Camera Replacement: 步骤 6 中的图像 1,2 Samsung Galaxy Tab 7.0 Sprint Camera Replacement: 步骤 6 中的图像 2,2
    • Holding the bottom of the device, lift the front panel from the back panel.

    • Make sure to remove the front panel slowly, to ensure that you don't accidentally break anything.

  7. Samsung Galaxy Tab 7.0 Sprint Camera Replacement, Battery: 步骤 7 中的图像 1,1
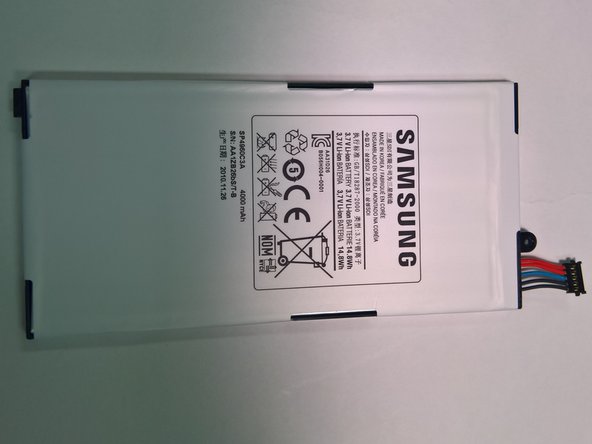
    • Place the front panel on the table, with the battery facing up.

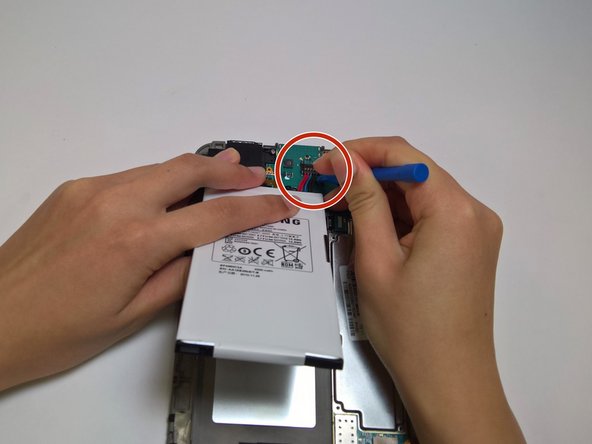
    • Find the small screw that is holding the battery to the motherboard, and unscrew it using the Phillips #00 Screwdriver.

    • Make sure to keep track of the screw for when you reassemble the device.

  8. Samsung Galaxy Tab 7.0 Sprint Camera Replacement: 步骤 8 中的图像 1,3 Samsung Galaxy Tab 7.0 Sprint Camera Replacement: 步骤 8 中的图像 2,3 Samsung Galaxy Tab 7.0 Sprint Camera Replacement: 步骤 8 中的图像 3,3
    • Lift the bottom part of the battery.

    • Use a plastic opening tool to remove the battery connector from its place on the motherboard. Make sure to pull it straight up.

    • Do not poke the battery with a screwdriver or an opening tool.

  9. Samsung Galaxy Tab 7.0 Sprint Camera Replacement, Camera: 步骤 9 中的图像 1,2 Samsung Galaxy Tab 7.0 Sprint Camera Replacement, Camera: 步骤 9 中的图像 2,2
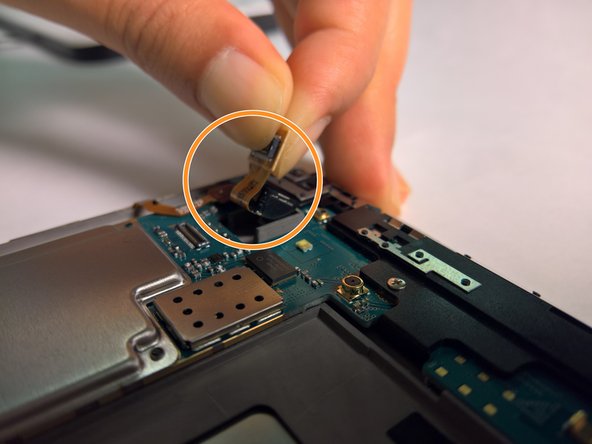
    • With an plastic opening tool, carefully pry off the orange connector that holds the camera to the motherboard.

    • Next, pulling from the connector, remove the camera out of its slot.

    • Make sure to do this step slowly and deliberately, as the equipment involved is delicate.

结论

To reassemble your device, follow these instructions in reverse order. Make sure all parts are aligned properly before attempting to put them back together.

团队

UC Davis, Team 1-2, Rodger Winter 2017 UC Davis, Team 1-2, Rodger Winter 2017 的会员

UCD-RODGER-W17S1G2

4 名成员

创作了12篇指南

0条评论

添加评论

浏览统计数据:

过去 24 小时: 0

过去 7 天: 0

过去 30 天: 1

总计 147