跳转到主内容

本指南有最近更改,您可查看未经巡查的最新版本

Samsung Galaxy Tab 4 7.0 Screen Replacement

你所需要的

  1. Samsung Galaxy Tab 4 7.0 Screen Replacement, Back Panel: 步骤 1 中的图像 1,2 Samsung Galaxy Tab 4 7.0 Screen Replacement, Back Panel: 步骤 1 中的图像 2,2
    • Starting at any corner, insert the pry tool between the chrome screen frame and black phone housing.

    • Slide the pry tool around the tablet while applying force to pry the screen away from the phone housing.

  2. Samsung Galaxy Tab 4 7.0 Screen Replacement: 步骤 2 中的图像 1,1
    • Carefully separate the rear housing from the front panel assembly.

  3. Samsung Galaxy Tab 4 7.0 Screen Replacement, Motherboard: 步骤 3 中的图像 1,3 Samsung Galaxy Tab 4 7.0 Screen Replacement, Motherboard: 步骤 3 中的图像 2,3 Samsung Galaxy Tab 4 7.0 Screen Replacement, Motherboard: 步骤 3 中的图像 3,3
    • Using the bent tweezers, carefully pull the flat cables away from the connectors.

    • Do not bend the flat cables at the tips as they may become permanently deformed.

  4. Samsung Galaxy Tab 4 7.0 Screen Replacement: 步骤 4 中的图像 1,3 Samsung Galaxy Tab 4 7.0 Screen Replacement: 步骤 4 中的图像 2,3 Samsung Galaxy Tab 4 7.0 Screen Replacement: 步骤 4 中的图像 3,3
    • Using the plastic opening tool, gently pry the chip connections away from the motherboard.

  5. Samsung Galaxy Tab 4 7.0 Screen Replacement: 步骤 5 中的图像 1,2 Samsung Galaxy Tab 4 7.0 Screen Replacement: 步骤 5 中的图像 2,2
    • Use the Phillips 000 screwdriver to remove the remaining five 1.2 mm screws.

  6. Samsung Galaxy Tab 4 7.0 Screen Replacement: 步骤 6 中的图像 1,2 Samsung Galaxy Tab 4 7.0 Screen Replacement: 步骤 6 中的图像 2,2
    • Use extreme care while removing the motherboard to avoid damaging the component.

    • Remove the motherboard by rotating it away from the rest of the phone as shown in the first photo.

  7. Samsung Galaxy Tab 4 7.0 Screen Replacement, Battery: 步骤 7 中的图像 1,3 Samsung Galaxy Tab 4 7.0 Screen Replacement, Battery: 步骤 7 中的图像 2,3 Samsung Galaxy Tab 4 7.0 Screen Replacement, Battery: 步骤 7 中的图像 3,3
    • You do not need to remove the motherboard in order to remove the battery as the photos may indicate.

    • Work the spudger underneath the battery as shown and pry the battery away from the phone case.

    • The battery is attached to the case with adhesive, so a bit of force is required during removal.

  8. Samsung Galaxy Tab 4 7.0 Screen Replacement, Screen: 步骤 8 中的图像 1,2 Samsung Galaxy Tab 4 7.0 Screen Replacement, Screen: 步骤 8 中的图像 2,2
    • Before you can remove the screen, you must first heat the surface evenly to loosen the adhesive.

    • You may have to reheat the heating pad once or twice to get enough heat onto the screen.

    • If you're using a heat gun, do not hold the heat in one spot for more than a few seconds. Instead, run the heat along the outer edge of the screen with a brushing motion.

  9. Samsung Galaxy Tab 4 7.0 Screen Replacement: 步骤 9 中的图像 1,3 Samsung Galaxy Tab 4 7.0 Screen Replacement: 步骤 9 中的图像 2,3 Samsung Galaxy Tab 4 7.0 Screen Replacement: 步骤 9 中的图像 3,3
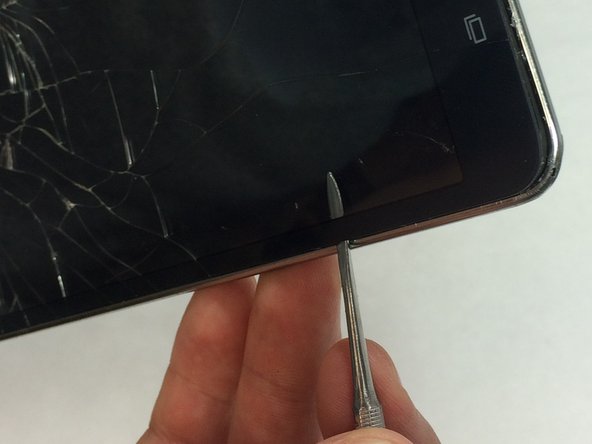
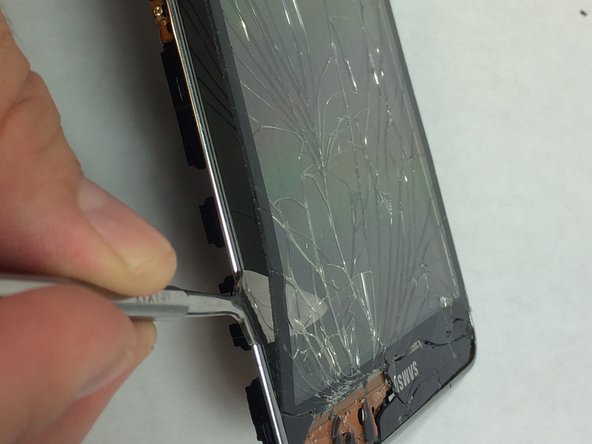
    • Using a spudger, carefully insert the fine metal tip in between the glass and the chrome edge of the tablet.

    • Now, slowly pry your way around the frame while slowly loosening the screen away from the frame.

  10. Samsung Galaxy Tab 4 7.0 Screen Replacement: 步骤 10 中的图像 1,3 Samsung Galaxy Tab 4 7.0 Screen Replacement: 步骤 10 中的图像 2,3 Samsung Galaxy Tab 4 7.0 Screen Replacement: 步骤 10 中的图像 3,3
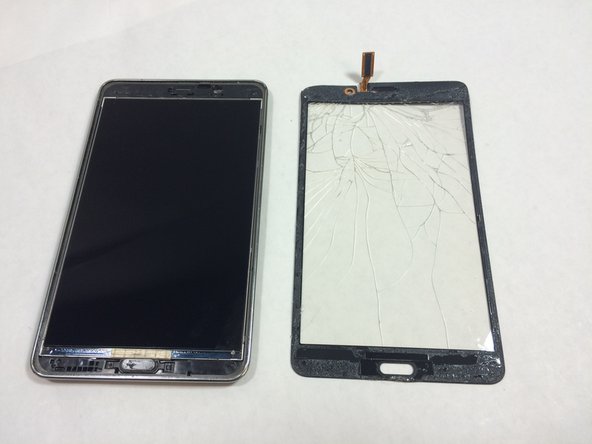
    • Once you've loosened the screen from the tablet, be sure to feed the chip connection through its designated slot as indicated by the second photo.

    • The screen may need a little more force to separate at the top end of the tablet.

    • Now the hardest part is done!

结论

To reassemble your device, follow these instructions in reverse order.

36等其他人完成本指南。

Aubrey Goodwin

于08/31/15注册

2,700 声望

创作了3篇指南

团队

USF Tampa, Team 1-3, Remmell Fall 2015 USF Tampa, Team 1-3, Remmell Fall 2015 的会员

USFT-REMMELL-F15S1G3

4 名成员

创作了12篇指南

11条评论

Where is the microfuse located?

bbruns - 回复

Do you have to remove the battery to replace the screen?

Vic Rector - 回复

This is digitizer replacement guide - not screen replacement !!

K P - 回复

This worked perfectly for me. Thank you!

gjarmour - 回复

This worked perfectly for me. I just bought the assembly instead of going through the full deal (which if I had it would have saved me about 30 bucks overall). But was easy enough to do anyway. I still intend to get the digitizer/glass and finish so I have a spare for future breaks. (I have kids and they are hard on these tablets)

gjarmour - 回复

添加评论

浏览统计数据:

过去 24 小时: 2

过去 7 天: 9

过去 30 天: 40

总计 46,167