简介
If you don't have the heating pad available, either use a heat gun or a hair dryer with a high heat setting.
你所需要的
-
-
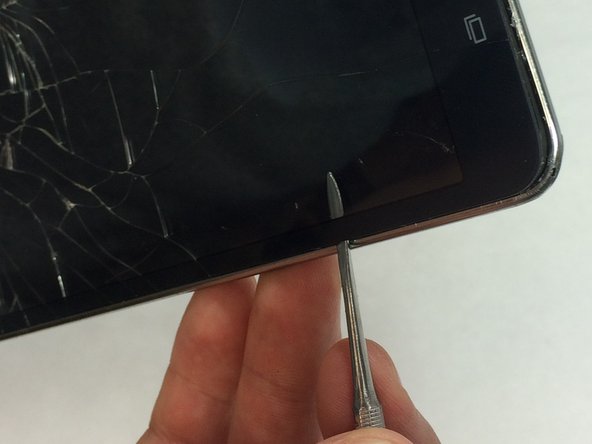
Starting at any corner, insert the pry tool between the chrome screen frame and black phone housing.
-
Slide the pry tool around the tablet while applying force to pry the screen away from the phone housing.
-
-
-
Using the bent tweezers, carefully pull the flat cables away from the connectors.
-
-
-
-
Work the spudger underneath the battery as shown and pry the battery away from the phone case.
-
-
-
Evenly heat the surface of the screen using your heating tool to loosen the adhesive that is holding the screen to the phone case.
-
-
-
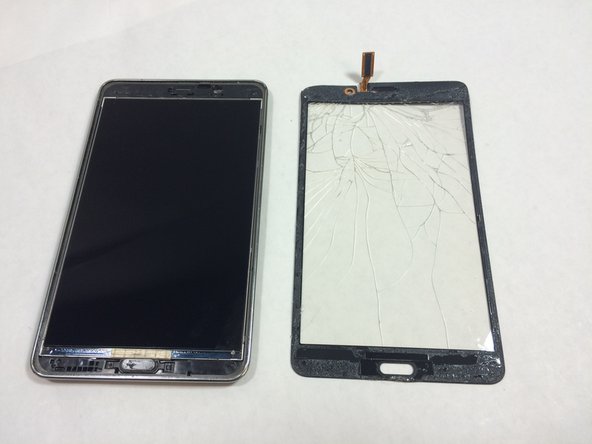
After you’ve removed the glass from the screen, feed the chip connection through the phone casing.
This was rather easy. I have been trying to find a place where install/repair guides are accurate and reliable. Thanks iFixIt. Thanks to you, "I FiXED it"!
do I have to remove the mother board to replace the digitizer?
I think the only concern by not removing the MoBo would be heating up the components with either a Heat gun or the Heat Pad.
Lawrence -
-


To reassemble your device, follow these instructions in reverse order.
To reassemble your device, follow these instructions in reverse order.
36等其他人完成本指南。
团队

USF Tampa, Team 1-3, Remmell Fall 2015 USF Tampa, Team 1-3, Remmell Fall 2015 的会员
USFT-REMMELL-F15S1G3
4 名成员
创作了12篇指南
11条评论
Do you have to remove the battery to replace the screen?
Vic Rector - 回复
This worked perfectly for me. I just bought the assembly instead of going through the full deal (which if I had it would have saved me about 30 bucks overall). But was easy enough to do anyway. I still intend to get the digitizer/glass and finish so I have a spare for future breaks. (I have kids and they are hard on these tablets)
After successfully replacing the screen, and reassembling the unit according to the directions, I have a problem with the display image. The unit turns on, but the image does not come on unless I plug un the charger. The image displayed is of the charging batter segmented on 3 different parts of the screen, and lines similar to a schematic. I’ve disassemble the unit, checked the connections, all appear tight, reassembled and the issue is still present.
Any suggestions of what else to look for?
That may be the Samsung battery (actually a single cell) not connected due to the ribbon contacts not mated correctly. Open the phone and check the ribbon connector. Be sure its tip fits flat inside the slot, and the tiny cover fitted on it.
As per the previous comment.
When reassembling the back cover, be extremely careful to fit the cover sideways over the three micro switches (on the right side when seen from the front). These are the power, volume up, and volume down switches. If you fit the back cover incorrectly, the switches may be blocked and not work, or worse be torn off the motherboard. I am writing this because this is what happened to me! I tore off the power switch and I had to salvage the switch from a different tablet to replace it. And that switch is extremely tiny!!
rayramirez - 回复
Screen keeps changing