跳转到主内容

当前版本的文档还未经巡查,您可以查看最新的已查核版本

你所需要的

  1. , 后壳: 步骤 1 中的图像 1,2 , 后壳: 步骤 1 中的图像 2,2
    • 使用撬棒或指甲来从后置摄像头靠近电源键位置撬起后壳。

  2. : 步骤 2 中的图像 1,3 : 步骤 2 中的图像 2,3 : 步骤 2 中的图像 3,3
    • 将后壳与手机上的卡扣分离,移除手机后壳。

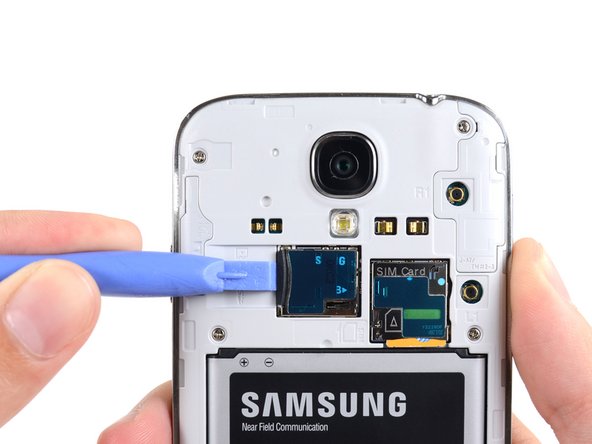
  3. , MicroSD 卡: 步骤 3 中的图像 1,3 , MicroSD 卡: 步骤 3 中的图像 2,3 , MicroSD 卡: 步骤 3 中的图像 3,3
    • 使用撬棒扁平的一端或者您的指甲,来轻轻按动microSD卡压入进卡槽中,直到听到卡塔一声。

    • 在听到咔塔一声后松开卡,卡将会从卡槽中弹出。

    • 移除卡片。

    • 要重新装入卡,将其插入卡槽,直至卡入到位。

  4. , 电池: 步骤 4 中的图像 1,3 , 电池: 步骤 4 中的图像 2,3 , 电池: 步骤 4 中的图像 3,3
    • 使用塑料撬棒或者手指甲来从电池仓槽口处向上提起电池。

    • 将电池从您的手机中移出。

  5. , SIM卡: 步骤 5 中的图像 1,3 , SIM卡: 步骤 5 中的图像 2,3 , SIM卡: 步骤 5 中的图像 3,3
    • 使用塑料开启工具(或者你的手指)来把SIM卡向卡槽反向轻微挤压,直到你听到了声响。

    • 听到声响后,停止挤压SIM卡,它会自动弹出卡槽。

    • 移除SIM卡。

    • 在重新安装的过程中,将卡推入卡槽直到你听到声响。

  6. , 中框: 步骤 6 中的图像 1,1
    • 拆下九个用来固定中框和屏幕的4 mm 菲利普斯# 00螺钉。

  7. : 步骤 7 中的图像 1,2 : 步骤 7 中的图像 2,2
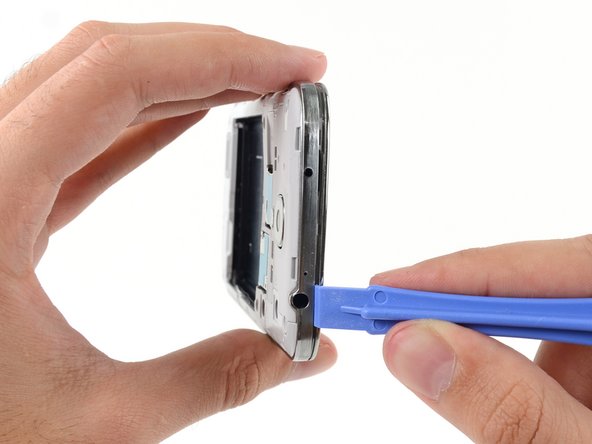
    • 中框是由几个塑料卡子后面的中框镀铬挡板固定在显示组件上的。接下来的步骤将指导你分离中框与屏幕组件的连接。

    • 从手机的音量按钮开始,在显示玻璃的铬边框和较大的镀铬边框之间插入塑料开口工具。寻找两者之间的缝隙。

    • 沿着切口滑动开孔工具,将塑料卡子分开。

    • 轻轻地撬开,只够将塑料卡子在中框挡板就可以打开。

  8. : 步骤 8 中的图像 1,2 : 步骤 8 中的图像 2,2
    • 继续撬开手机边缘。

    • 滑动你的开启工具沿着设备的底部中框和显示器之间的缝。

  9. : 步骤 9 中的图像 1,2 : 步骤 9 中的图像 2,2
    • 再次,撬到电源按钮的一边。

    • 沿缝滑动开启工具。

  10. : 步骤 10 中的图像 1,2 : 步骤 10 中的图像 2,2
    • 继续滑动开启工具在手机的顶部,最后市中框离开显示组件。

    • 检查一遍周围,确定所有边缘都已被撬棒打开。

  11. : 步骤 11 中的图像 1,3 : 步骤 11 中的图像 2,3 : 步骤 11 中的图像 3,3
    • 从剩余零件中去处中框。

  12. , 主板组件: 步骤 12 中的图像 1,3 , 主板组件: 步骤 12 中的图像 2,3 , 主板组件: 步骤 12 中的图像 3,3
    • 使用一个撬棒的平端断开USB板连接器。

    • 断开前面对面摄像机排线接头。

    • 断开耳机扬声器排线连接器。

  13. : 步骤 13 中的图像 1,3 : 步骤 13 中的图像 2,3 : 步骤 13 中的图像 3,3
    • 断开耳机插孔总成的排线接头。

    • 断开显示器/数字化器排线连接器。

    • 断开天线排线接头。

  14. : 步骤 14 中的图像 1,1
    • 从主板组装拆卸单2.4 mm菲利普斯# 00螺杆。

  15. : 步骤 15 中的图像 1,2 : 步骤 15 中的图像 2,2
    • 轻轻地拆下主板。

    • 保持主板的边缘以防止静电放电损坏。小心不要在任何电缆上把它从显示器装配中取出。

  16. 这个步骤还没有翻译 帮忙翻译一下

    : 步骤 16 中的图像 1,1
    • Use the flat end of a spudger to disconnect the rear-facing camera connector.

  17. 这个步骤还没有翻译 帮忙翻译一下

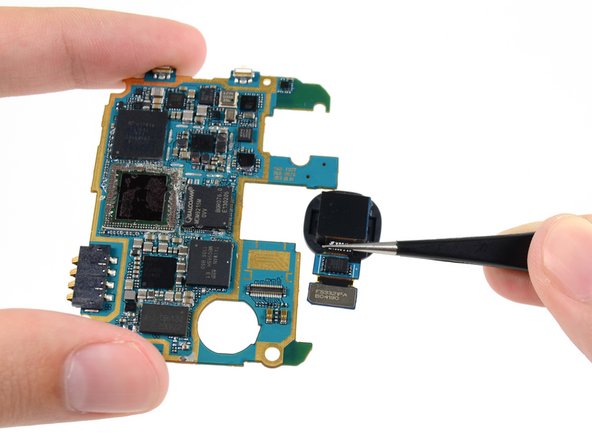
    : 步骤 17 中的图像 1,2 : 步骤 17 中的图像 2,2
    • Using tweezers, or your fingers, slide the rear-facing camera out of its notch in the motherboard.

终点

75等其他人完成本指南。

Sam Goldheart

于10/18/12注册

465,854 声望

创作了538篇指南

团队

iFixit iFixit 的会员

Staff

135 名成员

创作了17,199篇指南

11条评论

Where do you recommend getting the new rear facing camera from?

Justin - 回复

where do you recommend to buy a new rear camera?

sujatha - 回复

Useful step by step guide, I was able to replace the cracked lens on the camera following the instructions here. Without them I wouldn't have had a clue where to start and what to unclip. The kit I used was purchased from ebay and was straight forward enough to complete that part without the need for further instruction. For a few pounds I have increased the value of my phone for trade in at next upgrade. Very pleased with this result. Thank you for the comprehensive instructions.

Jenny Miller - 回复

what a great guide! took me less than an hour to replace the camera...this success gives me the inspiration to do the bigger job of replacing the sealed battery in my sisters macbook pro 13' late 2013 model...for those asking about where to get a replacement camera, I got mine from ebay for $19 AUD including postage!

gautamgoraya - 回复

Hi, Can the same technique and part be used on the Samsung Galaxy S4 mini?

vdthaoanh - 回复

添加评论

浏览统计数据:

过去 24 小时: 0

过去 7 天: 11

过去 30 天: 33

总计 93,852