跳转到主内容

Samsung Galaxy Grand Prime Digitizer and LCD Replacement

你所需要的

  1. Samsung Galaxy Grand Prime Digitizer and LCD Replacement, Battery: 步骤 1 中的图像 1,3 Samsung Galaxy Grand Prime Digitizer and LCD Replacement, Battery: 步骤 1 中的图像 2,3 Samsung Galaxy Grand Prime Digitizer and LCD Replacement, Battery: 步骤 1 中的图像 3,3
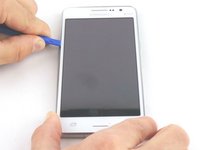
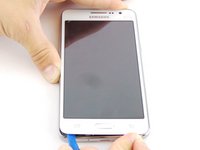
    • Remove the back cover of phone by lifting up on the back cover tab with the blue plastic opening tool.

    • Go around the edge of the back cover to completely remove it.

  2. Samsung Galaxy Grand Prime Digitizer and LCD Replacement, Remove the battery.: 步骤 2 中的图像 1,3 Samsung Galaxy Grand Prime Digitizer and LCD Replacement, Remove the battery.: 步骤 2 中的图像 2,3 Samsung Galaxy Grand Prime Digitizer and LCD Replacement, Remove the battery.: 步骤 2 中的图像 3,3
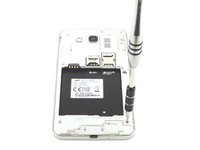
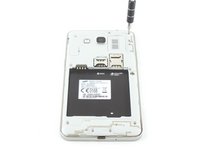
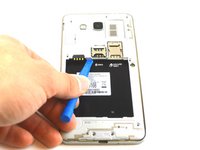
    • Remove the old battery by lifting up on the thumb tab.

    • Periodically clean the brass terminals on the battery and the phone. Place a minute amount of ISO on a Q-tip and gingerly clean the connections.

  3. Samsung Galaxy Grand Prime Digitizer and LCD Replacement, Midframe: 步骤 3 中的图像 1,3 Samsung Galaxy Grand Prime Digitizer and LCD Replacement, Midframe: 步骤 3 中的图像 2,3 Samsung Galaxy Grand Prime Digitizer and LCD Replacement, Midframe: 步骤 3 中的图像 3,3
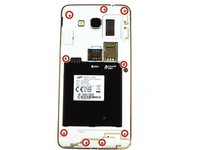
    • Remove the nine 4mm screws screws from the midframe with a Phillips #000 screwdriver.

  4. Samsung Galaxy Grand Prime Digitizer and LCD Replacement: 步骤 4 中的图像 1,2 Samsung Galaxy Grand Prime Digitizer and LCD Replacement: 步骤 4 中的图像 2,2
    • Wedge the blue plastic opening tool in between the front and side panel.

    • Move the blue plastic opening tool around the edges between the front and side panel.

  5. Samsung Galaxy Grand Prime Digitizer and LCD Replacement: 步骤 5 中的图像 1,2 Samsung Galaxy Grand Prime Digitizer and LCD Replacement: 步骤 5 中的图像 2,2
    • Make sure that you detach the mid-frame from the inside too.

  6. Samsung Galaxy Grand Prime Digitizer and LCD Replacement, Digitizer and LCD: 步骤 6 中的图像 1,1
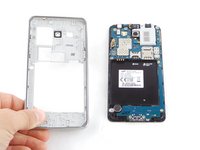
    • Disconnect all flex cables and remove the motherboard and the front-facing camera.

    • The display assembly is attached to the frame with adhesive.

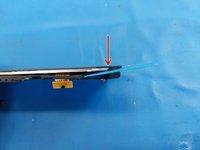
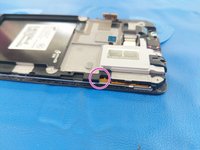
    • Insert an opening pick between the glass and the frame in the gap above the front-facing camera bracket. Begin to slice through the adhesive on the top bezel of the phone.

  7. Samsung Galaxy Grand Prime Digitizer and LCD Replacement: 步骤 7 中的图像 1,2 Samsung Galaxy Grand Prime Digitizer and LCD Replacement: 步骤 7 中的图像 2,2
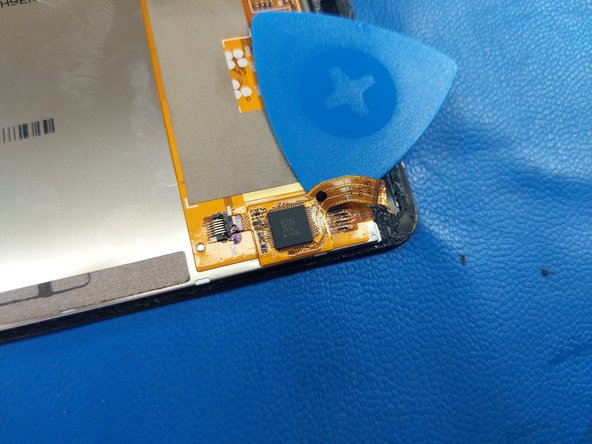
    • On the right corner, gently twist the pick up and down to further separate the adhesive, then insert it as shown between the LCD and the frame.

    • Insert a second pick into the gap between the frame and the display flex cable.

    • Move both picks towards the bottom of the phone to separate the adhesive on the sides of the screen.

  8. Samsung Galaxy Grand Prime Digitizer and LCD Replacement: 步骤 8 中的图像 1,1
    • Apply heat to the bottom bezel, then insert a pick between the frame and the digitizer.

    • To avoid damaging the home button, ensure the pick goes above it as shown.

    • The home button may fall out.

  9. Samsung Galaxy Grand Prime Digitizer and LCD Replacement, Removing the screen assembly: 步骤 9 中的图像 1,1
    • Separate the adhesive on the bottom half of the phone, flip it around, and separate the frame from the screen assembly starting from the bottom.

    • Ensure the display cable can freely move through the hole in the frame.

    • The ear speaker grille may fall out.

  10. Samsung Galaxy Grand Prime Digitizer and LCD Replacement, Separating the LCD and digitizer: 步骤 10 中的图像 1,2 Samsung Galaxy Grand Prime Digitizer and LCD Replacement, Separating the LCD and digitizer: 步骤 10 中的图像 2,2
    • The LCD and digitizer are not glued together with LOCA glue, but just with adhesive around the edges of the digitizer.

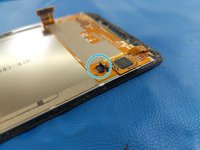
    • The digitizer is connected to the LCD with a flex cable. Flip up the bottom half of the connector.

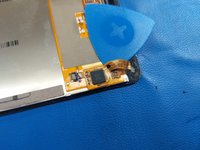
    • Apply gentle heat to the IC. Insert a pick as shown and separate.

    • To separate the LCD and digitizer, apply gentle heat to the front of the assembly and gently slide picks along the edges of the LCD.

结论

To reassemble your device, follow these instructions in reverse order.

6等其他人完成本指南。

Patrick

于05/14/14注册

6,574 声望

创作了21篇指南

0条评论

添加评论

浏览统计数据:

过去 24 小时: 0

过去 7 天: 13

过去 30 天: 32

总计 1,561