跳转到主内容

Samsung Chromebook XE550C22 Cooling Fan Replacement

你所需要的

  1. Samsung Chromebook XE550C22 Cooling Fan Replacement, Back Panel: 步骤 1 中的图像 1,3 Samsung Chromebook XE550C22 Cooling Fan Replacement, Back Panel: 步骤 1 中的图像 2,3 Samsung Chromebook XE550C22 Cooling Fan Replacement, Back Panel: 步骤 1 中的图像 3,3
    • Turn the power off before beginning this step.

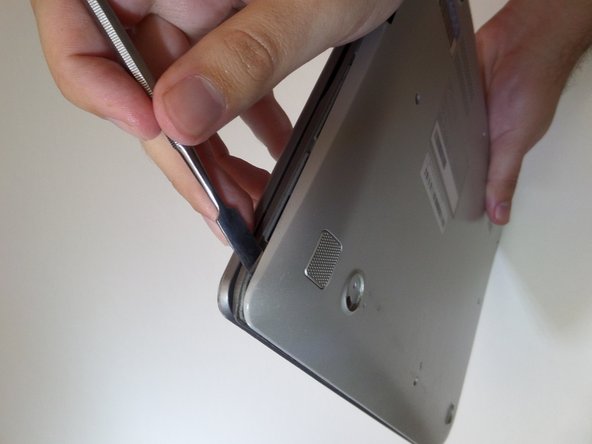
    • Using the spudger, remove the four 1/2 inch skid pads from the back of the laptop.

  2. Samsung Chromebook XE550C22 Cooling Fan Replacement: 步骤 2 中的图像 1,2 Samsung Chromebook XE550C22 Cooling Fan Replacement: 步骤 2 中的图像 2,2
    • Remove the eight 7mm screws using the J0 Screwdriver.

  3. Samsung Chromebook XE550C22 Cooling Fan Replacement: 步骤 3 中的图像 1,3 Samsung Chromebook XE550C22 Cooling Fan Replacement: 步骤 3 中的图像 2,3 Samsung Chromebook XE550C22 Cooling Fan Replacement: 步骤 3 中的图像 3,3
    • Starting at the center front of the laptop, insert the metal spudger between the keyboard panel and the bottom panel, separating the bottom panel from the laptop.

    • Continue prying around the sides to release more brackets.

  4. Samsung Chromebook XE550C22 Cooling Fan Replacement: 步骤 4 中的图像 1,2 Samsung Chromebook XE550C22 Cooling Fan Replacement: 步骤 4 中的图像 2,2
    • After deconnecting all the brackets, pull the back panel away from the laptop.

    • Note: The back panel has some flex to it, don't be afraid to use some force.

  5. Samsung Chromebook XE550C22 Cooling Fan Replacement, Battery: 步骤 5 中的图像 1,2 Samsung Chromebook XE550C22 Cooling Fan Replacement, Battery: 步骤 5 中的图像 2,2
    • Remove the four 3mm screws holding the battery with the J0 screwdriver.

  6. Samsung Chromebook XE550C22 Cooling Fan Replacement: 步骤 6 中的图像 1,2 Samsung Chromebook XE550C22 Cooling Fan Replacement: 步骤 6 中的图像 2,2
    • Lift the battery up at an angle to disconnect the battery from the motherboard, then pull it away from the laptop.

    • Do not lift the battery straight up. This will damage the battery's connectors.

  7. Samsung Chromebook XE550C22 Cooling Fan Replacement, Cooling Fan: 步骤 7 中的图像 1,1
    • Locate the cooling fan and the heat sink on the top center of the Chromebook.

  8. Samsung Chromebook XE550C22 Cooling Fan Replacement: 步骤 8 中的图像 1,3 Samsung Chromebook XE550C22 Cooling Fan Replacement: 步骤 8 中的图像 2,3 Samsung Chromebook XE550C22 Cooling Fan Replacement: 步骤 8 中的图像 3,3
    • Rotate the Chromebook 180 degrees so the fan is closest to you, and locate the fan power cable.

    • Disconnect the fan cable from the motherboard with the angled tweezers.

    • Be gentle and do not pull out the fan cable with excessive force. It will result with a non-working cooling fan and a damaged wire.

  9. Samsung Chromebook XE550C22 Cooling Fan Replacement: 步骤 9 中的图像 1,3 Samsung Chromebook XE550C22 Cooling Fan Replacement: 步骤 9 中的图像 2,3 Samsung Chromebook XE550C22 Cooling Fan Replacement: 步骤 9 中的图像 3,3
    • Remove four identical 6mm screws from the heat sink labelled CPU using the J0 screwdriver.

    • Using your hands, gently lift up and pull away the heat sink.

  10. Samsung Chromebook XE550C22 Cooling Fan Replacement: 步骤 10 中的图像 1,3 Samsung Chromebook XE550C22 Cooling Fan Replacement: 步骤 10 中的图像 2,3 Samsung Chromebook XE550C22 Cooling Fan Replacement: 步骤 10 中的图像 3,3
    • Remove the three identical 6mm screws from around the fan using the J0 screwdriver.

    • Using your hands, gently lift up the fan and pull it away from the laptop.

结论

To reassemble your device, follow these instructions in reverse order.

另外一个人完成了本指南。

Linh Luu

于09/11/17注册

312 声望

创作了2篇指南

团队

CSU Fullerton, Team S2-G7, Bruce Fall 2017 CSU Fullerton, Team S2-G7, Bruce Fall 2017 的会员

CSUF-BRUCE-F17S2G7

3 名成员

创作了14篇指南

0条评论

添加评论

浏览统计数据:

过去 24 小时: 1

过去 7 天: 2

过去 30 天: 3

总计 393