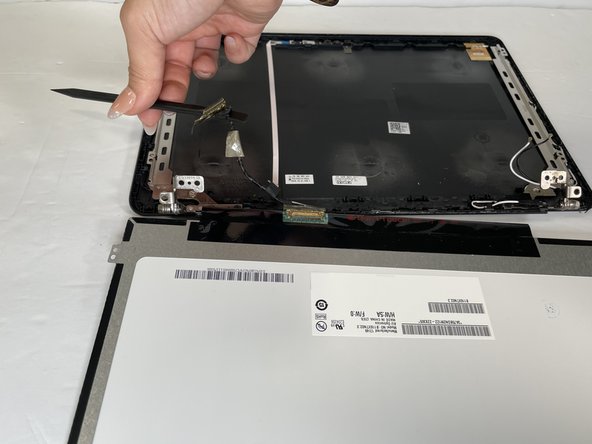
跳转到主内容

Samsung Chromebook 3 XE500C13-K05US LCD Replacement

你所需要的

  1. Samsung Chromebook 3 XE500C13-K05US LCD Replacement, Battery: 步骤 1 中的图像 1,1
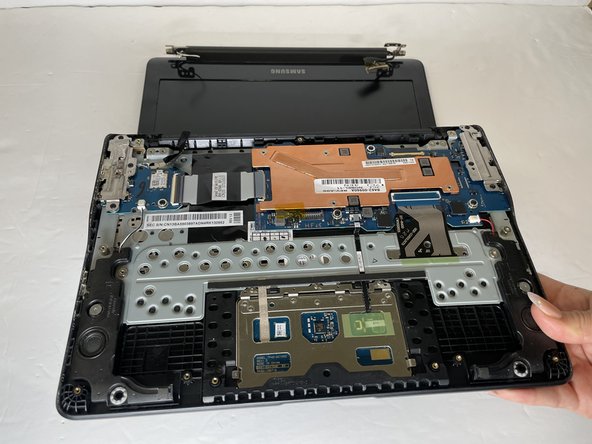
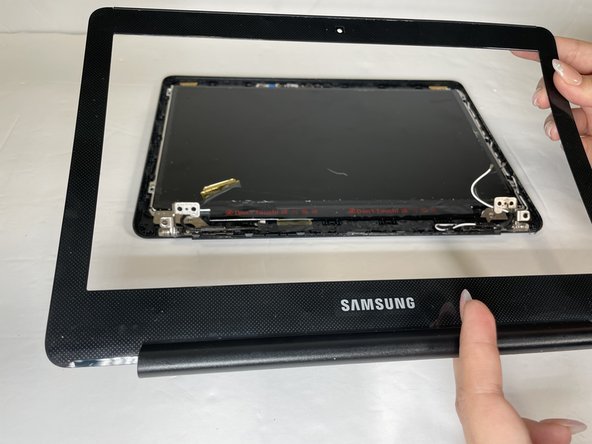
    • Place the laptop back cover facing up to show the screws.

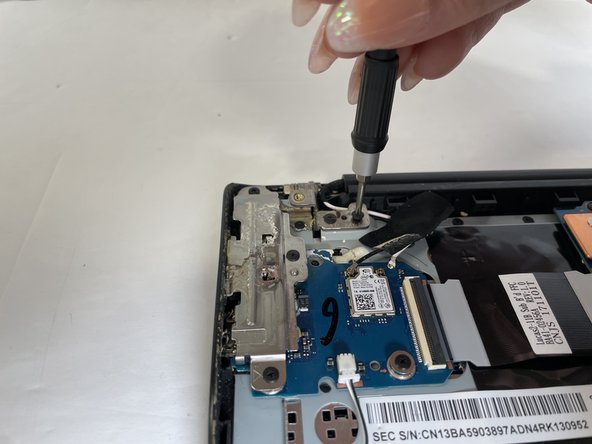
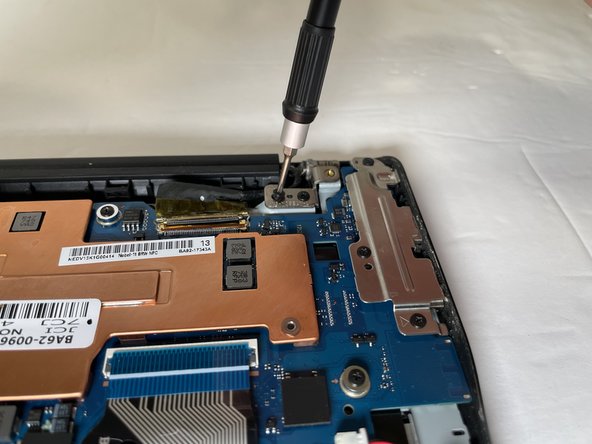
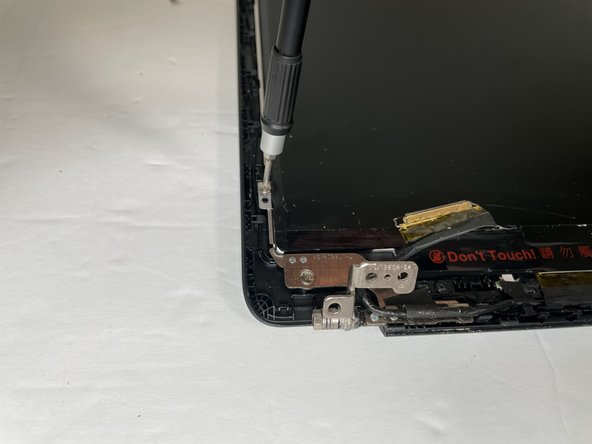
    • Use a Phillips #00 screwdriver to remove the nine 4.6 mm bottom cover screws.

  2. Samsung Chromebook 3 XE500C13-K05US LCD Replacement: 步骤 2 中的图像 1,1
    • Use a nylon spudger or plastic opening tool to pop open the cover of the laptop.

    • You will hear a popping sound as the connectors disengage inside the case.

  3. Samsung Chromebook 3 XE500C13-K05US LCD Replacement: 步骤 3 中的图像 1,2 Samsung Chromebook 3 XE500C13-K05US LCD Replacement: 步骤 3 中的图像 2,2
    • Remove the cover showing the inside of the laptop.

  4. Samsung Chromebook 3 XE500C13-K05US LCD Replacement: 步骤 4 中的图像 1,2 Samsung Chromebook 3 XE500C13-K05US LCD Replacement: 步骤 4 中的图像 2,2
    • Unscrew and remove the four screws that secure the battery.

  5. Samsung Chromebook 3 XE500C13-K05US LCD Replacement: 步骤 5 中的图像 1,3 Samsung Chromebook 3 XE500C13-K05US LCD Replacement: 步骤 5 中的图像 2,3 Samsung Chromebook 3 XE500C13-K05US LCD Replacement: 步骤 5 中的图像 3,3
    • Use a spudger to pry underneath the battery cable connector, and gently lift the connector up.

  6. Samsung Chromebook 3 XE500C13-K05US LCD Replacement: 步骤 6 中的图像 1,1
    • Lift the battery out of the case to remove it from the laptop.

  7. Samsung Chromebook 3 XE500C13-K05US LCD Replacement, LCD: 步骤 7 中的图像 1,2 Samsung Chromebook 3 XE500C13-K05US LCD Replacement, LCD: 步骤 7 中的图像 2,2
    • Use a spudger to lift the hinge that locks the gold colored display cable in place.

    • Pop the cable out and remove the hinge from the motherboard.

  8. Samsung Chromebook 3 XE500C13-K05US LCD Replacement: 步骤 8 中的图像 1,3 Samsung Chromebook 3 XE500C13-K05US LCD Replacement: 步骤 8 中的图像 2,3 Samsung Chromebook 3 XE500C13-K05US LCD Replacement: 步骤 8 中的图像 3,3
    • Using the ifixit spudger, raise the adhesive holding the wireless card antenna wires.

    • Raise the black and white antenna wires with the ifixit spudger.

  9. Samsung Chromebook 3 XE500C13-K05US LCD Replacement: 步骤 9 中的图像 1,3 Samsung Chromebook 3 XE500C13-K05US LCD Replacement: 步骤 9 中的图像 2,3 Samsung Chromebook 3 XE500C13-K05US LCD Replacement: 步骤 9 中的图像 3,3
    • Remove the four 4.6mm screws from the display mounts.

  10. Samsung Chromebook 3 XE500C13-K05US LCD Replacement: 步骤 10 中的图像 1,2 Samsung Chromebook 3 XE500C13-K05US LCD Replacement: 步骤 10 中的图像 2,2
    • Once the hinge screws have been detached, open the laptop.

    • The bottom of the laptop will divide from the screen once you are able to open it a certain amount.

  11. Samsung Chromebook 3 XE500C13-K05US LCD Replacement: 步骤 11 中的图像 1,3 Samsung Chromebook 3 XE500C13-K05US LCD Replacement: 步骤 11 中的图像 2,3 Samsung Chromebook 3 XE500C13-K05US LCD Replacement: 步骤 11 中的图像 3,3
    • Using the ifixit opening tool to pry in between the bezel and screen.

    • You will hear some snapping as you open the bezel with the ifixit opening tool.

  12. Samsung Chromebook 3 XE500C13-K05US LCD Replacement: 步骤 12 中的图像 1,2 Samsung Chromebook 3 XE500C13-K05US LCD Replacement: 步骤 12 中的图像 2,2
    • Remove the four 4.6mm screws from the display mounts.

  13. Samsung Chromebook 3 XE500C13-K05US LCD Replacement: 步骤 13 中的图像 1,2 Samsung Chromebook 3 XE500C13-K05US LCD Replacement: 步骤 13 中的图像 2,2
    • Using the spudger, raise the adhesive tap that is holding the display cable.

  14. Samsung Chromebook 3 XE500C13-K05US LCD Replacement: 步骤 14 中的图像 1,3 Samsung Chromebook 3 XE500C13-K05US LCD Replacement: 步骤 14 中的图像 2,3 Samsung Chromebook 3 XE500C13-K05US LCD Replacement: 步骤 14 中的图像 3,3
    • Slowly raise the panel up and fold it over to uncover the display cable on the backside of the display.

  15. Samsung Chromebook 3 XE500C13-K05US LCD Replacement: 步骤 15 中的图像 1,2 Samsung Chromebook 3 XE500C13-K05US LCD Replacement: 步骤 15 中的图像 2,2
    • Using the ifixit spudger, raise the hinge that is locking the gold colored display cable in place.

    • Pull the cable away from far from you to slide it out the monitor.

    • Be tender around the display circuit board, it is labeled "Do not touch."

  16. Samsung Chromebook 3 XE500C13-K05US LCD Replacement: 步骤 16 中的图像 1,1
    • Once the display cable has been detached, raise the screen up and out of the case.

结论

To reassemble your device, follow these instructions in reverse order.

Yamaris Acosta

于02/07/23注册

557 声望

创作了3篇指南

团队

Gateway, Team 4-4, Gonzalez Spring 2023 Gateway, Team 4-4, Gonzalez Spring 2023 的会员

GCC-GONZALEZ-S23S4G4

4 名成员

创作了3篇指南

0条评论

添加评论

浏览统计数据:

过去 24 小时: 1

过去 7 天: 5

过去 30 天: 14

总计 174