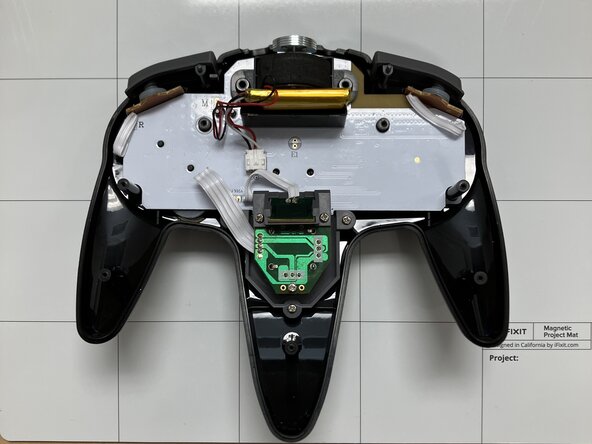
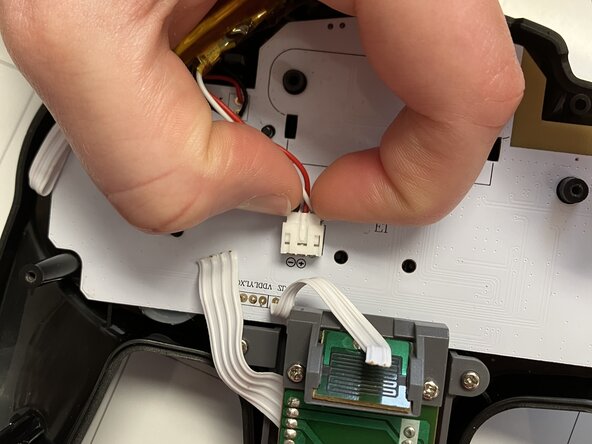
跳转到主内容

SAFFUN Wireless N64 Controller Battery Replacement

你所需要的

  1. SAFFUN Wireless N64 Controller Battery Replacement, Back Plate: 步骤 1 中的图像 1,1
    • Before you begin, make sure the controller is disconnected and the LED indicator light is off.

  2. SAFFUN Wireless N64 Controller Battery Replacement: 步骤 2 中的图像 1,2 SAFFUN Wireless N64 Controller Battery Replacement: 步骤 2 中的图像 2,2
    • Use a Phillips #1 screwdriver to remove the seven 9.3 mm screws from the backplate.

  3. SAFFUN Wireless N64 Controller Battery Replacement: 步骤 3 中的图像 1,2 SAFFUN Wireless N64 Controller Battery Replacement: 步骤 3 中的图像 2,2
    • Use a Phillips #1 screwdriver to remove the two 9.3 mm screws.

    • Use a screwdriver with a shaft length of at least 60 mm to reach the deep-set screws.

  4. SAFFUN Wireless N64 Controller Battery Replacement: 步骤 4 中的图像 1,3 SAFFUN Wireless N64 Controller Battery Replacement: 步骤 4 中的图像 2,3 SAFFUN Wireless N64 Controller Battery Replacement: 步骤 4 中的图像 3,3
    • Slide an opening pick along the edge of the rear cover to release the clips.

    • Gently remove the back plate from the controller.

  5. SAFFUN Wireless N64 Controller Battery Replacement, Battery: 步骤 5 中的图像 1,2 SAFFUN Wireless N64 Controller Battery Replacement, Battery: 步骤 5 中的图像 2,2
    • Carefully remove the battery from the holder.

    • Don't rip out the wires. The battery is still attached to the controller.

  6. SAFFUN Wireless N64 Controller Battery Replacement: 步骤 6 中的图像 1,2 SAFFUN Wireless N64 Controller Battery Replacement: 步骤 6 中的图像 2,2
    • Remove the rumble motor and its holder.

  7. SAFFUN Wireless N64 Controller Battery Replacement: 步骤 7 中的图像 1,1
    • Locate the power supply unit (PSU) on the motherboard shown by the red square.

  8. SAFFUN Wireless N64 Controller Battery Replacement: 步骤 8 中的图像 1,3 SAFFUN Wireless N64 Controller Battery Replacement: 步骤 8 中的图像 2,3 SAFFUN Wireless N64 Controller Battery Replacement: 步骤 8 中的图像 3,3
    • Squeeze the side clips on the battery connector and pull the battery cable straight out of its socket on the board.

    • Do not pull on the wires, as this can damage the connector.

结论

To reassemble your device, follow these instructions in reverse order.

Jacob Overcash

于09/23/25注册

541 声望

创作了4篇指南

团队

0指南评论

添加评论

浏览统计数据:

过去 24 小时: 2

过去 7 天: 5

过去 30 天: 6

总计 67