跳转到主内容

Ryobi P501G Shell Replacement

你所需要的

  1. Ryobi P501G Shell Replacement, Blade: 步骤 1 中的图像 1,1
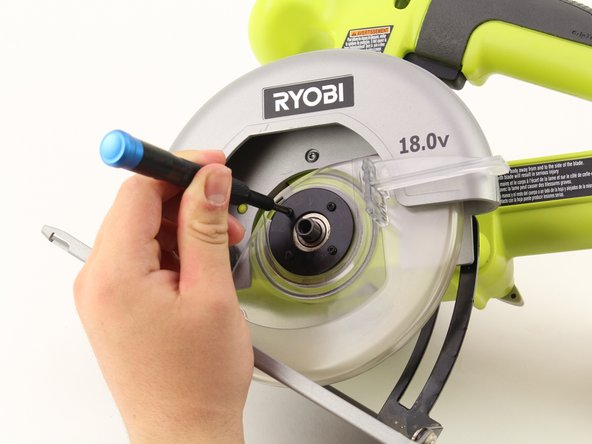
    • Locate the area where the blade is connected to the motor, where the circular covering is on the Ryobi P501G.

  2. Ryobi P501G Shell Replacement: 步骤 2 中的图像 1,2 Ryobi P501G Shell Replacement: 步骤 2 中的图像 2,2
    • Unscrew clockwise and remove the bearing in the middle, connecting the blade to the motor. This will also allow removal of the blade guard.

  3. Ryobi P501G Shell Replacement: 步骤 3 中的图像 1,3 Ryobi P501G Shell Replacement: 步骤 3 中的图像 2,3 Ryobi P501G Shell Replacement: 步骤 3 中的图像 3,3
    • Remove the four black screws holding the black bearing and remove the bearing itself.

  4. Ryobi P501G Shell Replacement: 步骤 4 中的图像 1,1
    • Once the black bearing is off, remove the transparent cover of the blade.

    • Once the cover is off, remove the blade.

    • Place the new blade with the flat notches lined up with the flat notches on the motor axle.

  5. Ryobi P501G Shell Replacement, Shell: 步骤 5 中的图像 1,3 Ryobi P501G Shell Replacement, Shell: 步骤 5 中的图像 2,3 Ryobi P501G Shell Replacement, Shell: 步骤 5 中的图像 3,3
    • Remove the three screws on the inside base of the metal casing of the blade.

    • Pull the metal blade casing off of the Ryobi P501G body.

  6. Ryobi P501G Shell Replacement: 步骤 6 中的图像 1,3 Ryobi P501G Shell Replacement: 步骤 6 中的图像 2,3 Ryobi P501G Shell Replacement: 步骤 6 中的图像 3,3
    • Remove all of the screws located on the right side of the saw.

    • Separate the right side of the saw from the left side by pulling away once all of the screws are removed.

    • Pull back the shell to access the housed parts underneath.

结论

To reassemble your device, follow these instructions in reverse order.

Eeshan Mishra

于01/24/19注册

424 声望

创作了4篇指南

团队

Cal Poly, Team S1-G2, Maness Spring 2019 Cal Poly, Team S1-G2, Maness Spring 2019 的会员

CPSU-MANESS-S19S1G2

4 名成员

创作了7篇指南

0条评论

添加评论

浏览统计数据:

过去 24 小时: 0

过去 7 天: 3

过去 30 天: 6

总计 285