跳转到主内容

Rydis H68 Pro Bumper Replacement

你所需要的

  1. Rydis H68 Pro Bumper Replacement, Battery: 步骤 1 中的图像 1,2 Rydis H68 Pro Bumper Replacement, Battery: 步骤 1 中的图像 2,2
    • Flip the vacuum over so that the wheels are facing you.

    • Use a Phillips #1 screwdriver to remove the four 10 mm screws that surround the battery cover.

  2. Rydis H68 Pro Bumper Replacement: 步骤 2 中的图像 1,1
    • Lift the battery cover up to reveal the battery.

    • Remove the battery.

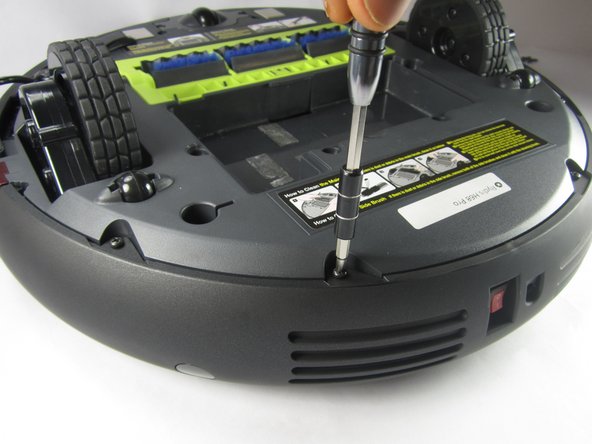
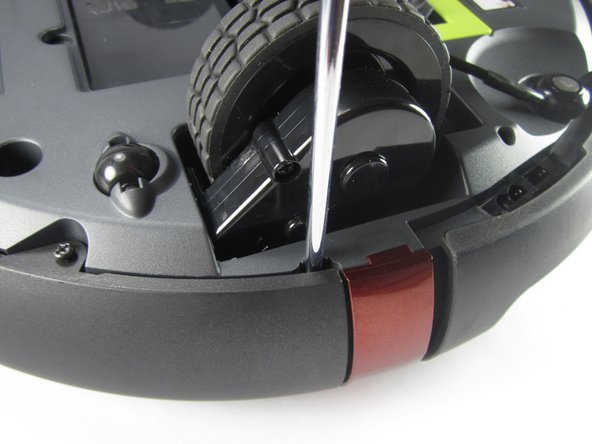
  3. Rydis H68 Pro Bumper Replacement, Bumper: 步骤 3 中的图像 1,3 Rydis H68 Pro Bumper Replacement, Bumper: 步骤 3 中的图像 2,3 Rydis H68 Pro Bumper Replacement, Bumper: 步骤 3 中的图像 3,3
    • Remove the eight 10 mm Phillips #1 screws.

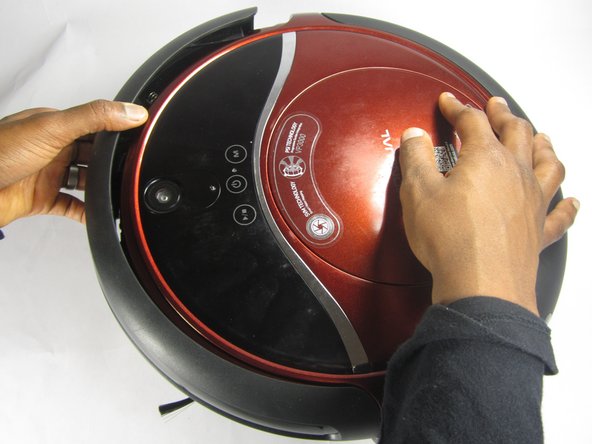
  4. Rydis H68 Pro Bumper Replacement: 步骤 4 中的图像 1,3 Rydis H68 Pro Bumper Replacement: 步骤 4 中的图像 2,3 Rydis H68 Pro Bumper Replacement: 步骤 4 中的图像 3,3
    • Hold the front bumper and pull it off.

    • It requires a lot of force to pull the bumper off.

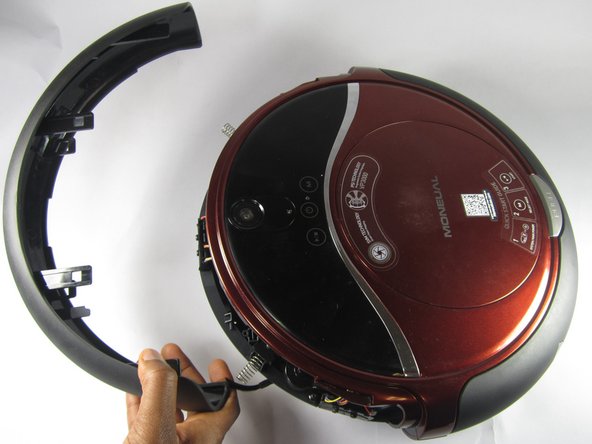
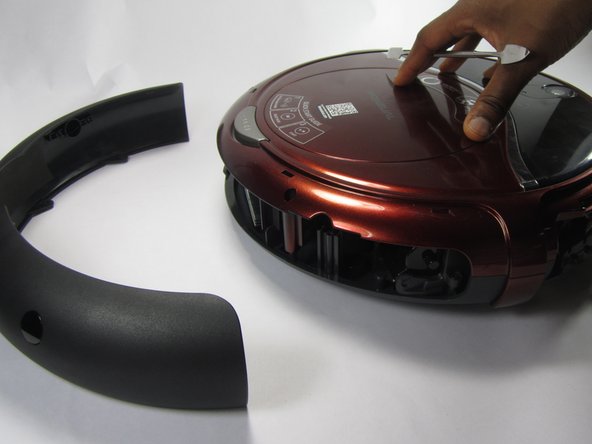
  5. Rydis H68 Pro Bumper Replacement: 步骤 5 中的图像 1,3 Rydis H68 Pro Bumper Replacement: 步骤 5 中的图像 2,3 Rydis H68 Pro Bumper Replacement: 步骤 5 中的图像 3,3
    • Pry off the back bumper by going around the entire top of the bumper with the metal spudger.

结论

To reassemble your device, follow these instructions in reverse order.

Joe Balduz

于02/15/17注册

231 声望

创作了2篇指南

团队

USFT-Lacy-S17S005G2 USFT-Lacy-S17S005G2 的会员

Repair Café

4 名成员

创作了10篇指南

0条评论

添加评论

浏览统计数据:

过去 24 小时: 0

过去 7 天: 0

过去 30 天: 5

总计 432