跳转到主内容

Rotor Riot Thumbstick Replacement

你所需要的

  1. Rotor Riot Thumbstick Replacement, Remove the iPhone mount: 步骤 1 中的图像 1,3 Rotor Riot Thumbstick Replacement, Remove the iPhone mount: 步骤 1 中的图像 2,3 Rotor Riot Thumbstick Replacement, Remove the iPhone mount: 步骤 1 中的图像 3,3
    • Use your fingers to remove the screw on the back side of the controller securing the iPhone mount.

    • Remove the iPhone mount.

  2. Rotor Riot Thumbstick Replacement, Unscrew the back cover: 步骤 2 中的图像 1,1
    • Use a T6 Torx screwdriver to remove the eight 9.2 mm-long screws securing the back cover.

    • Don't try to remove the back cover all the way yet! It's still connected to the mainboard.

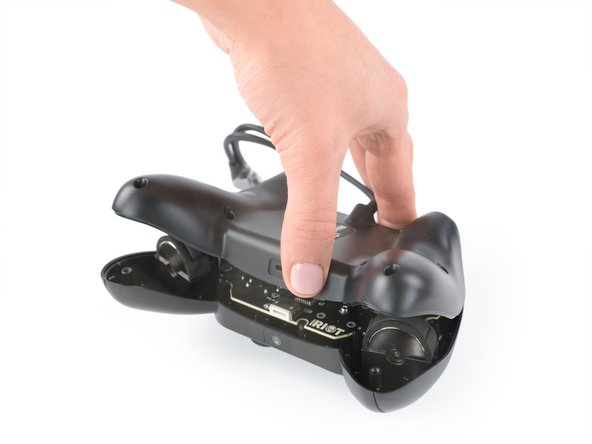
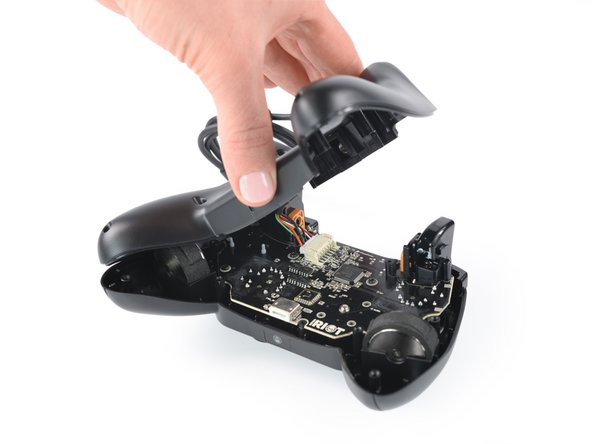
  3. Rotor Riot Thumbstick Replacement, Swing open the back cover: 步骤 3 中的图像 1,3 Rotor Riot Thumbstick Replacement, Swing open the back cover: 步骤 3 中的图像 2,3 Rotor Riot Thumbstick Replacement, Swing open the back cover: 步骤 3 中的图像 3,3
    • Lift up the back cover of the controller.

    • Lift the back cover to a 45 degree angle and place it next to the controller.

    • Don't strain the interconnect cable during this procedure.

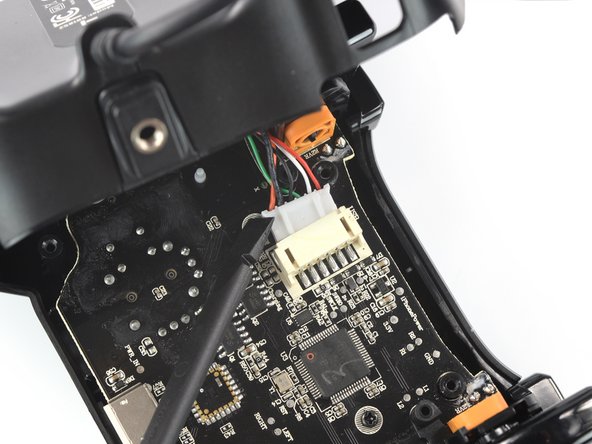
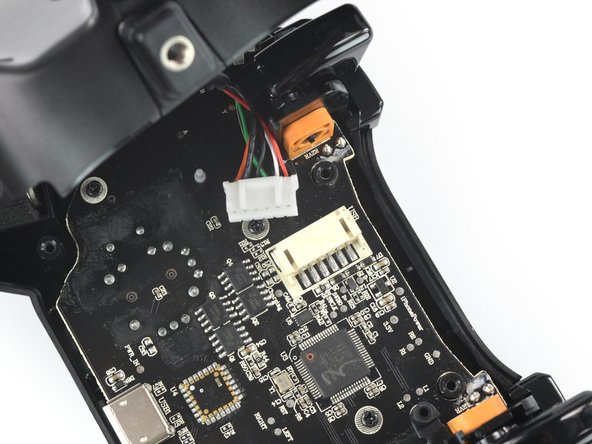
  4. Rotor Riot Thumbstick Replacement, Disconnect the phone connector cable: 步骤 4 中的图像 1,3 Rotor Riot Thumbstick Replacement, Disconnect the phone connector cable: 步骤 4 中的图像 2,3 Rotor Riot Thumbstick Replacement, Disconnect the phone connector cable: 步骤 4 中的图像 3,3
    • Use a spudger to disconnect the phone connector cable from the mainboard.

  5. Rotor Riot Thumbstick Replacement, Remove the back cover: 步骤 5 中的图像 1,1
    • Remove the back cover.

  6. Rotor Riot Thumbstick Replacement, Remove the shoulder buttons: 步骤 6 中的图像 1,2 Rotor Riot Thumbstick Replacement, Remove the shoulder buttons: 步骤 6 中的图像 2,2
    • Remove the shoulder buttons by lifting them out of the case.

  7. Rotor Riot Thumbstick Replacement, Unscrew the mainboard: 步骤 7 中的图像 1,1
    • Use a Phillips screwdriver to remove the four 7.0 mm-long screws securing the mainboard.

  8. Rotor Riot Thumbstick Replacement, Flip over the mainboard: 步骤 8 中的图像 1,3 Rotor Riot Thumbstick Replacement, Flip over the mainboard: 步骤 8 中的图像 2,3 Rotor Riot Thumbstick Replacement, Flip over the mainboard: 步骤 8 中的图像 3,3
    • Flip over the mainboard and place it above the controller housing.

    • Avoid tensioning the trigger button cables during this procedure and don't try to remove the mainboard all the way yet! It is still connected to the controller housing.

  9. Rotor Riot Thumbstick Replacement, Remove the thumbsticks: 步骤 9 中的图像 1,3 Rotor Riot Thumbstick Replacement, Remove the thumbsticks: 步骤 9 中的图像 2,3 Rotor Riot Thumbstick Replacement, Remove the thumbsticks: 步骤 9 中的图像 3,3
    • Use your fingers to remove the left thumbstick by pulling it upwards and off the left joystick.

    • Repeat this procedure for the right tumbstick.

结论

To reassemble your device, follow these instructions in reverse order.

Take your e-waste to an R2 or e-Stewards certified recycler.

Repair didn’t go as planned? Check our Answers community for help.

Adriana Zwink

于12/18/19注册

50,416 声望

创作了167篇指南

团队

iFixit iFixit 的会员

Staff

141 名成员

创作了17,893篇指南

0条评论

添加评论

浏览统计数据:

过去 24 小时: 0

过去 7 天: 1

过去 30 天: 9

总计 314