跳转到主内容

当前版本的文档还未经巡查,您可以查看最新的已查核版本

2017年 Retina MacBook 电池更换

你所需要的

  1. 2017年 Retina MacBook  电池更换, 禁用自动重启: 步骤 1 中的图像 1,3 2017年 Retina MacBook  电池更换, 禁用自动重启: 步骤 1 中的图像 2,3 2017年 Retina MacBook  电池更换, 禁用自动重启: 步骤 1 中的图像 3,3
    • 在开始此步骤之前,你必须禁用 Mac 的自动重启功能。自动重启功能会让 MacBook 在掀开盖子时自动开机。这个功能在拆卸过程中也可能会被意外触发。使用本指南或按照下面的简要说明来禁用自动启动。这项指令可能并不适用于所有 Mac。

    • 开机,并打开终端

    • 将以下命令复制粘贴到(或完全键入)终端窗口中:

    • sudo nvram AutoBoot=%00

    • [回车]。如果出现钥匙提示,请输入管理员密码(开机密码)并再次按[回车]。注意:您的回车键也可能标有「⏎」或 return

    • 你现在可以安全地关闭Mac电脑,并打开底壳,它不会再意外启动了。

    • 当修理完成、成功组装复原Mac电脑后,在「终端」中使用以下命令来启用「自动启动」功能:

    • sudo nvram AutoBoot=%03

  2. 2017年 Retina MacBook  电池更换, 松开底壳: 步骤 2 中的图像 1,1
    在这个步骤中使用的工具:
    Magnetic Project Mat
    $19.95
    购买
    • 在开始之前,请拔掉电源并关闭您的MacBook。关闭显示屏,并将其置于柔软的表面上,屏幕朝下。

    • 拆除八颗固定底壳的螺丝:

    • 两颗1.8毫米P5五星形螺丝

    • 四颗2.9毫米P5五星形螺丝

    • 两颗6.1毫米P5五星形螺丝

    • 注意在拆卸螺丝时的方向——重新安装时需要将其稍微倾斜。

    • 在整个修理过程中, 请保管好每一个螺丝 ,并确保将其准确地放回原位,以避免损坏您的设备。

  3. 2017年 Retina MacBook  电池更换: 步骤 3 中的图像 1,3 2017年 Retina MacBook  电池更换: 步骤 3 中的图像 2,3 2017年 Retina MacBook  电池更换: 步骤 3 中的图像 3,3
    • 将你的手指从MacBook的铰链后部开始,插入上壳和下壳之间。

    • 只轻微地抬起下壳,以避免损坏连接下壳和上壳的电缆。

    • 紧紧握住,稳定地提起,直到下壳与上壳略微分离。

    • 在抬起下壳时,你可能会遇到很大的阻力。如有必要,可以沿着下壳的侧边滑动一个开启工具或其他防静电撬棒,以弹开两个隐藏的保持夹。

    • 在重新组装时,为了重新固定夹子,需要在下壳的两侧边缘(靠近第三张图片中插入撬棒的地方)用力按压,直到听到夹子咔嗒一声卡入位。

  4. 2017年 Retina MacBook  电池更换: 步骤 4 中的图像 1,1
    • 在固定住下壳的同时,小心地将MacBook翻转过来,使苹果标志朝上。

  5. 2017年 Retina MacBook  电池更换: 步骤 5 中的图像 1,2 2017年 Retina MacBook  电池更换: 步骤 5 中的图像 2,2
    • 从正面将上壳和显示屏一起抬起,将其提升到大约45度。

    • 将MacBook撑开保持在这个位置,以便进行下一步。

  6. 2017年 Retina MacBook  电池更换: 步骤 6 中的图像 1,3 2017年 Retina MacBook  电池更换: 步骤 6 中的图像 2,3 2017年 Retina MacBook  电池更换: 步骤 6 中的图像 3,3
    • 使用撬棒的平头端,保持按压金色的“battery disconnect”按钮,不要松开。

    • 如果电源灯亮了,则继续按压该按钮,直到电源灯熄灭即可松开。整个过程最多可能需要10秒钟。

    • 如果电源灯一直没有亮,则在按压该按钮的5-10秒后松开。重复3次该操作。

    • 这一步是为了确保Macbook彻底断电以便进行后续操作。

  7. 2017年 Retina MacBook  电池更换: 步骤 7 中的图像 1,1
    • 合上Macbook,然后小心的翻到底面

  8. 2017年 Retina MacBook  电池更换: 步骤 8 中的图像 1,1
    • 从正面抬起底壳至大约45度的位置。

    • 小心不要扯掉连接在底壳的排线。

  9. 2017年 Retina MacBook  电池更换: 步骤 9 中的图像 1,2 2017年 Retina MacBook  电池更换: 步骤 9 中的图像 2,2
    • 用镊子掀开覆盖在触控板ZIF接口处的胶布。

  10. 2017年 Retina MacBook  电池更换: 步骤 10 中的图像 1,3 2017年 Retina MacBook  电池更换: 步骤 10 中的图像 2,3 2017年 Retina MacBook  电池更换: 步骤 10 中的图像 3,3
    • 用撬棒小心的把ZIF接口处的排线固定锁向上掀起。

  11. 2017年 Retina MacBook  电池更换: 步骤 11 中的图像 1,2 2017年 Retina MacBook  电池更换: 步骤 11 中的图像 2,2
    • 小心的,慢慢的把排线向后拉出来。

  12. 2017年 Retina MacBook  电池更换: 步骤 12 中的图像 1,3 2017年 Retina MacBook  电池更换: 步骤 12 中的图像 2,3 2017年 Retina MacBook  电池更换: 步骤 12 中的图像 3,3
    • 小心合上Macbook,然后苹果logo朝上地翻回来。

    • 从正面,连同屏幕和上壳一起,翻起至90度。找个结实的东西挨住,不然你的手要一直扶着。

    • 最好用胶纸在触控板位置将其与后面的支撑物固定住。

    • 非常不建议你把整个屏幕和上壳翻开至平放的状态,这样排线会很容易损坏。

  13. 2017年 Retina MacBook  电池更换: 步骤 13 中的图像 1,1
    • 拆除固定电池连接器和主板的唯一一颗2.9毫米T5 Torx螺丝。

  14. 2017年 Retina MacBook  电池更换: 步骤 14 中的图像 1,2 2017年 Retina MacBook  电池更换: 步骤 14 中的图像 2,2
    在这个步骤中使用的工具:
    Battery Blocker
    $3.99
    购买
    • 作为额外的预防措施,你可以通过在主板和电池接口之间插入一块 电池隔离工具来物理断开电池的连接。

  15. 这个步骤还没有翻译 帮忙翻译一下

    2017年 Retina MacBook  电池更换: 步骤 15 中的图像 1,1
    • Remove the two screws securing the USB-C port cable bracket:

    • 1.1 mm Phillips #00 screw

    • Some variations of this model may use a Tri-point Y00 screw.

    • 3.5 mm T5 Torx screw

  16. 这个步骤还没有翻译 帮忙翻译一下

    2017年 Retina MacBook  电池更换: 步骤 16 中的图像 1,2 2017年 Retina MacBook  电池更换: 步骤 16 中的图像 2,2
    • Use the flat end of a spudger to disconnect the USB-C port cable bracket by prying it straight up from the logic board.

    • To reconnect this cable, first line up the metal bracket over the screw holes, then press down on the middle of the bracket. Make sure it's aligned correctly, or you may damage the connector.

  17. 这个步骤还没有翻译 帮忙翻译一下

    2017年 Retina MacBook  电池更换: 步骤 17 中的图像 1,2 2017年 Retina MacBook  电池更换: 步骤 17 中的图像 2,2
    • Use a spudger to flip open the retaining flap on the audio jack board cable ZIF connector.

  18. 这个步骤还没有翻译 帮忙翻译一下

    2017年 Retina MacBook  电池更换: 步骤 18 中的图像 1,2 2017年 Retina MacBook  电池更换: 步骤 18 中的图像 2,2
    • Disconnect the audio jack board ribbon cable by pulling it straight back out of the ZIF connector.

    • During reassembly, orient the ribbon cable so the white stripe faces you. Insert the cable until the white line disappears under the socket.

    • At this point it is possible to open the macbook all the way and to lay it flat on a table without causing any damage to the flex cables.

  19. 这个步骤还没有翻译 帮忙翻译一下

    2017年 Retina MacBook  电池更换: 步骤 19 中的图像 1,2 2017年 Retina MacBook  电池更换: 步骤 19 中的图像 2,2
    • Use tweezers to peel back the tape covering the display cable connector.

  20. 这个步骤还没有翻译 帮忙翻译一下

    2017年 Retina MacBook  电池更换: 步骤 20 中的图像 1,2 2017年 Retina MacBook  电池更换: 步骤 20 中的图像 2,2
    • It's possible the metal retaining flap on the display cable connector may flip open, remaining stuck to the tape.

    • If so, use the flat end of a spudger to hold down the retaining flap while peeling the tape away with the tweezers.

  21. 这个步骤还没有翻译 帮忙翻译一下

    2017年 Retina MacBook  电池更换: 步骤 21 中的图像 1,1
    • Use the flat end of a spudger to flip open the retaining flap on the display cable connector.

    • Try to keep it clear of the tape, or it may re-adhere and make cable removal difficult.

  22. 这个步骤还没有翻译 帮忙翻译一下

    2017年 Retina MacBook  电池更换: 步骤 22 中的图像 1,3 2017年 Retina MacBook  电池更换: 步骤 22 中的图像 2,3 2017年 Retina MacBook  电池更换: 步骤 22 中的图像 3,3
    在这个步骤中使用的工具:
    iOpener
    $12.99
    购买
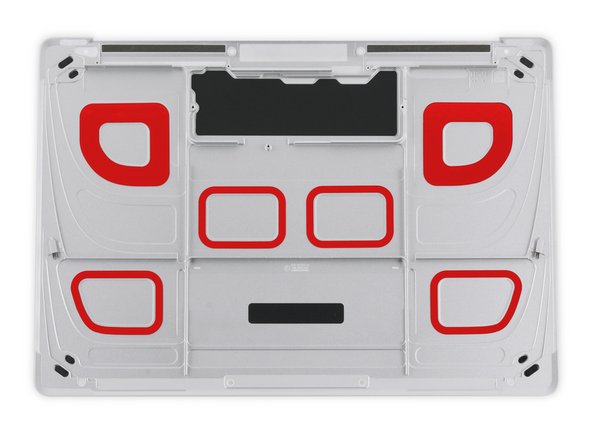
    • Carefully slide the flat end of a spudger underneath the display cable to separate the adhesive holding it to the lower case.

    • Take care not to damage the cable. If the adhesive is very strong, heat the case directly beneath the cable with an iOpener to soften the adhesive, and then try again.

  23. 这个步骤还没有翻译 帮忙翻译一下

    2017年 Retina MacBook  电池更换: 步骤 23 中的图像 1,3 2017年 Retina MacBook  电池更换: 步骤 23 中的图像 2,3 2017年 Retina MacBook  电池更换: 步骤 23 中的图像 3,3
    • Hold the retaining flap open.

    • Disconnect the display cable by gently pulling it straight out of its connector.

    • Immediately close the retaining flap. Keep it closed throughout your repair.

    • During reassembly, keep the flap closed while you insert the display cable. Remember to orient the cable so its gold contacts face down, making sure not to crimp or fold it—it'll click into place when it's connected.

  24. 这个步骤还没有翻译 帮忙翻译一下

    2017年 Retina MacBook  电池更换: 步骤 24 中的图像 1,1
    • Separate the upper case assembly from the lower case assembly.

  25. 这个步骤还没有翻译 帮忙翻译一下

    2017年 Retina MacBook  电池更换: 步骤 25 中的图像 1,3 2017年 Retina MacBook  电池更换: 步骤 25 中的图像 2,3 2017年 Retina MacBook  电池更换: 步骤 25 中的图像 3,3
    • Use tweezers to peel up the tape covering the two ZIF connectors—one for the right speaker cable, and one for the audio jack board cable.

  26. 这个步骤还没有翻译 帮忙翻译一下

    2017年 Retina MacBook  电池更换: 步骤 26 中的图像 1,3 2017年 Retina MacBook  电池更换: 步骤 26 中的图像 2,3 2017年 Retina MacBook  电池更换: 步骤 26 中的图像 3,3
    • Use the point of a spudger to flip up both ZIF connector retaining flaps.

  27. 这个步骤还没有翻译 帮忙翻译一下

    2017年 Retina MacBook  电池更换: 步骤 27 中的图像 1,2 2017年 Retina MacBook  电池更换: 步骤 27 中的图像 2,2
    • Carefully pull straight back on the two pieces of tape you just peeled up to disconnect the two ribbon cables.

  28. 这个步骤还没有翻译 帮忙翻译一下

    2017年 Retina MacBook  电池更换: 步骤 28 中的图像 1,2 2017年 Retina MacBook  电池更换: 步骤 28 中的图像 2,2
    • Use the point of a spudger to peel up the foam pad covering the two antenna connectors.

  29. 这个步骤还没有翻译 帮忙翻译一下

    2017年 Retina MacBook  电池更换: 步骤 29 中的图像 1,3 2017年 Retina MacBook  电池更换: 步骤 29 中的图像 2,3 2017年 Retina MacBook  电池更换: 步骤 29 中的图像 3,3
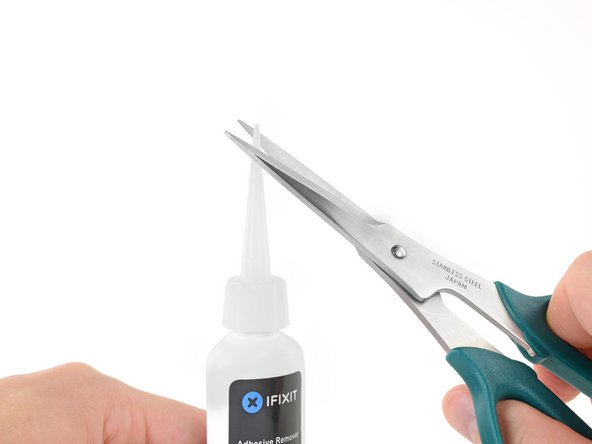
    • Insert one arm of your angled tweezers under the metal neck of the first antenna connector and pry up to disconnect it.

    • The antenna connectors and sockets are extremely fragile. Be very careful to lift only on the connector, and not on the socket itself. Do not lift under the cable, or put any unnecessary strain on it.

  30. 这个步骤还没有翻译 帮忙翻译一下

    2017年 Retina MacBook  电池更换: 步骤 30 中的图像 1,3 2017年 Retina MacBook  电池更换: 步骤 30 中的图像 2,3 2017年 Retina MacBook  电池更换: 步骤 30 中的图像 3,3
    • Pry up the second antenna connector to disconnect it.

    • The antenna connectors and sockets are extremely fragile. Be very careful to lift only on the connector, and not on the socket itself. Do not lift under the cable, or put any unnecessary strain on it.

  31. 这个步骤还没有翻译 帮忙翻译一下

    2017年 Retina MacBook  电池更换: 步骤 31 中的图像 1,2 2017年 Retina MacBook  电池更换: 步骤 31 中的图像 2,2
    • Use a spudger to disconnect the left speaker cable connector by prying it straight up from the logic board.

  32. 这个步骤还没有翻译 帮忙翻译一下

    2017年 Retina MacBook  电池更换: 步骤 32 中的图像 1,2 2017年 Retina MacBook  电池更换: 步骤 32 中的图像 2,2
    • Use a spudger to flip up the retaining flap on the trackpad cable ZIF connector.

  33. 这个步骤还没有翻译 帮忙翻译一下

    2017年 Retina MacBook  电池更换: 步骤 33 中的图像 1,2 2017年 Retina MacBook  电池更换: 步骤 33 中的图像 2,2
    • Disconnect the trackpad cable from the logic board by gently pulling it straight out of its connector.

    • During reassembly, check that your ZIF connector flaps are flipped up before reinserting their cables.

  34. 这个步骤还没有翻译 帮忙翻译一下

    2017年 Retina MacBook  电池更换: 步骤 34 中的图像 1,1
    • Remove the single 3.5 mm T5 Torx screw securing the logic board to the lower case.

  35. 这个步骤还没有翻译 帮忙翻译一下

    2017年 Retina MacBook  电池更换: 步骤 35 中的图像 1,3 2017年 Retina MacBook  电池更换: 步骤 35 中的图像 2,3 2017年 Retina MacBook  电池更换: 步骤 35 中的图像 3,3
    • Flip up the front edge of the logic board.

    • Handle the logic board only by its edges.

    • Lift and detach the EMI tape securing the logic board to the lower case.

    • If the tape feels stuck, heat it with a hair dryer or iOpener to soften the adhesive.

    • Reattach the tape securely during reassembly.

  36. 这个步骤还没有翻译 帮忙翻译一下

    2017年 Retina MacBook  电池更换: 步骤 36 中的图像 1,1
    • Remove the logic board.

  37. 2017年 Retina MacBook  电池更换, 电池: 步骤 37 中的图像 1,3 2017年 Retina MacBook  电池更换, 电池: 步骤 37 中的图像 2,3 2017年 Retina MacBook  电池更换, 电池: 步骤 37 中的图像 3,3
    • 抬起下壳组件的后边缘,并使用书本或泡沫块以一定角度将其支撑起来。

    • 在以下步骤中,你将沿着电池的边缘涂抹液体粘合剂去除剂。保持MacBook的一部分升高将有助于粘合剂移除在电池下方的流动。

    • 你可以在此过程中根据需要重新调整MacBook的方向,但请尽量避免粘合剂去除剂接触电池和金属机箱以外的任何组件。

    • 如有必要,可在MacBook下方添加一层铝箔,以防止工作区掉落粘合剂。

  38. 2017年 Retina MacBook  电池更换: 步骤 38 中的图像 1,2 2017年 Retina MacBook  电池更换: 步骤 38 中的图像 2,2
    • iFixit 粘合剂去除剂含有丙酮,对皮肤和眼睛略具有刺激性。

    • 处理和使用粘合剂去除剂时请戴上护目镜。(套装中包含护目镜。)

    • 如果不戴护目镜就不要戴隐形眼镜。套装中还包括防护手套。

    • 如果你担心皮肤过敏,请立即戴上手套。

  39. 2017年 Retina MacBook  电池更换: 步骤 39 中的图像 1,3 2017年 Retina MacBook  电池更换: 步骤 39 中的图像 2,3 2017年 Retina MacBook  电池更换: 步骤 39 中的图像 3,3
    • 从你的粘合剂去除剂瓶中取下黑色橡胶塞。

    • 在切割涂抹器尖端之前拧开以松开或取下瓶盖。

    • 这会打开瓶子并在切割涂抹器尖端之前使压力均衡。如果跳过此步骤,粘合剂去除器可能会在切割尖端时意外喷出。

    • 用剪刀剪掉涂抹器的密封尖端。

    • 靠近狭窄的尖端切割将使您获得更好的控制,因此您可以少量使用粘合剂去除剂。

    • 在进一步操作之前,请拧紧并关闭瓶盖。

  40. 2017年 Retina MacBook  电池更换: 步骤 40 中的图像 1,3 2017年 Retina MacBook  电池更换: 步骤 40 中的图像 2,3 2017年 Retina MacBook  电池更换: 步骤 40 中的图像 3,3
    • 将电池单元固定到下壳体的粘合剂位于标记为红色的区域中。

    • 在以下步骤中使用粘合剂去除剂时,你可以使用此步骤作为参考。

  41. 2017年 Retina MacBook  电池更换: 步骤 41 中的图像 1,2 2017年 Retina MacBook  电池更换: 步骤 41 中的图像 2,2
    • 沿右侧电池的边缘均匀涂抹几滴粘合剂。

    • 你不需要使用太多。瓶中含有两倍以上的去除所有电池所需的除胶剂。

    • 在进行下一步之前,等待2-3分钟让除胶剂渗入电池下方。

  42. 2017年 Retina MacBook  电池更换: 步骤 42 中的图像 1,3 2017年 Retina MacBook  电池更换: 步骤 42 中的图像 2,3 2017年 Retina MacBook  电池更换: 步骤 42 中的图像 3,3
    • 2-3分钟后,将塑料卡的一角滑到电池单元下方。

    • 这应该需要很小的力。如果你遇到问题,请沿着电池的另一边涂上更多的粘合剂去除剂,再给它2-3分钟穿透。

    • 尽量不要让电池变形。损坏或刺破的电池可能会泄漏危险化学品和/或着火。

    • 轻轻扭动卡片可能有助于在电池和MacBook 之间打开一个小小的空隙

    • 将其电池单元向下滑动,使其与将电池固定在MacBook 上盖上的粘合胶分开。

  43. 2017年 Retina MacBook  电池更换: 步骤 43 中的图像 1,2 2017年 Retina MacBook  电池更换: 步骤 43 中的图像 2,2
    • 提起电池将其从外壳中分离,但不要尝试将其取出。

    • 将塑料卡留在电池下方,以防止在进行下一步时再次粘住塑料卡。

  44. 2017年 Retina MacBook  电池更换: 步骤 44 中的图像 1,2 2017年 Retina MacBook  电池更换: 步骤 44 中的图像 2,2
    • 重复前三个步骤以分离左前电池。

    • 将塑料卡放在电池下面,以防止在进行下一步时重新粘附。

  45. 2017年 Retina MacBook  电池更换: 步骤 45 中的图像 1,3 2017年 Retina MacBook  电池更换: 步骤 45 中的图像 2,3 2017年 Retina MacBook  电池更换: 步骤 45 中的图像 3,3
    • 重复上述步骤,分离MacBook左侧的大电池。

  46. 2017年 Retina MacBook  电池更换: 步骤 46 中的图像 1,2 2017年 Retina MacBook  电池更换: 步骤 46 中的图像 2,2
    • 重复上述步骤,分离MacBook右侧的大电池。

    • 小心不要损坏靠近电池单元后缘的音频插孔柔性电缆。

  47. 2017年 Retina MacBook  电池更换: 步骤 47 中的图像 1,3 2017年 Retina MacBook  电池更换: 步骤 47 中的图像 2,3 2017年 Retina MacBook  电池更换: 步骤 47 中的图像 3,3
    • 将下壳组件平放,并将粘合剂去除剂施加到两个中间电池单元 ——每侧,并沿前边缘(与主板区域相对)。

  48. 2017年 Retina MacBook  电池更换: 步骤 48 中的图像 1,1
    • 沿着下一个电池单元中间均匀地涂上少量的粘合胶去除剂。

    • 在进行下一步之前,等待2-3分钟让粘胶去除剂渗入电池下方。

  49. 2017年 Retina MacBook  电池更换: 步骤 49 中的图像 1,3 2017年 Retina MacBook  电池更换: 步骤 49 中的图像 2,3 2017年 Retina MacBook  电池更换: 步骤 49 中的图像 3,3
    • 将塑料卡插入其中一个电池单元的前缘下方并小心地将其分开。

    • 尽量不要让电池变形。损坏或刺破的电池可能会泄漏危险化学品和/或着火。

    • 如果你在将电池放在电池单元下方时遇到问题,请尝试在电池单元下方使用一块牙线或电线,并以锯切方式将其左右拉动以分离粘合剂。

  50. 2017年 Retina MacBook  电池更换: 步骤 50 中的图像 1,1
    • 重复之前的步骤以最终分离电池。

  51. 2017年 Retina MacBook  电池更换: 步骤 51 中的图像 1,3 2017年 Retina MacBook  电池更换: 步骤 51 中的图像 2,3 2017年 Retina MacBook  电池更换: 步骤 51 中的图像 3,3
    • 提起并取出电池。

    • 注意不要将电池拖到下壳组件上,否则可能会损坏扬声器或柔性电缆。

    • 在安装新电池之前,请从MacBook机壳中去除所有剩余的粘合剂。

    • 用镊子或带手套的手指剥掉较大的粘合剂。

    • 用塑料工具刮掉剩余的粘合剂,并用粘合剂去除剂或异丙醇清洁下面的区域。擦拭一个方向,而不是来回擦拭,直到所有的粘合剂残留物消失。

    • 这可能需要相当多的清洁工作,所以要耐心等待。

  52. 2017年 Retina MacBook  电池更换: 步骤 52 中的图像 1,3 2017年 Retina MacBook  电池更换: 步骤 52 中的图像 2,3 2017年 Retina MacBook  电池更换: 步骤 52 中的图像 3,3
    • 在安装之前,请仔细测试新电池的安装和对齐情况。

    • 与大多数笔记本电池不同,MacBook的电池外形精确,以适应下壳的“梯形”形状。必须正确定位每个单元格,否则MacBook可能无法正确关闭并可能导致损坏。

    • 你的更换电池可能贴在厚塑料顶部衬垫上,以便在安装时将各个电池保持在适当的位置。

    • 在安装电池之前,请勿卸下此衬管。如果你的电池预装在底部,请剥去底部塑料衬垫以露出粘合剂。如果您的电池没有附带粘合剂,请在标有红色的区域将薄的双面胶带(如Tesa 61395)粘贴到下壳。

    • 小心放置电池并将其放置到位。将每个电池牢牢按住5-10秒钟,将其固定在下壳上。然后,将塑料顶部衬垫与任何泡沫衬垫一起剥离。

    • 仅限2015款:重新组装后,请务必在开机前将MacBook连接至低压电源。不遵守这些说明可能会导致主板损坏。

    • 校准 你新安装的电池: 将电池充电至100%并继续充电至少两小时,然后拔掉电源正常使用你的电脑。当出现低电量警告时,保存你的工作并继续使用电脑直至电量低自动休眠。静置至少5小时后一次性充电至100%。

    • 如果你在安装新电池以后注意到任何异常举动或者问题,也许你需要重置你 MacBook Pro 的 SMC。

结论

请按逆序重组你的设备。

29等其他人完成本指南。

由衷感谢以下译者:

en zh

100%

Yuting Zhao正在帮助我们修复这个世界! 您也想加入吗?
开始翻译 ›

Jeff Suovanen

于08/06/13注册

428,098 声望

创作了259篇指南

团队

iFixit iFixit 的会员

Staff

135 名成员

创作了16,817篇指南

17条评论

Un coñazo vamos :D

Hugo Angulo - 回复

When will the battery Start to swell?

Any warning sign for emergency replacement?

Keyur chakurkar - 回复

Is this Battery compatible with my Macbook 12-inch 2015 Retina?

Alberto Pomales - 回复

Absolutely fantastic instructions. Just follow step by step. There will be no surprises. Took about 2-2,5 hours.

vanblerk123 - 回复

Guys! I did it! took me 2.5 hrs. really appreciate the thorough instructions!

austenschultz - 回复

添加评论

浏览统计数据:

过去 24 小时: 53

过去 7 天: 374

过去 30 天: 1,700

总计 76,489