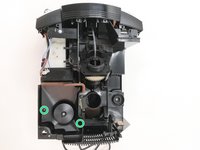
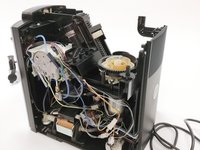
跳转到主内容

Removing and replacing the grinder

你所需要的

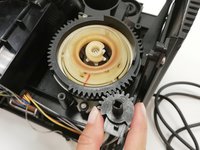
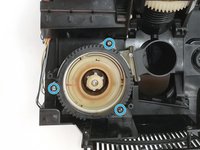
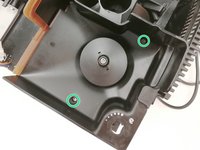
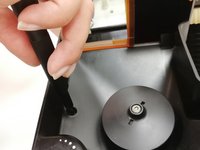
    • Remove the lock washer on the axle for grinding degree adjustment using pliers.

    • Removing the lock washer requires some force. Don't hesitate to pull firmly.

    • Remove the grinding degree adjustment axle by using pliers to pull it upwards.

  1. Removing and replacing the grinder: 步骤 3 中的图像 1,2 Removing and replacing the grinder: 步骤 3 中的图像 2,2
    • Remove the 2 screws on the bean container of the coffee machine with the Torx T10 screwdriver.

    • The screws are in a recess.

  2. Removing and replacing the grinder: 步骤 4 中的图像 1,2 Removing and replacing the grinder: 步骤 4 中的图像 2,2
    • Remove the bean container.

  3. Removing and replacing the grinder: 步骤 5 中的图像 1,2 Removing and replacing the grinder: 步骤 5 中的图像 2,2
    • Remove the pinion for the grinding degree adjustment.

  4. Removing and replacing the grinder: 步骤 6 中的图像 1,2 Removing and replacing the grinder: 步骤 6 中的图像 2,2
    • Remove the 3 screws attaching the grinding mill attachment to the grinder with the Torx T10 screwdriver.

  5. Removing and replacing the grinder: 步骤 7 中的图像 1,1
    • Make sure not to rip any cables in this step.

    • Carefully lift up the grinder.

    • Disconnect the first connector (black cable) from the plug-in connector attached to the bottom of the grinder.

    • After you have removed the plug, you can carefully set down the grinder. For the next step you will need both hands.

    • Separate the second (white) cable attached to the grinder from the housing of the plug-in connector.

    • Carefully press on the housing of the plug-in connector.

    • Remove the grinder to clean or replace it.

    • Avoid putting the grinder down completely in this step, but hold it in your hand.

    • Reinstall the new or repaired grinder into the coffee machine.

    • Reconnect the grinder to the connectors. Make sure to place the connectors in the correct place.

  6. Removing and replacing the grinder: 步骤 12 中的图像 1,1
    • Now set the grinder back into its correct position

  7. Removing and replacing the grinder: 步骤 13 中的图像 1,2 Removing and replacing the grinder: 步骤 13 中的图像 2,2
    • Reattach the 3 screws for grinding mill by fastening them to the inserted grinder with the Torx T10 screwdriver.

  8. Removing and replacing the grinder: 步骤 14 中的图像 1,1
    • Reinsert the pinion.

    • Make sure that the marking aligns with the center of the grinder, as the pinion is used to adjust the grinding degree and hence the strength of the coffee.

    • Reinsert the bean container into the coffee machine.

  9. Removing and replacing the grinder: 步骤 16 中的图像 1,2 Removing and replacing the grinder: 步骤 16 中的图像 2,2
    • Fasten the two screws we remove from the bean container earlier with the Torx T10 screwdriver.

    • Reinsert the axle for grinding degree adjustment.

    • Use pliers to reseat the safety washer.

结论

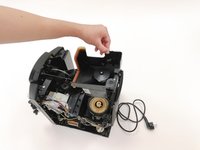
Need help closing the case of your Jura Impressa F50 coffee grinder? Check out the instructions "Close machine housing".

3等其他人完成本指南。

由衷感谢以下译者:

de en

100%

这些译者帮助我们修补全世界! 您也想加入吗?
开始翻译 ›

Natalie

于05/08/19注册

738 声望

创作了4篇指南

团队

KMM 2019SS KMM 2019SS 的会员

Community

11 名成员

创作了8篇指南

一条评论

I’ve got a similar Impressa machine to this one (the outside is visually identical). While removing the grinder, the ferrite inductor that is on the black wiring going into the grinder broke. Does anyone know what the rating/specs are of this inductor so I can splice in a replacement? The other similar inductor in the machine is unmarked and offers no hint as to what it’s ratings are. It’s been weeks since I broke the piece and I’m having a lot of trouble figuring this out.

Michael Zubi - 回复

添加评论

浏览统计数据:

过去 24 小时: 12

过去 7 天: 64

过去 30 天: 224

总计 9,507