跳转到主内容

当前版本的文档还未经巡查,您可以查看最新的已查核版本

你所需要的

  1. 这个步骤还没有翻译 帮忙翻译一下

    : 步骤 1 中的图像 1,3 : 步骤 1 中的图像 2,3 : 步骤 1 中的图像 3,3
    在这个步骤中使用的工具:
    Safety Glasses
    $3.19
    购买
    • If your display glass is cracked, keep further breakage contained and prevent bodily harm during your repair by taping the glass.

    • Lay overlapping strips of clear packing tape over the iPad's display until the whole face is covered. For particularly bad breaks, you may need to lay down two layers.

    • This will keep glass shards contained and provide structural integrity when prying and lifting the display.

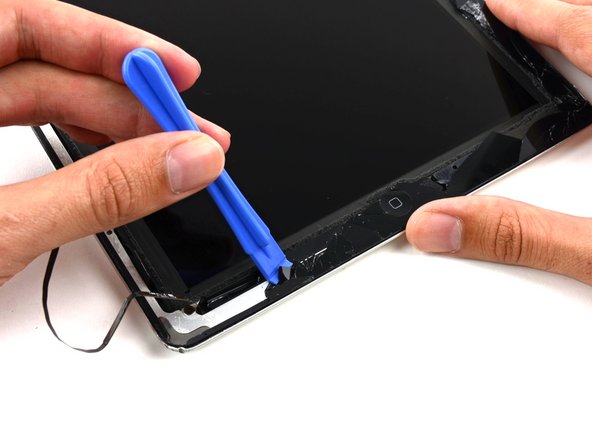
    • Do your best to follow the rest of the guide as described. However, once the glass is broken, it will likely continue to crack as you work, and you may need to use a metal prying tool to scoop the glass out.

    • Protect your eyes! This procedure will cause small pieces of glass to fly directly toward your face. Do not attempt without safety glasses.

  2. , 加热iOpener: 步骤 2 中的图像 1,2 , 加热iOpener: 步骤 2 中的图像 2,2
    • 在操作前我们推荐你清空微波炉,在底部的任何讨厌的食物残渣最终都可能粘在iOpener上。

    • 将iOpener放在微波炉中央 。

    • 对于旋转式微波炉:确保盘子可以自由旋转。如果转盘卡住了,iOpener可能会过热并燃烧

  3. : 步骤 3 中的图像 1,1
    • 加热iOpener三十秒

    • 在整个维修过程中,如果iOpener 冷却了,在微波炉中每次重新加热额外的三十秒。

    • 注意在维修过程中不要过度加热iOpener,过热可能会导致iOpener爆炸。

    • 如果iOpener过热膨胀,千万不要触碰iOpener。

    • 如果iOpener中间部分依然烫的没法碰,请等待冷却后再使用,加热好的iOpener 应该可以保持热度十分钟

  4. : 步骤 4 中的图像 1,1
    • 把iOpener从微波炉中拿出来,捏着两边扁平边缘中的一个以避免碰到中心热的部分。

    • iOpener会非常烫,所以拿着它的时候千万要小心。必要的时候可以使用烤箱手套。

  5. , 加热iOpener的替代方案: 步骤 5 中的图像 1,2 , 加热iOpener的替代方案: 步骤 5 中的图像 2,2
    • 如果你没有微波炉,请按照此步骤在沸水中加热iOpener。

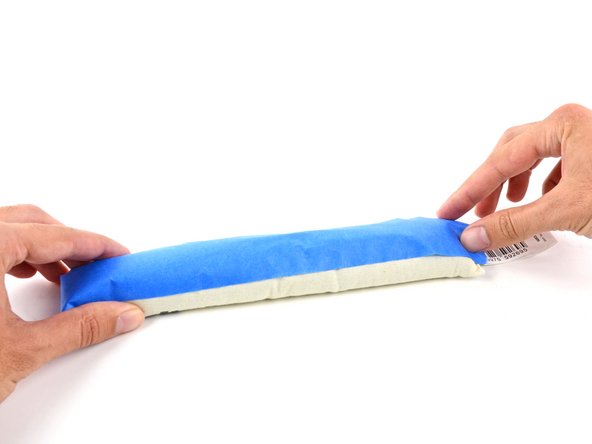
    • 在锅或平底锅里装满足够的水来完全淹没iOpener。

    • 把水加热到沸腾。关火。

    • 将iOpener放入热水中2-3分钟。确保iOpener完全浸入水中。

    • 用钳子从热水中提取加热的iOpener。

    • 用毛巾彻底擦干iOpener。

    • iOpener会很燙,所以拿取時請小心的從iOpener的邊邊拿

    • 你的iOpener已准备好使用!如果你需要重新加热iOpener,请将水加热到沸点,关火,并将iOpener放入水中2-3分钟。

  6. 这个步骤还没有翻译 帮忙翻译一下

    : 步骤 6 中的图像 1,1
    • Use your hot iOpener to heat up all four edges of the front panel. Let the iOpener rest on each edge for at least 90 seconds, microwaving for 30 seconds at a time as needed.

    • Take your time and ensure the entire bezel is warm. The more time you spend on this, the less time you'll spend picking out glass shards in the next steps.

    • Once all of the adhesive is warmed, pick out the edge with the largest uncracked section of glass.

    • Try using a suction up to pull up on this section, and then wedge a guitar pick beneath the glass.

    • If the glass is too badly cracked for the suction cup to grab, apply more heat and force the pick in, careful not to damage the LCD.

  7. 这个步骤还没有翻译 帮忙翻译一下

    : 步骤 7 中的图像 1,2 : 步骤 7 中的图像 2,2
    • Work your way around the entire perimeter of the front panel with an opening pick.

    • Much of the glass around the bezel will break off from the rest of the panel, and will stay adhered to the rear case of the iPad. Work your way past these pieces to free as much of the glass panel as possible.

    • When you get to the digitizer and (on iPad 4) home button cables, you may find it helpful to cut these cables, rather than risk ripping them out of their sockets and damaging the logic board.

    • Remove the taped-together glass panel from the iPad. Be careful as this will have sharp edges and may drop pieces of glass. Dispose of safely.

  8. 这个步骤还没有翻译 帮忙翻译一下

    : 步骤 8 中的图像 1,3 : 步骤 8 中的图像 2,3 : 步骤 8 中的图像 3,3
    • For the next step, you'll need to apply your iOpener directly to the broken glass left adhered to the iPad.

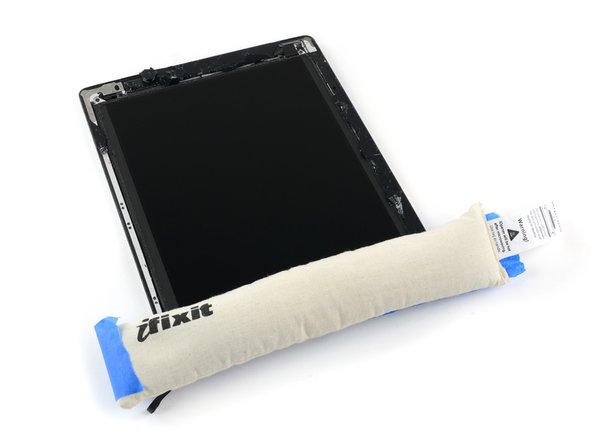
    • To protect your iOpener from the glass and keep it from filling with glass dust, stick some masking tape to one side.

    • Heat the iOpener and apply it to one edge of the iPad, directly on top of the pieces of glass that are still adhered to the rear case of the iPad.

    • Leave the iOpener there for at least 90 seconds, to soften the adhesive holding these small pieces in place.

    • Be careful not to touch or otherwise disturb the LCD.

  9. 这个步骤还没有翻译 帮忙翻译一下

    : 步骤 9 中的图像 1,2 : 步骤 9 中的图像 2,2
    • Did you take off your safety glasses? If so, put them back on now. Seriously.

    • Grab your favorite plastic tool and start prying out the remaining pieces of glass from the iPad frame.

    • This is a slow and tedious process, but benefits greatly from heating the adhesive.

    • There is a serious risk of cutting yourself while working with this glass. Work slowly and with controlled force. You may wish to wear thin leather gloves.

    • Remove all of the glass and residual adhesive and continue your repair.

终点

17等其他人完成本指南。

团队

iFixit iFixit 的会员

Staff

136 名成员

创作了17,298篇指南

一条评论

During step 9, if you can manage to grab an end of the adhesive going under glass, see if you can slowly pull it out and to the side of the frame. If the strip doesn’t break too much, this should greatly reduce shard spread and increase speed!

Zachary Pontius - 回复

添加评论

浏览统计数据:

过去 24 小时: 1

过去 7 天: 10

过去 30 天: 71

总计 11,785