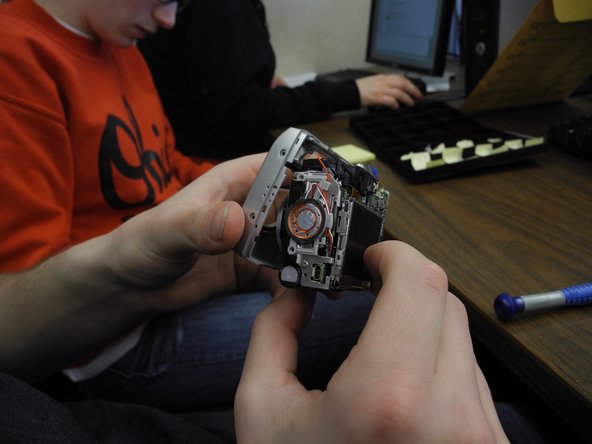
跳转到主内容

Remove the Screen

你所需要的

  1. Remove the Screen, Remove Screws: 步骤 1 中的图像 1,3 Remove the Screen, Remove Screws: 步骤 1 中的图像 2,3 Remove the Screen, Remove Screws: 步骤 1 中的图像 3,3
    • Remove the screws from the bottom, right, and left side of camera.

  2. Remove the Screen, Remove back: 步骤 2 中的图像 1,1
    • Remove the back of the camera, this may require force.

  3. Remove the Screen, Remove Metal Bracket: 步骤 3 中的图像 1,1
    • Unscrew the right metal bracket of the viewing lens

  4. Remove the Screen, Remove front of camera: 步骤 4 中的图像 1,1
    • Unscrew the top right corner screw

  5. Remove the Screen: 步骤 5 中的图像 1,1
    • Unscrew the bottom right corner screw.

  6. Remove the Screen: 步骤 6 中的图像 1,2 Remove the Screen: 步骤 6 中的图像 2,2
    • Pull the grey circular facet that sits on the bottom outside of the camera off - may have to use force.

  7. Remove the Screen: 步骤 7 中的图像 1,2 Remove the Screen: 步骤 7 中的图像 2,2
    • Pull the front of the camera off of the mother board.

  8. Remove the Screen, Remove the Screen: 步骤 8 中的图像 1,1
    • Unhinge the outer case of the screen from the back of the camera. The screen should still be hanging by wires.

  9. Remove the Screen: 步骤 9 中的图像 1,1
    • Remove outer case/rim of screen from the back of the camera. The screen should still be hanging by the red wire and white wire.

  10. Remove the Screen: 步骤 10 中的图像 1,1
    • Pull out the red wire and white wire attaching the screen to the motherboard.

  11. Remove the Screen: 步骤 11 中的图像 1,1
    • Flip up black lever holding data cable to motherboard, and remove data cable from motherboard.

结论

To reassemble your device, follow these instructions in reverse order.

另外一个人完成了本指南。

Melissa

于02/12/13注册

240 声望

创作了2篇指南

团队

Ohio State, Team 1-2, Buehl Spring 2013 Ohio State, Team 1-2, Buehl Spring 2013 的会员

OSU-BUEHL-S13S1G2

2 名成员

创作了7篇指南

0条评论

添加评论

浏览统计数据:

过去 24 小时: 0

过去 7 天: 2

过去 30 天: 7

总计 368