跳转到主内容

Reflowing solder joints on a TEAC GSA-5300 stereo integrated amplifier

你所需要的

  1. Reflowing solder joints on a TEAC GSA-5300 stereo integrated amplifier, Reflowing solder joints on a TEAC GSA-5300 stereo integrated amplifier: 步骤 1 中的图像 1,2 Reflowing solder joints on a TEAC GSA-5300 stereo integrated amplifier, Reflowing solder joints on a TEAC GSA-5300 stereo integrated amplifier: 步骤 1 中的图像 2,2
    • I used 1000v insulated electricians screwdrivers, as I like to be safe when working on electronics that have a higher risk of zapping me.

    • Amplifiers can have a high current stored in the large internal capacitors. Even with the insulated screwdrivers, please be sensible and ensure the amplifier is unplugged and try to leave it without power for a day or so. Also, read up on working with capacitors before you start work.

  2. Reflowing solder joints on a TEAC GSA-5300 stereo integrated amplifier: 步骤 2 中的图像 1,1
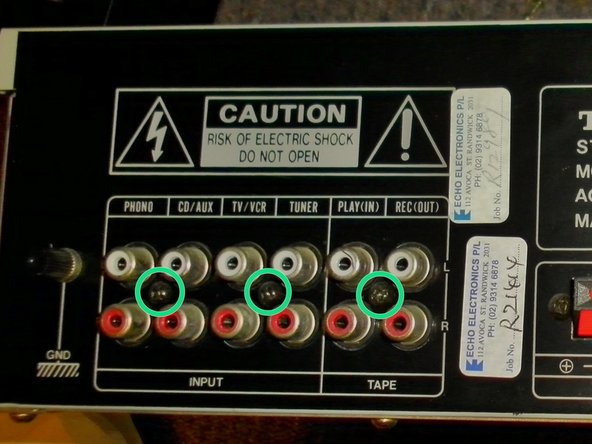
    • Turn the amplifier over onto its side and you will find two Phillips #2 screws holding the main black casing on, on each side of the amplifier. Remove them using the Phillips #2 screwdriver.

  3. Reflowing solder joints on a TEAC GSA-5300 stereo integrated amplifier: 步骤 3 中的图像 1,3 Reflowing solder joints on a TEAC GSA-5300 stereo integrated amplifier: 步骤 3 中的图像 2,3 Reflowing solder joints on a TEAC GSA-5300 stereo integrated amplifier: 步骤 3 中的图像 3,3
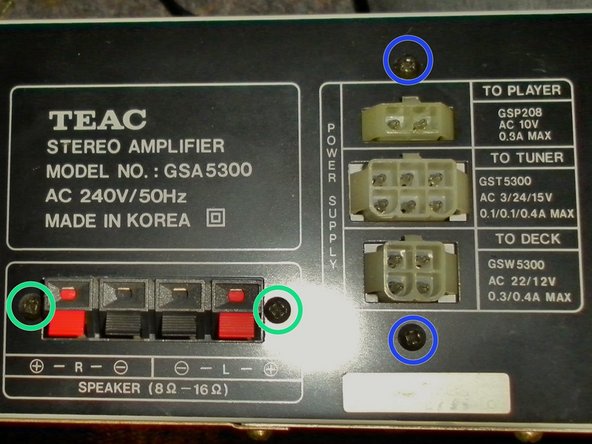
    • Once the main casing is removed, you'll need to remove the back panel. Keep the amplifier on its side and remove the two, Phillips #1 screws holding it on, on both sides of the amplifier.

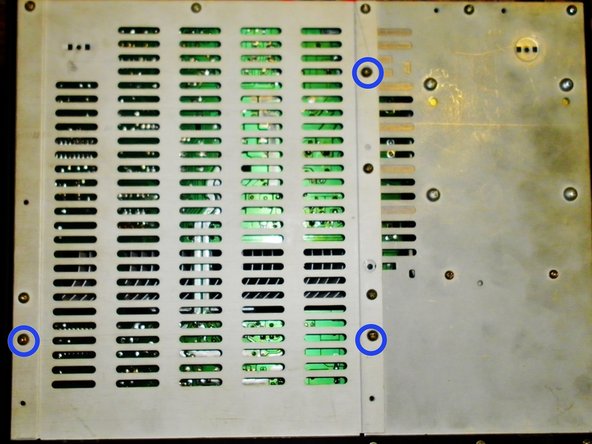
    • You'll also need to turn the amplifier over, and remove 5 additional, Phillips #1 screws from the back of the amplifier.

    • Leave these screws in, as they aren't required to be removed, in order to take the back panel off.

  4. Reflowing solder joints on a TEAC GSA-5300 stereo integrated amplifier: 步骤 4 中的图像 1,3 Reflowing solder joints on a TEAC GSA-5300 stereo integrated amplifier: 步骤 4 中的图像 2,3 Reflowing solder joints on a TEAC GSA-5300 stereo integrated amplifier: 步骤 4 中的图像 3,3
    • Now, to completely remove the back panel and the left hand back service panel, you'll need to remove 5 Phillips #1 screws.

    • To remove the service panel, you need to remove a further 3, Phillips #1 screws. once you have done this, you can remove the back panel and the service panel.

    • Leave these three screw in as the service panel has larges holes for these three screws and undoing them, undoes the circuit boards stand offs.

  5. Reflowing solder joints on a TEAC GSA-5300 stereo integrated amplifier: 步骤 5 中的图像 1,1
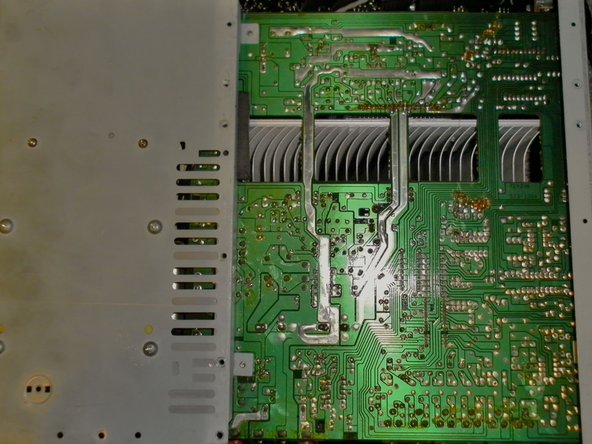
    • Now to get down to the reflowing. Put the tip of the soldering iron, onto each of the solder joins. When they melt (Aprox. 10 seconds using a 30 Watt soldering iron), add a little extra solder to the molten solder pool.

    • Once you have reflowed the solder joins, reassemble the amplifier and connect the speakers etc, to test if it has worked.

    • Don't hold the soldering iron on the circuit broad as you can damage it and the terminal block.

结论

To reassemble your device, follow these instructions in reverse order.

8等其他人完成本指南。

james

于11/29/13注册

2,213 声望

创作了2篇指南

团队

Master Techs Master Techs 的会员

Community

322 名成员

创作了2,535篇指南

0条评论

添加评论

浏览统计数据:

过去 24 小时: 0

过去 7 天: 6

过去 30 天: 24

总计 2,723