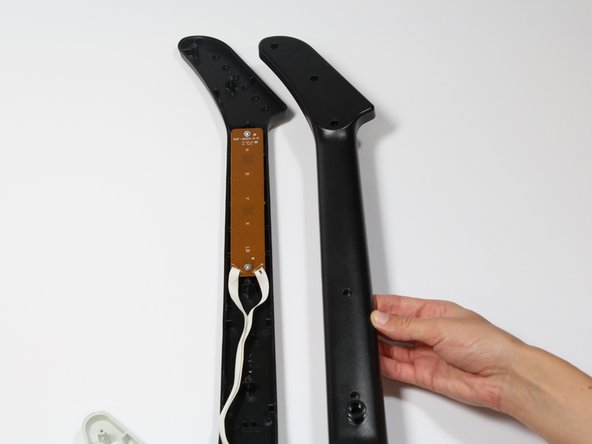
跳转到主内容

RedOctane X-Plorer Auxiliary Port Replacement

你所需要的

  1. RedOctane X-Plorer Auxiliary Port Replacement, Rear Case: 步骤 1 中的图像 1,2 RedOctane X-Plorer Auxiliary Port Replacement, Rear Case: 步骤 1 中的图像 2,2
    • Remove the strap by pulling it off of the mounts located on the body and neck.

  2. RedOctane X-Plorer Auxiliary Port Replacement: 步骤 2 中的图像 1,3 RedOctane X-Plorer Auxiliary Port Replacement: 步骤 2 中的图像 2,3 RedOctane X-Plorer Auxiliary Port Replacement: 步骤 2 中的图像 3,3
    • Remove the nine 12mm Phillips #1 screws around the perimeter of the case with a screwdriver.

    • Remove the two 15mm Phillips #1 screws connecting the body panel to the neck panel with a screwdriver.

    • These screws can also be Torx on some models.

    • Pull off the rear case.

  3. RedOctane X-Plorer Auxiliary Port Replacement: 步骤 3 中的图像 1,3 RedOctane X-Plorer Auxiliary Port Replacement: 步骤 3 中的图像 2,3 RedOctane X-Plorer Auxiliary Port Replacement: 步骤 3 中的图像 3,3
    • Remove the five 12mm Phillips #1 screws along the neck with a screwdriver.

    • Pull off the top shell of the neck to expose the internal features.

  4. RedOctane X-Plorer Auxiliary Port Replacement, Auxiliary Port: 步骤 4 中的图像 1,3 RedOctane X-Plorer Auxiliary Port Replacement, Auxiliary Port: 步骤 4 中的图像 2,3 RedOctane X-Plorer Auxiliary Port Replacement, Auxiliary Port: 步骤 4 中的图像 3,3
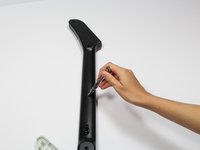
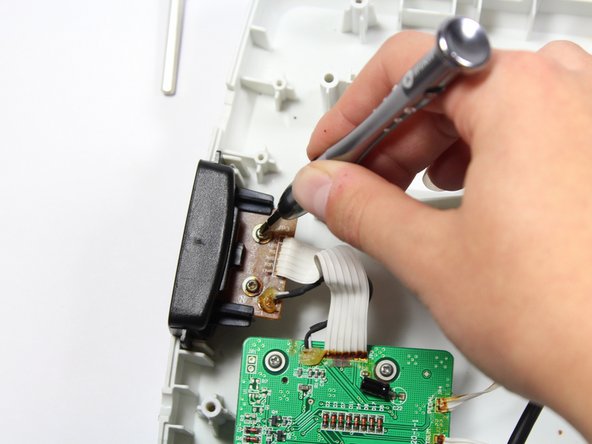
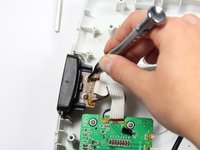
    • Remove the two 10mm Phillips #1 screws from the auxiliary port board using a screwdriver.

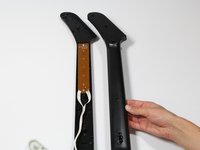
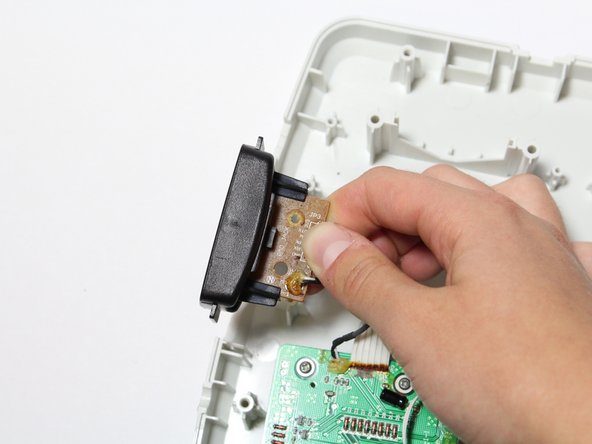
    • Gently lift up on the auxiliary port to remove it from the case.

结论

To reassemble your device, follow these instructions in reverse order.

Riley

于04/18/18注册

649 声望

创作了7篇指南

团队

Cal Poly, Team S17-G1, Livingston Spring 2018 Cal Poly, Team S17-G1, Livingston Spring 2018 的会员

CPSU-LIVINGSTON-S18S17G1

3 名成员

创作了9篇指南

一条评论

What does the neck have to do with this? You mention it in the intro and step 3, but I don’t get why you’d need to open up the neck at all for this repair.

Tuesday - 回复

添加评论

浏览统计数据:

过去 24 小时: 0

过去 7 天: 1

过去 30 天: 11

总计 1,147