跳转到主内容

RCA ViSYS 25424RE1 Keypad Replacement

你所需要的

  1. RCA ViSYS 25424RE1 Keypad Replacement, Base: 步骤 1 中的图像 1,3 RCA ViSYS 25424RE1 Keypad Replacement, Base: 步骤 1 中的图像 2,3 RCA ViSYS 25424RE1 Keypad Replacement, Base: 步骤 1 中的图像 3,3
    • Remove the eight 11mm screws found on the bottom side of the base with a Phillips #00 screwdriver.

  2. RCA ViSYS 25424RE1 Keypad Replacement: 步骤 2 中的图像 1,3 RCA ViSYS 25424RE1 Keypad Replacement: 步骤 2 中的图像 2,3 RCA ViSYS 25424RE1 Keypad Replacement: 步骤 2 中的图像 3,3
    • Use a plastic opening tool to separate the back and front pieces.

    • Gently remove the back cover, because the wires are connected to each piece.

  3. RCA ViSYS 25424RE1 Keypad Replacement: 步骤 3 中的图像 1,3 RCA ViSYS 25424RE1 Keypad Replacement: 步骤 3 中的图像 2,3 RCA ViSYS 25424RE1 Keypad Replacement: 步骤 3 中的图像 3,3
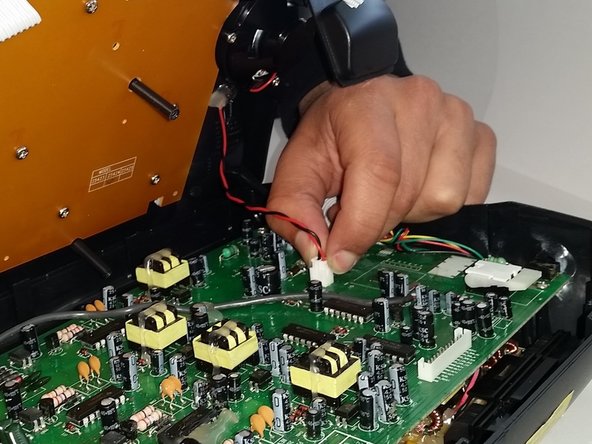
    • Unclip the wires that connect the front piece to the circuit board on the back piece.

  4. RCA ViSYS 25424RE1 Keypad Replacement, Keypad: 步骤 4 中的图像 1,2 RCA ViSYS 25424RE1 Keypad Replacement, Keypad: 步骤 4 中的图像 2,2
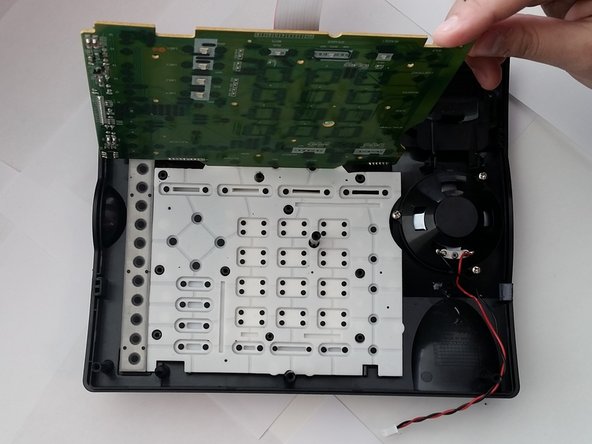
    • Remove the nine 11mm screws from the board using a Phillips #00 screwdriver, in order to expose the keyboard pressure sensors.

  5. RCA ViSYS 25424RE1 Keypad Replacement: 步骤 5 中的图像 1,3 RCA ViSYS 25424RE1 Keypad Replacement: 步骤 5 中的图像 2,3 RCA ViSYS 25424RE1 Keypad Replacement: 步骤 5 中的图像 3,3
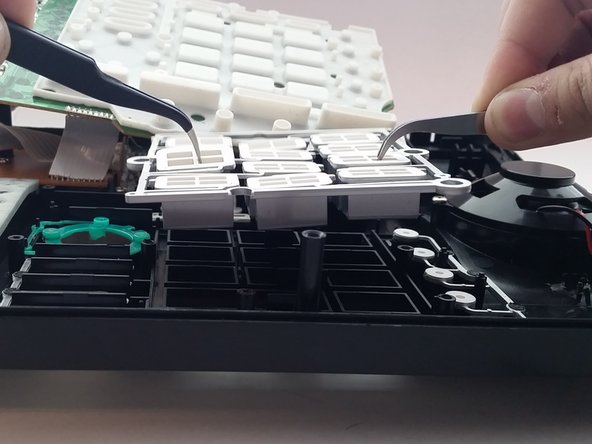
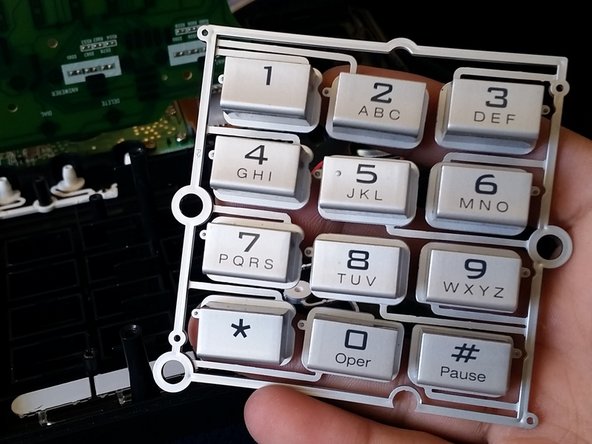
    • Lift the rubber keypad.

    • Use a pair of tweezers to lift the number pad from both ends at the same time.

结论

To reassemble your device, follow these instructions in reverse order.

Munija Ramin

于02/18/15注册

143 声望

撰写一个指南

团队

Penn State, Team 1-17, Kaschak Winter 2015 Penn State, Team 1-17, Kaschak Winter 2015 的会员

PSU-KASCHAK-W15S1G17

4 名成员

创作了6篇指南

0条评论

添加评论

浏览统计数据:

过去 24 小时: 2

过去 7 天: 2

过去 30 天: 2

总计 282