跳转到主内容

PowerShot G7 X Mark II Front Cover Replacement

你所需要的

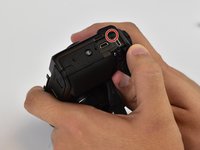
  1. PowerShot G7 X Mark II Front Cover Replacement, Top Cover Button Panel: 步骤 1 中的图像 1,2 PowerShot G7 X Mark II Front Cover Replacement, Top Cover Button Panel: 步骤 1 中的图像 2,2
    • Use a Phillips #000 screwdriver to remove four 4mm screws from the NFC panel cover on the bottom of the camera.

  2. PowerShot G7 X Mark II Front Cover Replacement: 步骤 2 中的图像 1,2 PowerShot G7 X Mark II Front Cover Replacement: 步骤 2 中的图像 2,2
    • Use a Phillips #000 screwdriver to remove five screws from under the LCD screen:

    • Three 2.4 mm screws

    • Two 3 mm screws

  3. PowerShot G7 X Mark II Front Cover Replacement: 步骤 3 中的图像 1,1
    • Use a Phillips #000 screwdriver to remove one 3mm screw on the left of the camera.

  4. PowerShot G7 X Mark II Front Cover Replacement: 步骤 4 中的图像 1,2 PowerShot G7 X Mark II Front Cover Replacement: 步骤 4 中的图像 2,2
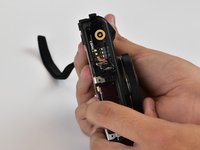
    • Use a Phillips #000 screwdriver to remove one 3mm and one 4mm screw on the surface of the right face of the camera, and one under the USB/HDMI cover.

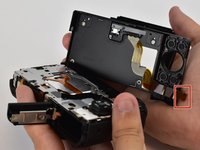
  5. PowerShot G7 X Mark II Front Cover Replacement: 步骤 5 中的图像 1,2 PowerShot G7 X Mark II Front Cover Replacement: 步骤 5 中的图像 2,2
    • Carefully remove the back cover off of the camera by hand, minding the ribbon cable attached to the camera body. If the cover does not detach, use a spudger to pry it off.

    • Use the spudger tool to open the ZIF connector attaching the ribbon cable to the camera body.

  6. PowerShot G7 X Mark II Front Cover Replacement: 步骤 6 中的图像 1,2 PowerShot G7 X Mark II Front Cover Replacement: 步骤 6 中的图像 2,2
    • Use a Phillips #000 screwdriver to remove two 3mm screws on the pop-up flash.

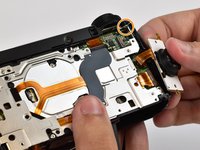
  7. PowerShot G7 X Mark II Front Cover Replacement: 步骤 7 中的图像 1,2 PowerShot G7 X Mark II Front Cover Replacement: 步骤 7 中的图像 2,2
    • Use a Phillips #000 screwdriver to remove two 2mm screws attaching the button panel to the camera body.

    • Use a Phillips #000 screwdriver to remove a 3mm screw from beneath the mode dial.

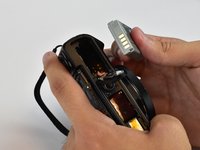
  8. PowerShot G7 X Mark II Front Cover Replacement: 步骤 8 中的图像 1,3 PowerShot G7 X Mark II Front Cover Replacement: 步骤 8 中的图像 2,3 PowerShot G7 X Mark II Front Cover Replacement: 步骤 8 中的图像 3,3
    • Open the battery compartment and remove the battery by flipping the small latch holding it in.

    • Use a Phillips #000 screwdriver to remove one 6mm screw in the bottom of the battery compartment.

  9. PowerShot G7 X Mark II Front Cover Replacement: 步骤 9 中的图像 1,2 PowerShot G7 X Mark II Front Cover Replacement: 步骤 9 中的图像 2,2
    • Pry the top cover button assembly off of the camera body by detaching clips around the base of it.

  10. PowerShot G7 X Mark II Front Cover Replacement, Front Cover: 步骤 10 中的图像 1,1
    • Use a Phillips #000 screwdriver to remove two 3mm screws on the left and one 5mm screw on the right from the front panel.

  11. PowerShot G7 X Mark II Front Cover Replacement: 步骤 11 中的图像 1,1
    • Remove the USB/HDMI panel from the right side of the camera.

  12. PowerShot G7 X Mark II Front Cover Replacement: 步骤 12 中的图像 1,1
    • Separate the front cover and focus ring assembly from the front of the camera. Use a plastic spudger to detach the ZIF connector holding the ribbon cable connected to the focus assembly.

结论

To reassemble your device, follow these instructions in reverse order.

2等其他人完成本指南。

Brandon

于02/15/17注册

602 声望

创作了4篇指南

团队

USF Tampa, Team 12-3, Eyestone Spring 2017 USF Tampa, Team 12-3, Eyestone Spring 2017 的会员

USFT-EYESTONE-S17S12G3

3 名成员

创作了4篇指南

一条评论

thank you so much for the guide!! extremely helpful, clear pictures, and easy to understand instructions.

victoria - 回复

添加评论

浏览统计数据:

过去 24 小时: 1

过去 7 天: 12

过去 30 天: 32

总计 3,849