跳转到主内容

PowerA Enhanced1516953-01 Vibration Motors Replacement

你所需要的

  1. PowerA Enhanced1516953-01 Vibration Motors Replacement, Rear Case: 步骤 1 中的图像 1,3 PowerA Enhanced1516953-01 Vibration Motors Replacement, Rear Case: 步骤 1 中的图像 2,3 PowerA Enhanced1516953-01 Vibration Motors Replacement, Rear Case: 步骤 1 中的图像 3,3
    • Lay the controller face down.

    • Use a Phillips screwdriver to remove the eight 9.2 mm screws that secure the rear case.

    • Lift the rear case up and off of the chassis.

  2. PowerA Enhanced1516953-01 Vibration Motors Replacement, Motherboard: 步骤 2 中的图像 1,3 PowerA Enhanced1516953-01 Vibration Motors Replacement, Motherboard: 步骤 2 中的图像 2,3 PowerA Enhanced1516953-01 Vibration Motors Replacement, Motherboard: 步骤 2 中的图像 3,3
    • Remove the two 3.3 mm Phillips screws that secure the motherboard to the front case.

    • Lift the motherboard up and out of the chassis.

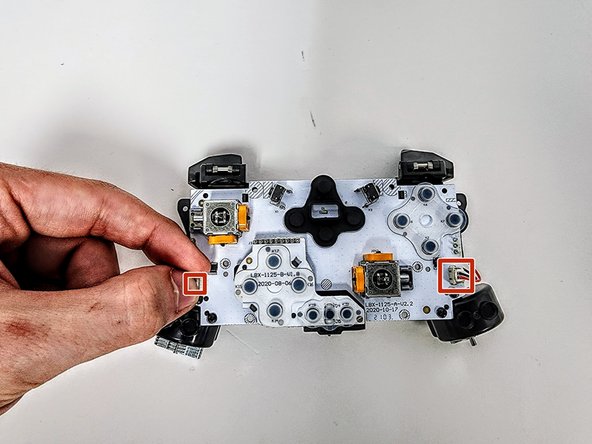
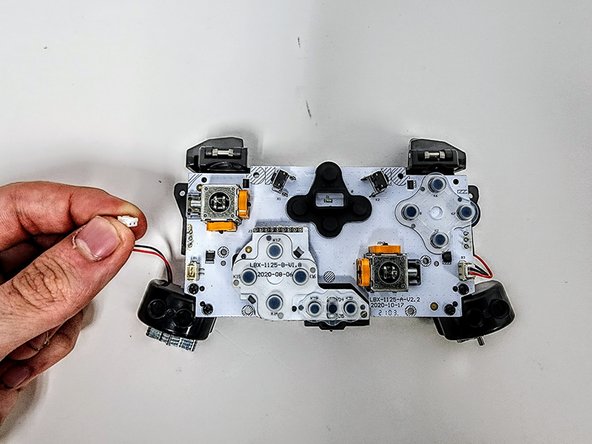
  3. PowerA Enhanced1516953-01 Vibration Motors Replacement, Vibration Motors: 步骤 3 中的图像 1,3 PowerA Enhanced1516953-01 Vibration Motors Replacement, Vibration Motors: 步骤 3 中的图像 2,3 PowerA Enhanced1516953-01 Vibration Motors Replacement, Vibration Motors: 步骤 3 中的图像 3,3
    • Grip the white vibration motor connectors and pull them straight up and out of their sockets.

    • Do not pull on the wires.

    • Gently pull the connector from the pins

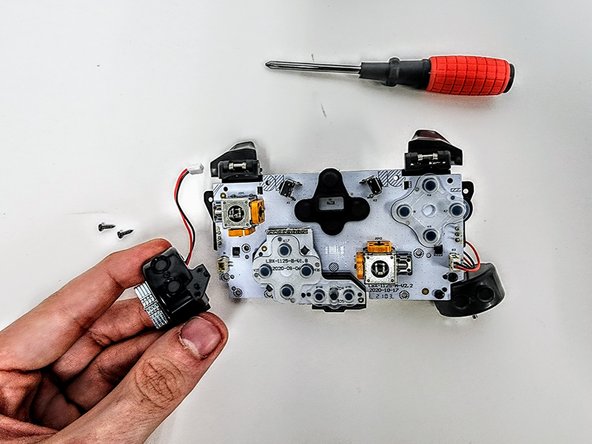
  4. PowerA Enhanced1516953-01 Vibration Motors Replacement: 步骤 4 中的图像 1,2 PowerA Enhanced1516953-01 Vibration Motors Replacement: 步骤 4 中的图像 2,2
    • Remove the four 3.3 mm Phillips screws that secure the motors.

    • Two screws secure each motor.

    • Once the second screw is removed on each motor, the vibration motor will immediately release itself. Support the motor while you remove the second screw.

结论

To reassemble your device, follow these instructions in reverse order.

Austin Fox

于01/30/24注册

566 声望

创作了5篇指南

0条评论

添加评论

浏览统计数据:

过去 24 小时: 0

过去 7 天: 2

过去 30 天: 25

总计 33