跳转到主内容

Porsche 997.1 PCM 2.1 Screen Replacement

你所需要的

  1. Porsche 997.1 PCM 2.1 Screen Replacement, Starting out: 步骤 1 中的图像 1,1
    • This guide only shows the steps to change the screen once the PCM has been removed from the car. There are lots of great You Tube videos that cover the removal process.

  2. Porsche 997.1 PCM 2.1 Screen Replacement, Remove the two access screws: 步骤 2 中的图像 1,1
    • As the top of the unit says: the PCM should not be opened. Remove the two Torx T9 machine screws

  3. Porsche 997.1 PCM 2.1 Screen Replacement, Splitting the PCM top from the bottom: 步骤 3 中的图像 1,2 Porsche 997.1 PCM 2.1 Screen Replacement, Splitting the PCM top from the bottom: 步骤 3 中的图像 2,2
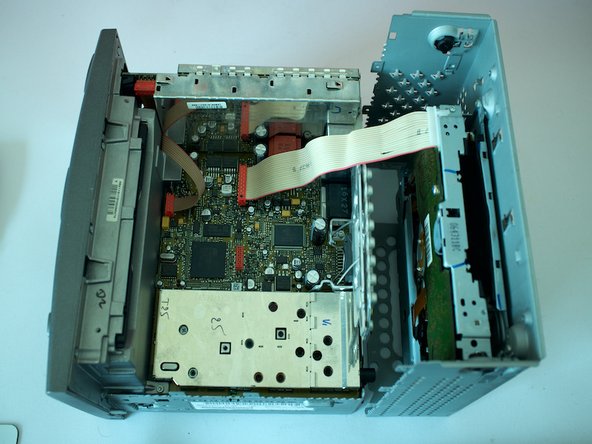
    • Carefully split the PCM case in half. There are several interlocking tabs, but essentially open from the front to the back like an oyster shell. The top half can be set behind the unit as shown in the second photo.

    • Do not use excessive force, the CD unit is in the top half and joined to the motherboard via a PC cable.

  4. Porsche 997.1 PCM 2.1 Screen Replacement, Separating the CD unit from the main chassis: 步骤 4 中的图像 1,1
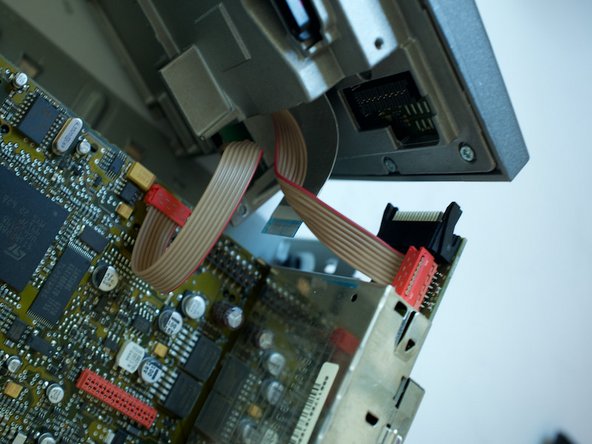
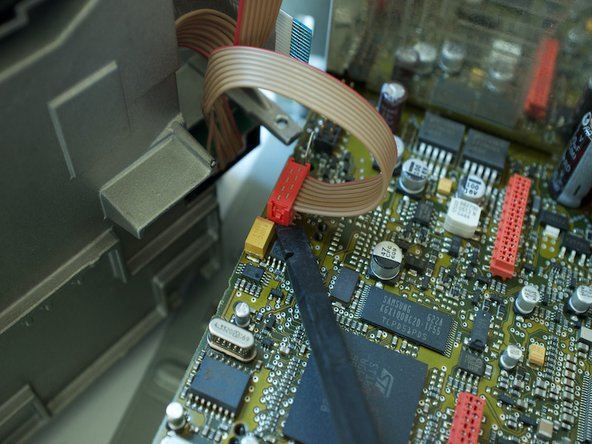
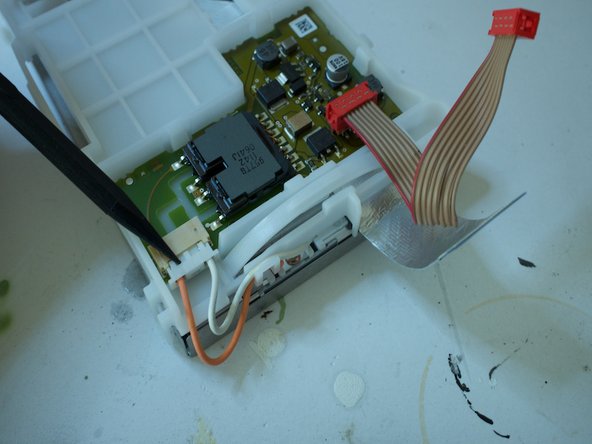
    • Use a plastic spudger to disconnect the PC ribbon cable joining the CD player to the motherboard and place the CD unit safely to one side.

  5. Porsche 997.1 PCM 2.1 Screen Replacement, Removing the torx fasteners connecting the facia with the main chassis: 步骤 5 中的图像 1,2 Porsche 997.1 PCM 2.1 Screen Replacement, Removing the torx fasteners connecting the facia with the main chassis: 步骤 5 中的图像 2,2
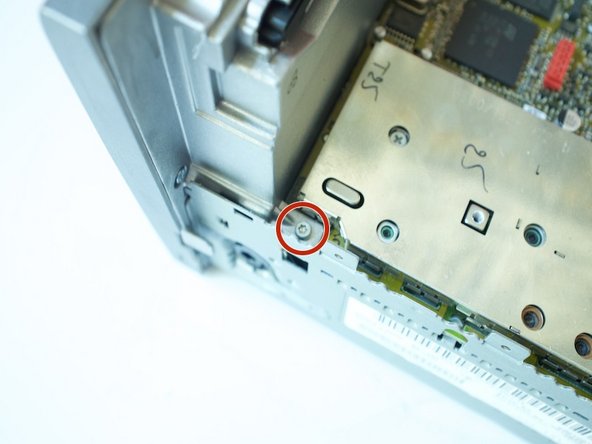
    • Remove the two Torx T9 machine screws that attach the front facia to the chassis. There is one screw either side as shown in the photos.

  6. Porsche 997.1 PCM 2.1 Screen Replacement, Disconnecting the ribbon cable: 步骤 6 中的图像 1,2 Porsche 997.1 PCM 2.1 Screen Replacement, Disconnecting the ribbon cable: 步骤 6 中的图像 2,2
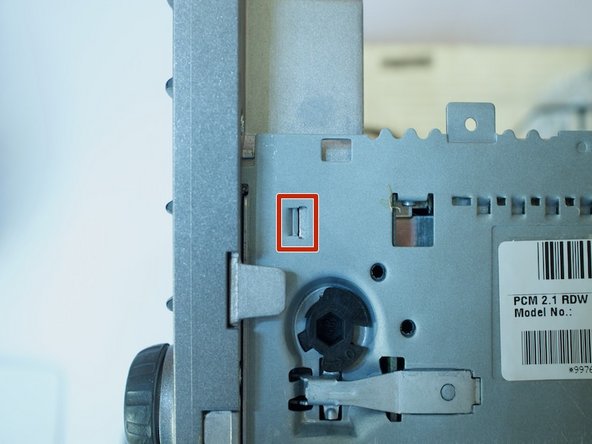
    • Open the ribbon cable lock (there is probably a proper name for it) and remove the ribbon cable on the left hand side of the unit.

  7. Porsche 997.1 PCM 2.1 Screen Replacement, Identifying the tab retainers keeping the facia connected to the chassis: 步骤 7 中的图像 1,3 Porsche 997.1 PCM 2.1 Screen Replacement, Identifying the tab retainers keeping the facia connected to the chassis: 步骤 7 中的图像 2,3 Porsche 997.1 PCM 2.1 Screen Replacement, Identifying the tab retainers keeping the facia connected to the chassis: 步骤 7 中的图像 3,3
    • This is the most difficult step in the process. Firstly, identify the four tab retainers holding the facia to the chassis. The three photos show them all.

  8. Porsche 997.1 PCM 2.1 Screen Replacement, Using a metal spludger to disconnect the retaining tabs: 步骤 8 中的图像 1,2 Porsche 997.1 PCM 2.1 Screen Replacement, Using a metal spludger to disconnect the retaining tabs: 步骤 8 中的图像 2,2
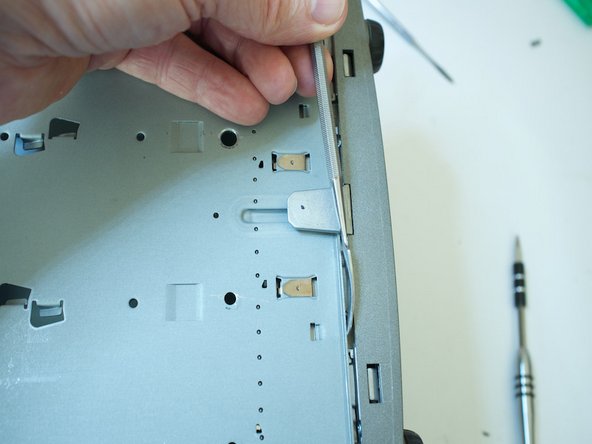
    • A curved metal spudger seemed to work well for this. Each tab had to be carefully leveraged up to disconnect them from the facia.

  9. Porsche 997.1 PCM 2.1 Screen Replacement, Prying the facia away from the chassis: 步骤 9 中的图像 1,3 Porsche 997.1 PCM 2.1 Screen Replacement, Prying the facia away from the chassis: 步骤 9 中的图像 2,3 Porsche 997.1 PCM 2.1 Screen Replacement, Prying the facia away from the chassis: 步骤 9 中的图像 3,3
    • Working around the tabs, the facia can be gently pried off the chassis. This requires patience and care.

    • When the facia has come apart from the chassis, care is required as the two are still connected with another two PC ribbon cables.

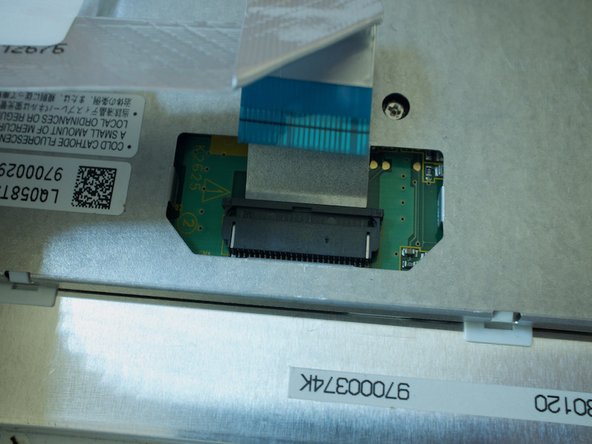
    • The third photo shows the fixed connector which needs careful realignment on reassembly.

  10. Porsche 997.1 PCM 2.1 Screen Replacement, Disconnect the PC ribbon cables joining the facia to the chassis: 步骤 10 中的图像 1,2 Porsche 997.1 PCM 2.1 Screen Replacement, Disconnect the PC ribbon cables joining the facia to the chassis: 步骤 10 中的图像 2,2
    • Use a spudger to disconnect the PC ribbon cables connecting the facia to the chassis.

  11. Porsche 997.1 PCM 2.1 Screen Replacement, Identify all the torx T9 fasteners on the facia: 步骤 11 中的图像 1,2 Porsche 997.1 PCM 2.1 Screen Replacement, Identify all the torx T9 fasteners on the facia: 步骤 11 中的图像 2,2
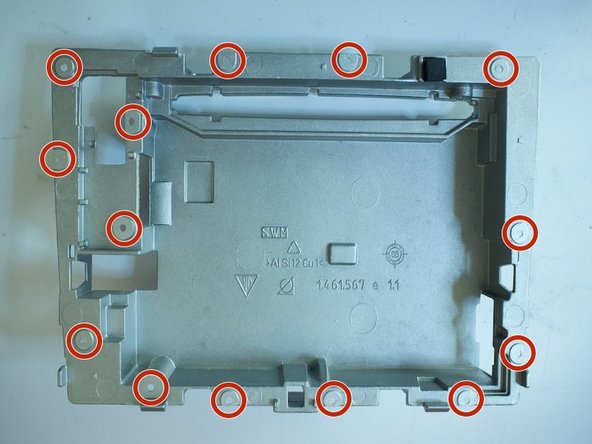
    • The two halves of the facia are connected using 14 torx T9 self tapping screws.

    • If you only find thirteen, you have missed one of the little blighters. If you only find twelve.. well see previous comment but add one to the list of missed fasteners. The back of the casting is show as it better indicate the fastener placements.

  12. Porsche 997.1 PCM 2.1 Screen Replacement, Disconnect the remaining tabs holding the facia together: 步骤 12 中的图像 1,1
    • Once all 14 torx T9 screws have been found and undone, there are two tabs remaining that need to be disconnected before the facia comes apart.

    • Once the two halves are separated, the three ribbon connectors need to be carefully threaded through the holes in the back of the facia casting.

  13. Porsche 997.1 PCM 2.1 Screen Replacement, Removing the screen carrier: 步骤 13 中的图像 1,3 Porsche 997.1 PCM 2.1 Screen Replacement, Removing the screen carrier: 步骤 13 中的图像 2,3 Porsche 997.1 PCM 2.1 Screen Replacement, Removing the screen carrier: 步骤 13 中的图像 3,3
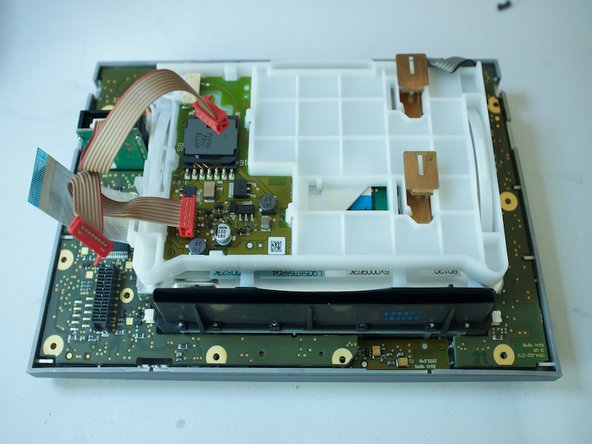
    • The first photo shows the location of the screen carrier clips. Once these are released with a spudger, the screen carrier can be released, the small grey ribbon connector can be gently pushed out the way when this is done.

  14. Porsche 997.1 PCM 2.1 Screen Replacement, Separating the screen from the screen carrier: 步骤 14 中的图像 1,3 Porsche 997.1 PCM 2.1 Screen Replacement, Separating the screen from the screen carrier: 步骤 14 中的图像 2,3 Porsche 997.1 PCM 2.1 Screen Replacement, Separating the screen from the screen carrier: 步骤 14 中的图像 3,3
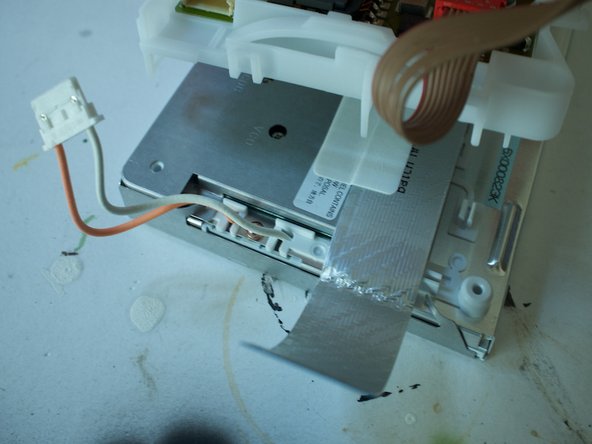
    • Use a spudger to disconnect the orange/white cable. This only reconnects one way. Unhook the orange/white cable from the screen carrier and the carrier will lift away from the screen.

  15. Porsche 997.1 PCM 2.1 Screen Replacement, Disconnect the screen ribbon cable: 步骤 15 中的图像 1,1
    • Disconnect the ribbon cable using the same technique that was done at the other end, where it connects to the motherboard.

  16. Porsche 997.1 PCM 2.1 Screen Replacement, Transfer the ribbon cable: 步骤 16 中的图像 1,1
    • Transfer the ribbon cable to the new screen.

结论

To reassemble your device, follow these instructions in reverse order.

3等其他人完成本指南。

m330cameron

于07/18/10注册

343 声望

撰写一个指南

一条评论

This guide saved me a lot of money. Follow it and don’t be scared. It’s actually a fairly easy job.

Bill Berry - 回复

添加评论

浏览统计数据:

过去 24 小时: 0

过去 7 天: 17

过去 30 天: 64

总计 2,448