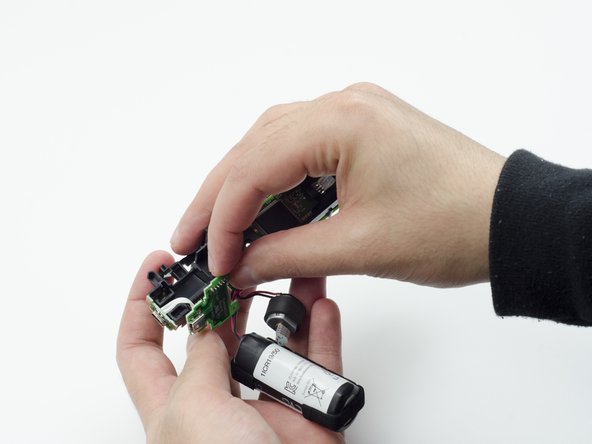
跳转到主内容

PlayStation Move Battery Replacement

你所需要的

  1. PlayStation Move Battery Replacement, Case: 步骤 1 中的图像 1,2 PlayStation Move Battery Replacement, Case: 步骤 1 中的图像 2,2
    • Turn the controller over and unscrew the four 10mm screws with a PH #00 screwdriver.

  2. PlayStation Move Battery Replacement: 步骤 2 中的图像 1,3 PlayStation Move Battery Replacement: 步骤 2 中的图像 2,3 PlayStation Move Battery Replacement: 步骤 2 中的图像 3,3
    • Pinch the sides of the back panel to remove it and set it aside.

  3. PlayStation Move Battery Replacement: 步骤 3 中的图像 1,2 PlayStation Move Battery Replacement: 步骤 3 中的图像 2,2
    • Hold the base of the controller with one hand and with the other carefully pull up on the white spherical piece to remove it.

  4. PlayStation Move Battery Replacement: 步骤 4 中的图像 1,2 PlayStation Move Battery Replacement: 步骤 4 中的图像 2,2
    • Push the Lithium Ion battery from its slot to remove it.

    • Be mindful not to damage the wires or wired components, as the battery will still be attached via its connector.

  5. PlayStation Move Battery Replacement: 步骤 5 中的图像 1,1
    • Unscrew the 9mm screw in the battery slot with a PH #00 screwdriver.

  6. PlayStation Move Battery Replacement: 步骤 6 中的图像 1,2 PlayStation Move Battery Replacement: 步骤 6 中的图像 2,2
    • Using a plastic opening tool, carefully pry the rumble motor free.

  7. PlayStation Move Battery Replacement: 步骤 7 中的图像 1,1
    • Unscrew the 9mm screw behind the rumble motor slot with a PH #00 screwdriver.

  8. PlayStation Move Battery Replacement: 步骤 8 中的图像 1,3 PlayStation Move Battery Replacement: 步骤 8 中的图像 2,3 PlayStation Move Battery Replacement: 步骤 8 中的图像 3,3
    • Carefully pinch the plastic sides of the battery slot and lift it (along with the circuit board) from the plastic shell of the move controller.

  9. PlayStation Move Battery Replacement: 步骤 9 中的图像 1,2 PlayStation Move Battery Replacement: 步骤 9 中的图像 2,2
    • Using your fingers, carefully pry the square green piece beneath the battery slot free.

    • It is attached via white ribbons which need to be kept intact.

  10. PlayStation Move Battery Replacement: 步骤 10 中的图像 1,3 PlayStation Move Battery Replacement: 步骤 10 中的图像 2,3 PlayStation Move Battery Replacement: 步骤 10 中的图像 3,3
    • Follow the white ribbon attached to the part you just removed to a smaller, more rectangular piece.

    • Lift the rectangular piece from its slot to free it.

  11. PlayStation Move Battery Replacement: 步骤 11 中的图像 1,3 PlayStation Move Battery Replacement: 步骤 11 中的图像 2,3 PlayStation Move Battery Replacement: 步骤 11 中的图像 3,3
    • Carefully lift the entire circuit board from the black plastic encasing it.

    • Take extra care not to damage any of the wired components.

  12. PlayStation Move Battery Replacement, Battery: 步骤 12 中的图像 1,2 PlayStation Move Battery Replacement, Battery: 步骤 12 中的图像 2,2
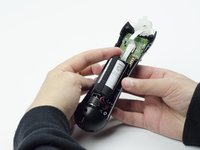
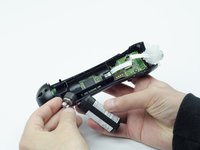
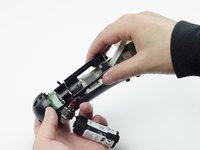
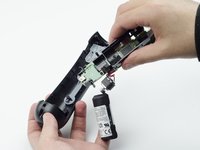
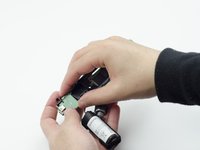
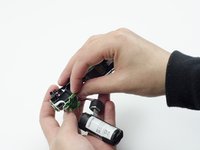
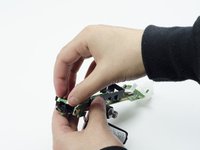
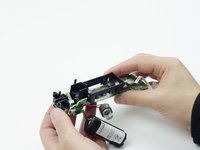
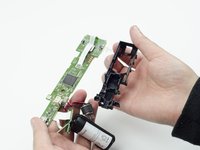
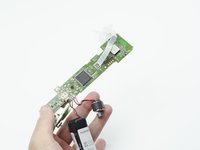
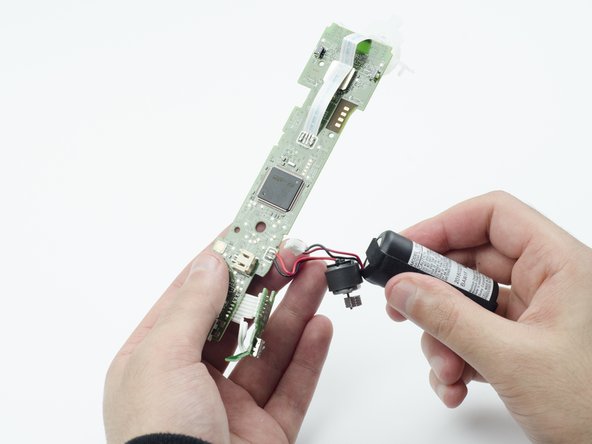
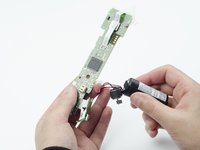
    • Using tweezers, carefully pull the power cable from its port on the circuit board.

结论

To reassemble your device, follow these instructions in reverse order.

8等其他人完成本指南。

Sarah Shand

于02/20/17注册

1,885 声望

创作了7篇指南

团队

USF Tampa, Team S3-G1, Sullivan Spring 2017 USF Tampa, Team S3-G1, Sullivan Spring 2017 的会员

USFT-SULLIVAN-S17S3G1

3 名成员

创作了13篇指南

一条评论

No need to remove the the rumble motor, if you are careful and gentle and have some good tweezers you can unplug the battery cable after step 4, but it’s safer to do all steps

Andrew S. - 回复

添加评论

浏览统计数据:

过去 24 小时: 3

过去 7 天: 44

过去 30 天: 171

总计 20,334