简介
Use this guide to remove or replace your Playstation 4 Slim’s plastic bottom cover.
你所需要的
-
-
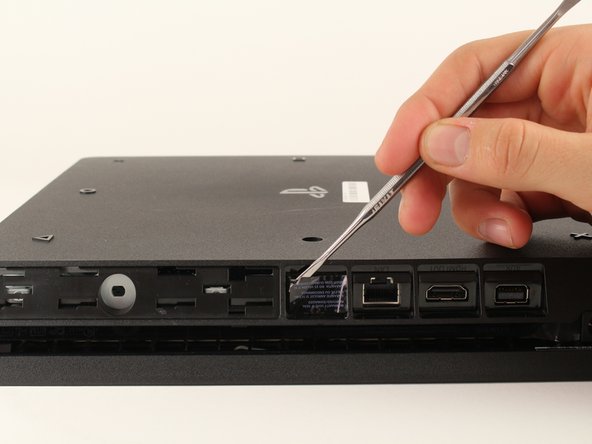
Locate the plastic warranty sticker next to the three ports on the side of the console.
-
Remove the warranty sticker by peeling it off with any kind of spudger.
-
-
-
-
Unscrew and remove the now exposed 5.0mm screw using a T8 security Torx screwdriver with a counter-clockwise motion.
T8 fits like a glove for me
Is there anything else you can use
randomweeb - 回复
A small flathead screwdriver will work
There is a small metal rod in the middle of the screw that isn’t allowing my t8 inside. Any insight on this?
Some T8 bits have a hole in the middle that will allow that rod to go through; some do not. If you have a set of multiple bits, check if there are any others labeled T8 or TR8 with that hole in the middle.
Nicholas -
There is a metal thing inside of the screw slot any insite on this?
-
-
-
Place the Playstation 4 Slim upside down with the side of the screw you just removed facing you.
-
Pry up on the two corners that are facing you with your fingers.
-
Remove the bottom cover by sliding it towards the back corners and lifting up.
It says to place it upside down, but didn't you do so in the previous step? I've been trying to unscrew the screw with my screwdriver that I got from here and if I had to had the system right side up, I'm afraid I might've stripped the screw from all the force I tried to use to get the screw out that will NOT budge. It didn't even move the slightest after removing the warranty sticker.
There is a single clip on the left side about 5cms in, and another clip on the right side equidistant to the one on the other side. Jamming a spudger in there first, and lifting those clips helped, and then I had to slide down to lift a total of 4 clips on each side (each about 4cms apart). Then push the cover away from you, if that makes more sense than “sliding it towards the back corners”, since the back corners are technically facing you.
I saw many video and tried it my self, you have to remove the hard disc before removing any cover.
-
To reassemble your device, follow these instructions in reverse order.
To reassemble your device, follow these instructions in reverse order.
36等其他人完成本指南。


Remove the screw directly to the left of that one in the picture as well. Should be silver.
Elizabeth Johnson - 回复
ihr seid so ein scheiß haufen das stimmt über haubt nix
Toaster 95 - 回复
einfach alles stimmt nicht
Toaster 95 - 回复