跳转到主内容

PlayStation 4 CUH-1200 整机拆卸

你所需要的

  1. PlayStation 4 CUH-1200 整机拆卸, 将型号为 CUH-1200 的 PS4 拆箱: 步骤 1 中的图像 1,3 PlayStation 4 CUH-1200 整机拆卸, 将型号为 CUH-1200 的 PS4 拆箱: 步骤 1 中的图像 2,3 PlayStation 4 CUH-1200 整机拆卸, 将型号为 CUH-1200 的 PS4 拆箱: 步骤 1 中的图像 3,3
    • CUH-1200A 拆箱

  2. PlayStation 4 CUH-1200 整机拆卸, 让我们拆下硬盘保护盖!: 步骤 2 中的图像 1,1
    • 硬盘保护盖和前一代推开的方式一样

  3. PlayStation 4 CUH-1200 整机拆卸, 移除硬盘: 步骤 3 中的图像 1,3 PlayStation 4 CUH-1200 整机拆卸, 移除硬盘: 步骤 3 中的图像 2,3 PlayStation 4 CUH-1200 整机拆卸, 移除硬盘: 步骤 3 中的图像 3,3
    • 硬盘有一颗螺丝固定,需要将螺丝移除才能将硬盘取下。

    • 要完成此步骤,你需要一把 PH 0 螺丝刀。

  4. PlayStation 4 CUH-1200 整机拆卸, 去除保修贴纸——我们最擅长的。: 步骤 4 中的图像 1,2 PlayStation 4 CUH-1200 整机拆卸, 去除保修贴纸——我们最擅长的。: 步骤 4 中的图像 2,2
    • 使用拨子或其他类似的东西,剥掉保修贴纸后会露出两个黑色的 T9 梅花螺丝钉。

    • 移除这两颗 T9 梅花螺丝钉。

    • 这是我们发现的第一个重大改动......只有两个螺丝钉来固定。 在这以前的型号有四个。

  5. PlayStation 4 CUH-1200 整机拆卸, 移除顶盖: 步骤 5 中的图像 1,3 PlayStation 4 CUH-1200 整机拆卸, 移除顶盖: 步骤 5 中的图像 2,3 PlayStation 4 CUH-1200 整机拆卸, 移除顶盖: 步骤 5 中的图像 3,3
    • 如果按顺序执行以下步骤,卸下顶盖将更容易:

    • 1)抓住电源按钮附近顶盖的下方。

    • 2)向上拉,你将听到卡扣被打开的声音。

    • 3)将你的手移到顶盖的对面,在如图位置向上拉。

    • 4)在拉起顶盖的两侧后,它现在应该从 PS4 上卸下来了。

    • 我们现在有了 CUH 1200 内部的第一个视角。首先注意到的是,主板的尺寸要小得多,而且APU的夹具已经被重新设计了。 该模型的内部与以前的型号完全不同。

  6. PlayStation 4 CUH-1200 整机拆卸, 移除底盖: 步骤 6 中的图像 1,3 PlayStation 4 CUH-1200 整机拆卸, 移除底盖: 步骤 6 中的图像 2,3 PlayStation 4 CUH-1200 整机拆卸, 移除底盖: 步骤 6 中的图像 3,3
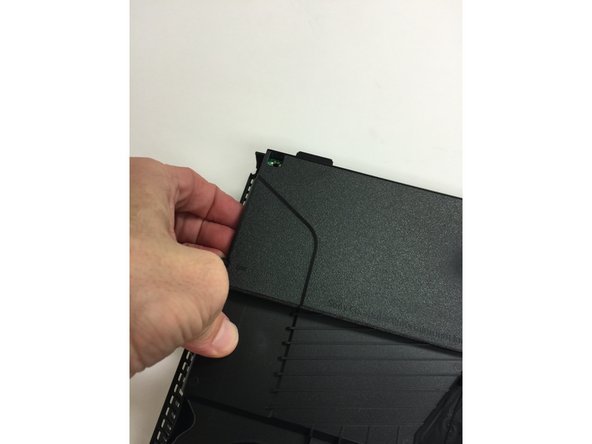
    • 要移除底盖,你需要在控制台背面附近的盖子的两侧用力向上拉。

    • 您可能只能用手拉,但也可能需要使用一些工具来撬开。

    • 我们首先查看控制台底部的组件。 看起来有一个重新设计的电源和光驱。

  7. PlayStation 4 CUH-1200 整机拆卸, 注意按钮!: 步骤 7 中的图像 1,2 PlayStation 4 CUH-1200 整机拆卸, 注意按钮!: 步骤 7 中的图像 2,2
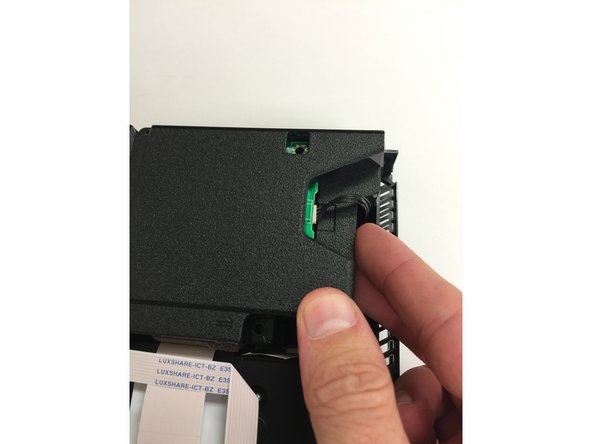
    • 当我们移除底部的塑料后,看到了索尼决定使用的物理弹出按钮。这是与以前型号相比另一个显著的变化。

    • 我们猜测这种变化是为了解决像之前型号光盘的“随机弹出”。

  8. PlayStation 4 CUH-1200 整机拆卸, 移除电源: 步骤 8 中的图像 1,3 PlayStation 4 CUH-1200 整机拆卸, 移除电源: 步骤 8 中的图像 2,3 PlayStation 4 CUH-1200 整机拆卸, 移除电源: 步骤 8 中的图像 3,3
    • 拆下三个 T9 梅花螺丝和两根 philips PH 0 长螺丝钉。

    • 在左侧(没有四根电线的一侧)向上拉,电源的右侧很难拉动,所以你需要拉紧。

    • 松开后,您可以将其拉起来,但仍然与四根电线相连接,因此请勿将其拉出,直至断开连接(如下一步所示)。

  9. PlayStation 4 CUH-1200 整机拆卸, 移除电源连接器: 步骤 9 中的图像 1,3 PlayStation 4 CUH-1200 整机拆卸, 移除电源连接器: 步骤 9 中的图像 2,3 PlayStation 4 CUH-1200 整机拆卸, 移除电源连接器: 步骤 9 中的图像 3,3
    • 你需要从主板上断开这四根电线的连接。

    • 我们发现最好的方法是使用迷你钳子。 拉起一边后拉另一边,每次操作一边。直到全部拉出。

    • 电源连接器现在已经可以安全移除。

    • 请注意,这种连接线很容易从主板上拔下来。

    • 请确认你是在拉动电线本身而不是主板上的插槽。

  10. PlayStation 4 CUH-1200 整机拆卸, 断开 WiFi 天线和光驱线缆: 步骤 10 中的图像 1,3 PlayStation 4 CUH-1200 整机拆卸, 断开 WiFi 天线和光驱线缆: 步骤 10 中的图像 2,3 PlayStation 4 CUH-1200 整机拆卸, 断开 WiFi 天线和光驱线缆: 步骤 10 中的图像 3,3
    • 使用相同的钳子夹住 WiFi 天线电缆并小心拉起。

    • 光驱线缆有一个黑色的“领子”,需要在每一侧抬起。 这将断开与光驱的连接。

    • 另外两根线缆可以直接从相应的插槽中拔出。

  11. PlayStation 4 CUH-1200 整机拆卸, 去路由和卸下WiFi天线: 步骤 11 中的图像 1,2 PlayStation 4 CUH-1200 整机拆卸, 去路由和卸下WiFi天线: 步骤 11 中的图像 2,2
    • 拆下固定WiFi天线的T9梅花螺丝。

    • 拆下WiFi线缆。

  12. PlayStation 4 CUH-1200 整机拆卸, 取出光驱: 步骤 12 中的图像 1,3 PlayStation 4 CUH-1200 整机拆卸, 取出光驱: 步骤 12 中的图像 2,3 PlayStation 4 CUH-1200 整机拆卸, 取出光驱: 步骤 12 中的图像 3,3
    • 从光驱移除小型带状电线。

    • 卸下五颗T9安全梅花螺丝

    • 将绿色PCB板上的两颗PH 0十字螺丝钉一并取下。

  13. PlayStation 4 CUH-1200 整机拆卸, 光驱注意事项: 步骤 13 中的图像 1,2 PlayStation 4 CUH-1200 整机拆卸, 光驱注意事项: 步骤 13 中的图像 2,2
    • 即使光驱已经重新设计,它们仍然使用我们相同的滚动系统,其间有白色条。 我们猜测这些白色滚轮还会出现问题。

    • 激光和支架看起来与以前的型号非常相似。

  14. PlayStation 4 CUH-1200 整机拆卸, 取下顶部金属保护罩: 步骤 14 中的图像 1,3 PlayStation 4 CUH-1200 整机拆卸, 取下顶部金属保护罩: 步骤 14 中的图像 2,3 PlayStation 4 CUH-1200 整机拆卸, 取下顶部金属保护罩: 步骤 14 中的图像 3,3
    • 卸下12颗T9安全梅花螺丝

    • 注意不要弄丢左上角黑色盖子下面的小金属螺帽,这个螺帽是与前面步骤中卸下的两根固定电源接口的长螺丝中的一根配套的.

    • 卸出六个PH 0十字螺丝

    • 卸下三个PH 0十字螺丝

    • 卸下三个PH 0十字螺丝

    • 将顶部金属保护罩从机子上取出。

  15. PlayStation 4 CUH-1200 整机拆卸, 主板注意事项: 步骤 15 中的图像 1,1
    • 我们首先注意到的主板(除了尺寸)就是索尼完全重新设计了散热片。 我们猜测(和希望)会减少或消除PS4打开的问题之后关闭。

  16. PlayStation 4 CUH-1200 整机拆卸, 拆下散热片夹和电源按钮: 步骤 16 中的图像 1,3 PlayStation 4 CUH-1200 整机拆卸, 拆下散热片夹和电源按钮: 步骤 16 中的图像 2,3 PlayStation 4 CUH-1200 整机拆卸, 拆下散热片夹和电源按钮: 步骤 16 中的图像 3,3
    • 卸下两个PH 0十字螺丝。

    • 在拆下夹具后还需要拆下夹具。

    • 通过撬起挂在主板上的挂钩上取下电源按钮。

    • 挂钩被抬起后,按钮将向后滑动。

  17. PlayStation 4 CUH-1200 整机拆卸, 卸下主板: 步骤 17 中的图像 1,3 PlayStation 4 CUH-1200 整机拆卸, 卸下主板: 步骤 17 中的图像 2,3 PlayStation 4 CUH-1200 整机拆卸, 卸下主板: 步骤 17 中的图像 3,3
    • 当您抬起主板前方时,您会注意到风扇仍然在里面,这可以用一对小钳子抓住连接器来取出。

    • 之后主板将可以取出。

  18. PlayStation 4 CUH-1200 整机拆卸, 主板注意事项: 步骤 18 中的图像 1,2 PlayStation 4 CUH-1200 整机拆卸, 主板注意事项: 步骤 18 中的图像 2,2
    • 我们现在可以看到老款机型和这款新机型之间的巨大差异之一,主板一侧没有RAM!

    • RAM数量仍然相当,但RAM芯片的总数已经减少了一半。

    • 在其他发现中,HDMI端口终于被重新设计了! 这是一个好消息,因为旧式很容易失败。

  19. PlayStation 4 CUH-1200 整机拆卸, 取下风扇: 步骤 19 中的图像 1,3 PlayStation 4 CUH-1200 整机拆卸, 取下风扇: 步骤 19 中的图像 2,3 PlayStation 4 CUH-1200 整机拆卸, 取下风扇: 步骤 19 中的图像 3,3
    • 取下三个PH 0十字螺丝然后取出金属片。

    • 随之而来的是,只有一个螺丝(PH 0)握住风扇,取出并完成!

  20. PlayStation 4 CUH-1200 整机拆卸, 忽视的警告!: 步骤 20 中的图像 1,2 PlayStation 4 CUH-1200 整机拆卸, 忽视的警告!: 步骤 20 中的图像 2,2
    • 当我们开始组装这个PS4时,我们注意到这个小件放在底部的金属板上。 当我们重新组装时,我们发现它是在主板的顶部,其中一个长电源螺丝去。 有一个黑色的塑料件,将覆盖它。

  21. PlayStation 4 CUH-1200 整机拆卸, 结论: 步骤 21 中的图像 1,1
    • 随着PS4的这种截然不同的型号,我们希望索尼已经解决了旧型号(HDMI端口等)的一些问题。 我们对他们有谨慎乐观的态度。

终点

157等其他人完成本指南。

由衷感谢以下译者:

en zh

100%

这些译者帮助我们修补全世界! 您也想加入吗?
开始翻译 ›

TronicsFix

于11/06/13注册

34,802 声望

创作了5篇指南

团队

TronicsFix TronicsFix 的会员

Business

1 名成员

创作了21篇指南

77条评论

You didn't show what the supply connector is supposed to look like, when disconnected. Now I ripped it off of my mother board, attempting to assess milk damage. Thanks for helping me make sure my PS4 will stay broken.

draconicfeathers - 回复

I'm so sorry it ripped off. I'm assuming you are talking about the power supply connector? If so step #10 shows the method we use to remove this connector. We use mini pliers and grasp one end at a time and pull up gently but firmly each time...this will eventually get the connector off without damage in most cases. That being said we have had to fix a connector every once in a while on these because some of them are fragile.

TronicsFix -

I ripped off my power supply from the motherboard too, assuming that from these photos that was where I was supposed to pull. Playstation is very broken now.

taylah.sewell -

Same here. I really don’t know what I’m supposed to do now.

Florent Krasniqi -

i dropped my ps4 and it made grinding noises when it reading discs and also it wouldnt eject disc, i fixed the eject problem by disassembling the blu ray drive but it still grinds when reading and only reads when i rebuild database. are you guys gonna start selling replacements anytime soon or will the blu ray from the cuh-11xx models work?

jer - 回复

添加评论

浏览统计数据:

过去 24 小时: 189

过去 7 天: 1,280

过去 30 天: 6,161

总计 767,029