简介
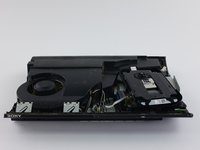
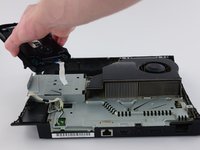
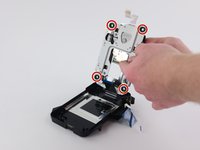
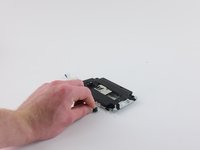
The guide will show users how to remove the laser lens of the PlayStation 3 Super Slim. By showing the removal of the correct screws and cables, the guide will be able to give users the ability to remove their optical drive from its enclosure. After removing the optical drive, The user will open up the optical drive to be able to remove the laser lens. This allows for the replacement of a component of the PlayStation 3 Super Slim that reads the Blu-Ray discs.
你所需要的
-
-
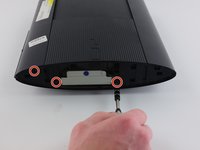
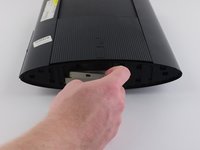
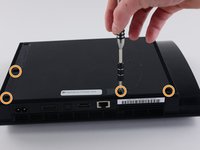
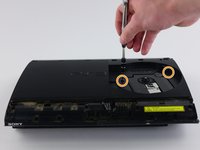
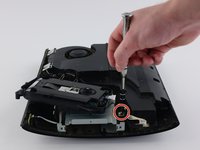
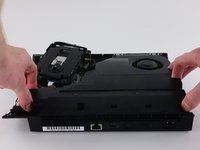
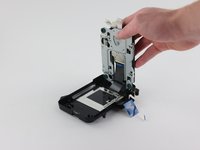
Remove the side HDD bay cover by sliding the panel towards the back of the device.
-
-
-
-
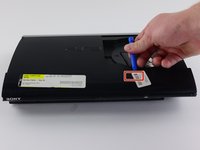
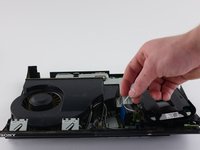
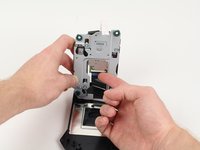
Remove the front white flex-ribbon cable by pulling upward from its base.
-
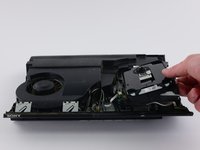
Remove the black and blue flex-ribbon cable behind it by pulling upward on the black tab, then pulling out the cable.
-
-
-
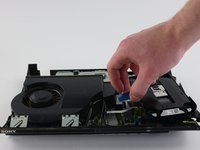
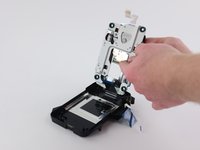
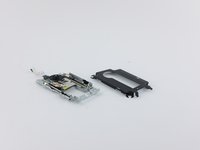
Lift up the free end of the laser lens to separate the two layers.
-
On the bottom of the laser lens, flip up the black plastic latch to remove the flex ribbon cable.
-


To reassemble your device, follow these instructions in reverse order.
To reassemble your device, follow these instructions in reverse order.
8等其他人完成本指南。
团队

Cal Poly, Team 34-13, Maness Spring 2016 Cal Poly, Team 34-13, Maness Spring 2016 的会员
CPSU-MANESS-S16S34G13
4 名成员
创作了24篇指南
6条评论
so i did follow this to a tee and not only does the laser not want to work but it keeps makeing this buzzing sound whenever the disk tray is closed
is there something i might be doing wrong
like the video,
Where is the parts purchased from?
Thanks Joe
Laser is KEM-850a. You can order them from ebay. gamesunlimited and ep game supply are good stores. You can also order these from groupvertical.com or sourcleyplus.com
I am replacing the optical drive in my console. But didn't note where the drive ribbon was positioned!? Every video I have found, they just pop right in...my original and replacement drives, have larger receptacles than the ribbon it self. There are at least 5 pins, that don't have (potentially) anything connecting them, to the ribbon. I don't want to randomly place the ribbon in one of the possible (7?) positions and fry something in the process...so where do I connect the smaller ribbon?!