跳转到主内容

当前版本的文档还未经巡查,您可以查看最新的已查核版本

你所需要的

  1. , 智能板: 步骤 1 中的图像 1,2 , 智能板: 步骤 1 中的图像 2,2
    • 使用一个撬棒的尖端从PS3的侧面去除黑色橡胶螺丝盖。

    • 这个螺丝盖也许在保修贴纸的下面。贴纸被移除后将会改变外观并且 显示“无效”(移除保修贴纸将使你的设备失去厂家/商家的保修)。

  2. : 步骤 2 中的图像 1,1
    • 从智能板上取下一个8.5毫米的T10安全Torx螺丝钉。

  3. : 步骤 3 中的图像 1,3 : 步骤 3 中的图像 2,3 : 步骤 3 中的图像 3,3
    • 把智能板拉向硬盘驱动器,然后把它从PS3主体上抬起并且拿下来。

  4. : 步骤 4 中的图像 1,1
    • 请注意一定要注意一下松松地放在顶盖上的小金属支架,如果你的机器配备了这样东西的话。

  5. , 顶盖: 步骤 5 中的图像 1,1
    • 拆卸这图片中的7个螺丝

    • 6个52毫米的菲利普斯螺丝(十字)

    • 1个30毫米的菲利普斯螺丝(十字)

  6. : 步骤 6 中的图像 1,1
    • 从后边缘抬起顶盖并且把它旋转到PS3的前部。

    • 拆掉顶盖

  7. , 蓝光驱动器: 步骤 7 中的图像 1,1
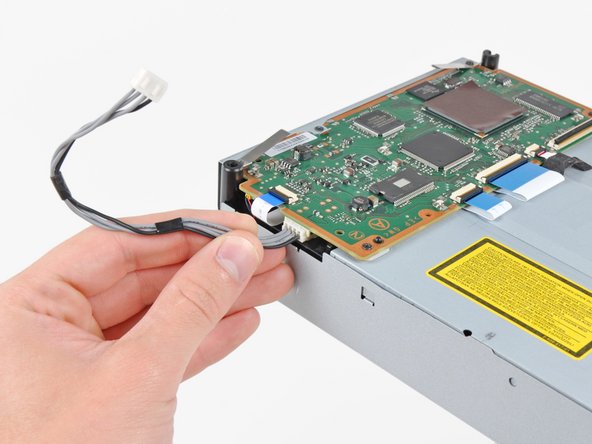
    • 从主板断开蓝光的电缆

    • 如图,将插头垂直拉出插座

  8. : 步骤 8 中的图像 1,1
    • 从最靠近电源的边缘抬起蓝光驱动器,并且把它从机箱旋转到足够接近带状电缆。

  9. : 步骤 9 中的图像 1,3 : 步骤 9 中的图像 2,3 : 步骤 9 中的图像 3,3
    • 用你的指甲在蓝光带状电缆插座上翻转固定襟翼。

    • 确保翘起襟翼而不是插座本身。

    • 把带状电缆从插座上拔出。

    • 从PS3上取下蓝光光驱。

    • 如果更换新的蓝光驱动器,请将电源移到您新的驱动器上。

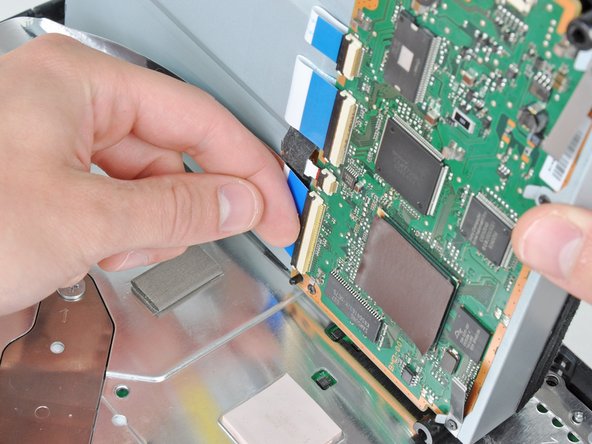
  10. , 主板: 步骤 10 中的图像 1,1
    • 将控制板上的带状电缆直接从主板上的插座中拔出。

  11. : 步骤 11 中的图像 1,2 : 步骤 11 中的图像 2,2
    • 拆掉两个12毫米的Phillips螺丝,把控制板固定到底部外壳。

    • 从PS3上拆掉控制板以及它的附属电缆。

  12. : 步骤 12 中的图像 1,1
    • 拆掉图中8个螺丝把主板组件固定到较低外壳上。

    • 7个12毫米菲利普斯螺丝

    • 1个30毫米的菲利普斯螺丝

  13. : 步骤 13 中的图像 1,1
    • 拆下主板支架。

  14. : 步骤 14 中的图像 1,2 : 步骤 14 中的图像 2,2
    • 用撬棍的平底撬起硬盘驱动器支架使其远离低的一端。

    • 拆下硬盘盖。

  15. : 步骤 15 中的图像 1,1
    • 从底板上抬起主板组件。

  16. 这个步骤还没有翻译 帮忙翻译一下

    : 步骤 16 中的图像 1,1
    • De-route the fan cables from under the plastic finger molded into the heat sink.

  17. 这个步骤还没有翻译 帮忙翻译一下

    : 步骤 17 中的图像 1,1
    • Disconnect the fan from the motherboard.

    • Pull the connector straight up and out of its socket on the motherboard.

  18. 这个步骤还没有翻译 帮忙翻译一下

    : 步骤 18 中的图像 1,1
    • Remove the three 5.7 mm #0 Phillips screws securing the fan to the heat sink.

  19. 这个步骤还没有翻译 帮忙翻译一下

    : 步骤 19 中的图像 1,1
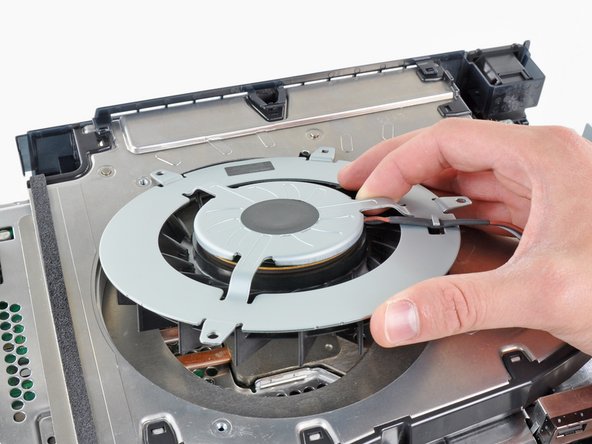
    • Remove the fan from the heat sink, minding its cables that may get caught.

终点

56等其他人完成本指南。

5条评论

Im guessing its not possible to flip the device over in order to get to the fan... Im genuinely asking this.

anthony - 回复

Super tutorial but my ps3 fat look a little bit different inside but after all I was able to replace the 12v fan inside to an third part one which was definetly very quite even if I set it up to 100% (using a web exploit)

Michal S. - 回复

Remember fellas - the PS3 shown in this tutorial is most likely (almost 100%) the launch backwards compatible model. Meaning, the later FAT models without backwards compatibility WILL LOOK DIFFERENT INSIDE.

Be aware of that as to not wrongly disassemble your precious old PS3.

Paulo - 回复

I'm quite happy to have found this guide and would give the author the +30 points if the suggested changes to the orange/red circles on the photos had been made - its been three years since the original comment and I, too, have trouble discerning those two colors.

Palfrus Wyrmrest - 回复

Che tipo di ventola va inserita?

David - 回复

添加评论

浏览统计数据:

过去 24 小时: 13

过去 7 天: 139

过去 30 天: 522

总计 130,447