当前版本的文档还未经巡查,您可以查看最新的已查核版本。
这个步骤还没有翻译 帮忙翻译一下
Disconnect all cables from the console and flip the unit over to reveal its base.
Locate the 6 feet on the base of the unit. Pry them off using a spudger to reveal the screws.
Note: One of the feet is located under the sticker shown in the photo. Removing this sticker will void any warranty with Sony.
Remove all six 4.0 mm screws from the base of the unit using a #1 Phillips screwdriver.
Starting at the corner at which the power and Ethernet ports are located, pry open the outer shell using a spudger and continue around the entire unit.
Note: You may use your hands for additional force to separate the two pieces of the outer shell.
Locate the fan at the front, left section of the unit.
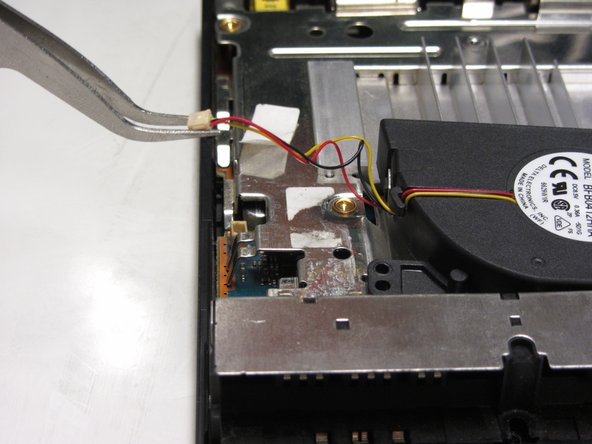
Peel off the sticker holding the power cords to the unit.
Lift the connector from the motherboard with a pair of tweezers using a firm, upward force.
Remove all three 1.6 mm screws fastening the fan to the unit using a #1 Phillips screwdriver.
Gently lift and remove the fan from its compartment.
取消:我没有完成这个指南。
10等其他人完成本指南。
与1其他贡献者
于10/23/13注册
3,927 声望
创作了6篇指南
徽章: 14
+ 11更多徽章
选择一个尺寸并复制下面的代码,将本指南作为一个小插件嵌入到你的网站/论坛中。
过去 24 小时: 3
过去 7 天: 34
过去 30 天: 119
总计 8,372