跳转到主内容

Philips Satinelle Gear Replacement

你所需要的

  1. Philips Satinelle Gear Replacement, Philips Satinelle Disassembly: 步骤 1 中的图像 1,2 Philips Satinelle Gear Replacement, Philips Satinelle Disassembly: 步骤 1 中的图像 2,2
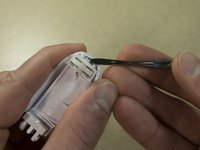
    • Unplug the device and remove the purple guard.

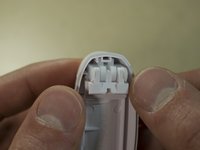
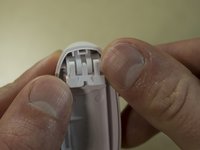
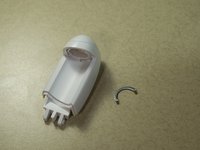
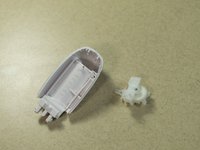
    • Remove the head by pressing the right side of the head (with the device facing away from you).

    • You will hear a 'click' and the head will become dislodged from the body of the device.

  2. Philips Satinelle Gear Replacement: 步骤 2 中的图像 1,3 Philips Satinelle Gear Replacement: 步骤 2 中的图像 2,3 Philips Satinelle Gear Replacement: 步骤 2 中的图像 3,3
    • While wearing safety glasses, use a plastic opening tool to pry from right to left to pry out the tensor clip.

    • Be careful not to lose the clip. It will likely fly off when it releases.

  3. Philips Satinelle Gear Replacement: 步骤 3 中的图像 1,1
    • The left side will swing down.

    • Remove the Tweezers.

  4. Philips Satinelle Gear Replacement: 步骤 4 中的图像 1,3 Philips Satinelle Gear Replacement: 步骤 4 中的图像 2,3 Philips Satinelle Gear Replacement: 步骤 4 中的图像 3,3
    • Remove the plastic component that swings down.

    • Use fingernails to lift clips from stubs.

  5. Philips Satinelle Gear Replacement: 步骤 5 中的图像 1,3 Philips Satinelle Gear Replacement: 步骤 5 中的图像 2,3 Philips Satinelle Gear Replacement: 步骤 5 中的图像 3,3
    • Using Needle Nose pliers remove metal roller track on both sides of the Tweezers Head.

  6. Philips Satinelle Gear Replacement: 步骤 6 中的图像 1,3 Philips Satinelle Gear Replacement: 步骤 6 中的图像 2,3 Philips Satinelle Gear Replacement: 步骤 6 中的图像 3,3
    • Use a spudger to pry the gear housing unit from the base.

  7. Philips Satinelle Gear Replacement: 步骤 7 中的图像 1,3 Philips Satinelle Gear Replacement: 步骤 7 中的图像 2,3 Philips Satinelle Gear Replacement: 步骤 7 中的图像 3,3
    • Use your thumbnail and a pair of needle nose pliers to push out the gear housing retention pin.

  8. Philips Satinelle Gear Replacement, Gear Replacement: 步骤 8 中的图像 1,1
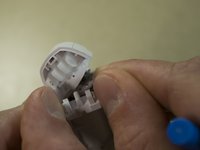
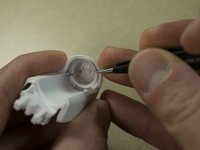
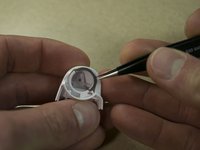
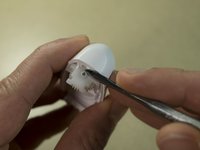
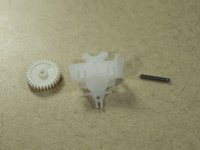
    • Replace the gear and re-insert the pin.

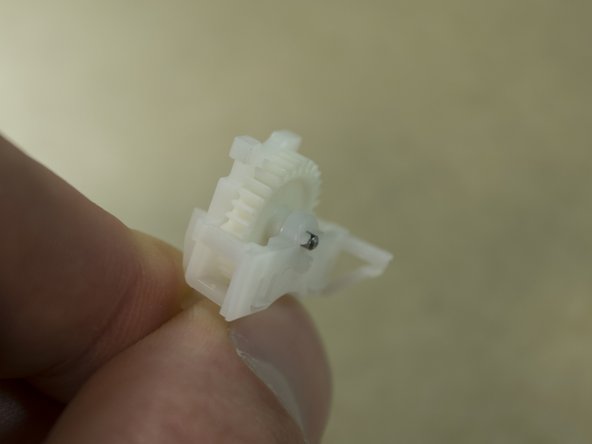
    • Ensure that pin is protruding slightly, it should not be flush.

结论

To reassemble your device, follow these instructions in reverse order.

Nathan Christian

于11/11/17注册

505 声望

创作了3篇指南

团队

IUPUI, Team S5-G5, Wilson Fall 2017 IUPUI, Team S5-G5, Wilson Fall 2017 的会员

IUPUI-WILSON-F17S5G5

3 名成员

创作了4篇指南

2条评论

What size pinion is used in it? Kindly help.

Wilkis James - 回复

Can you send link to buy this piece?

Or 3d Printer file?

Thanks

Emilio Hernandez - 回复

添加评论

浏览统计数据:

过去 24 小时: 1

过去 7 天: 12

过去 30 天: 22

总计 1,293