跳转到主内容

Parrot FLYPAD Buttons Replacement

你所需要的

  1. Parrot FLYPAD Buttons Replacement, Buttons: 步骤 1 中的图像 1,2 Parrot FLYPAD Buttons Replacement, Buttons: 步骤 1 中的图像 2,2
    • Position the controller so the back is facing up.

    • Use a T6 screwdriver to remove the six screws on the back of the controller: four 0.9 mm screws and two 0.1 mm screws.

  2. Parrot FLYPAD Buttons Replacement: 步骤 2 中的图像 1,2 Parrot FLYPAD Buttons Replacement: 步骤 2 中的图像 2,2
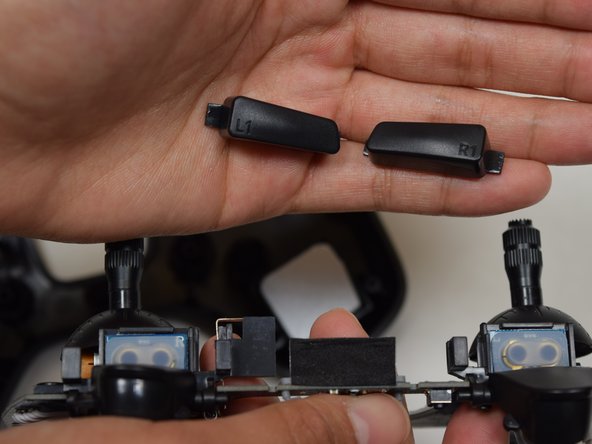
    • Remove the foam adhesive that connects the front plate to the motherboard

    • The buttons (L1,R1) may fall out. Set aside to replace during reassembly.

    • Use a Phillips #0 screwdriver to remove the two 0.7 mm screws.

    • Remove the motherboard from the front plate.

  3. Parrot FLYPAD Buttons Replacement: 步骤 3 中的图像 1,3 Parrot FLYPAD Buttons Replacement: 步骤 3 中的图像 2,3 Parrot FLYPAD Buttons Replacement: 步骤 3 中的图像 3,3
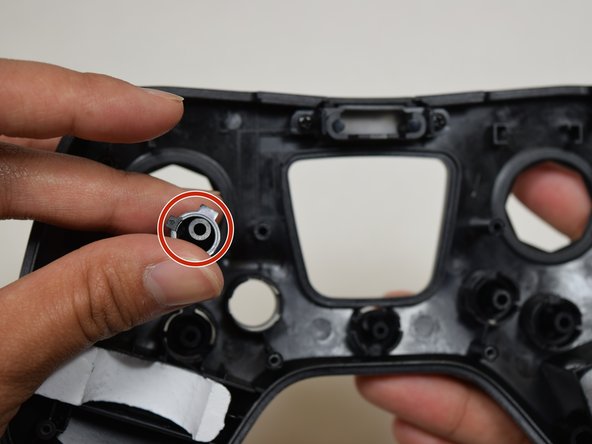
    • Remove the buttons from the front plate of the fly pad and replace as needed.

    • Hold the front plate of the fly pad facing downwards to prevent buttons from falling out.

    • Make sure the text on buttons L1 and R1 correctly line up with L2 and R2 when reassembling the device.

结论

To reassemble your device, follow these instructions in reverse order.

2等其他人完成本指南。

HUY NGUYEN

于04/10/17注册

376 声望

创作了3篇指南

团队

UW Tacoma, Team S3-G5, Liner Spring 2017 UW Tacoma, Team S3-G5, Liner Spring 2017 的会员

UWT-LINER-S17S3G5

5 名成员

创作了3篇指南

0条评论

添加评论

浏览统计数据:

过去 24 小时: 0

过去 7 天: 0

过去 30 天: 1

总计 541