跳转到主内容

Panasonic SDR-H85 Hard Drive Replacement

你所需要的

  1. Panasonic SDR-H85 Hard Drive Replacement, Battery: 步骤 1 中的图像 1,3 Panasonic SDR-H85 Hard Drive Replacement, Battery: 步骤 1 中的图像 2,3 Panasonic SDR-H85 Hard Drive Replacement, Battery: 步骤 1 中的图像 3,3
    • Gently slide the battery ejection button which is located underneath the battery and slide the battery out.

    • Once the battery is removed, you can safely dispose it and replace with a new one. Dispose battery at an authorized battery recycling center.

  2. Panasonic SDR-H85 Hard Drive Replacement, Hard Drive: 步骤 2 中的图像 1,1
    • Remove three Phillips #00 screws from the left-hand side of the camera.

  3. Panasonic SDR-H85 Hard Drive Replacement: 步骤 3 中的图像 1,1
    • Flip the camera so the bottom is facing upwards.

    • Remove four Phillips #00 screws to release the bottom portion of the camera panel.

  4. Panasonic SDR-H85 Hard Drive Replacement: 步骤 4 中的图像 1,1
    • Open up the charging port of the camera.

    • Hold the charging port flap open, and remove the single Phillips #00 screw.

  5. Panasonic SDR-H85 Hard Drive Replacement: 步骤 5 中的图像 1,1
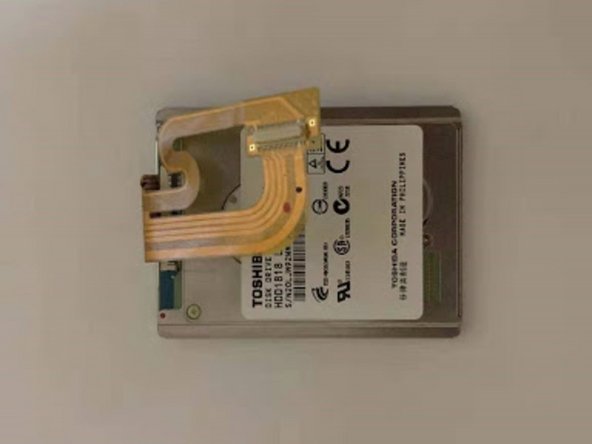
    • This step needs to be done very slowly and carefully due to the delicate hard drive ribbon cable.

    • Open the camera cover slowly and enough to see the orange ribbon cable. Do not pull to release the ribbon cable from the hard drive.

    • Gently detach the connection of the ribbon cable from the hard drive by using the spudger to drive a wedge between the ribbon cable and the hard drive itself.

    • Do not use excessive force on the ribbon cable due to its delicate nature. You should feel a click when the connection has been broken.

  6. Panasonic SDR-H85 Hard Drive Replacement: 步骤 6 中的图像 1,3 Panasonic SDR-H85 Hard Drive Replacement: 步骤 6 中的图像 2,3 Panasonic SDR-H85 Hard Drive Replacement: 步骤 6 中的图像 3,3
    • Remove three Phillips #00 screws from the interior of the camera.

    • Carefully pull out the hard drive from both the top and the bottom in alternative moves, first from the top and then from the bottom.

    • Use slight force because the rubber lining around the hard drive is very secure.

    • Remove the rubber lining of the hard drive.

    • Make sure you remove the rubber lining carefully as it could pop through and potentially hit you.

结论

To reassemble your device, follow these instructions in reverse order.

2等其他人完成本指南。

Hamza Lodhi

于01/14/20注册

381 声望

创作了2篇指南

团队

0条评论

添加评论

浏览统计数据:

过去 24 小时: 0

过去 7 天: 4

过去 30 天: 14

总计 680