跳转到主内容

Panasonic Lumix DMC-ZS3 LCD Screen Replacement

你所需要的

  1. Panasonic Lumix DMC-ZS3 LCD Screen Replacement, Back Cover: 步骤 1 中的图像 1,3 Panasonic Lumix DMC-ZS3 LCD Screen Replacement, Back Cover: 步骤 1 中的图像 2,3 Panasonic Lumix DMC-ZS3 LCD Screen Replacement, Back Cover: 步骤 1 中的图像 3,3
    • Remove the following eleven screws securing the covers to the ZS3

    • Eleven 3 mm Phillips screws

    • Using too much pressure when removing the screws may strip the screws and complicate screw removal at a later time.

  2. Panasonic Lumix DMC-ZS3 LCD Screen Replacement: 步骤 2 中的图像 1,2 Panasonic Lumix DMC-ZS3 LCD Screen Replacement: 步骤 2 中的图像 2,2
    • Use the flat end of a spudger to pry apart the back cover from the rest of the unit as shown.

    • Be sure to carefully and slowly lift the back cover. Forcefully lifting the back cover and fully separating it at this point may ruin internal connections.

  3. Panasonic Lumix DMC-ZS3 LCD Screen Replacement: 步骤 3 中的图像 1,2 Panasonic Lumix DMC-ZS3 LCD Screen Replacement: 步骤 3 中的图像 2,2
    • Using your fingernail or a spudger, flip up the ZIF locking flap on the two LCD ribbon cable sockets that connect the back cover to the rest of the unit.

    • Be sure you are opening the locking tab, not pulling against the socket mounted to the board.

  4. Panasonic Lumix DMC-ZS3 LCD Screen Replacement: 步骤 4 中的图像 1,1
    • Remove the two LCD board ribbon cables out of their sockets.

  5. Panasonic Lumix DMC-ZS3 LCD Screen Replacement, LCD Screen: 步骤 5 中的图像 1,3 Panasonic Lumix DMC-ZS3 LCD Screen Replacement, LCD Screen: 步骤 5 中的图像 2,3 Panasonic Lumix DMC-ZS3 LCD Screen Replacement, LCD Screen: 步骤 5 中的图像 3,3
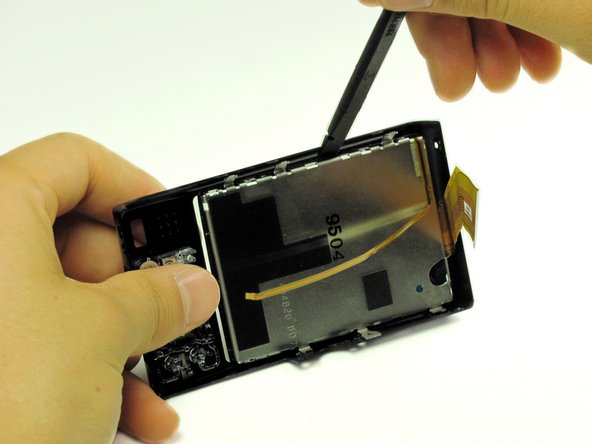
    • Take the back panel and use the flat end of the spudger to pry the LCD screen from the back cover.

    • It may be necessary to wiggle the spudger a little it to loosen the adhesive that holds the LCD screen to the back cover.

    • Be sure not to use excessive force in order to avoid damaging the components.

结论

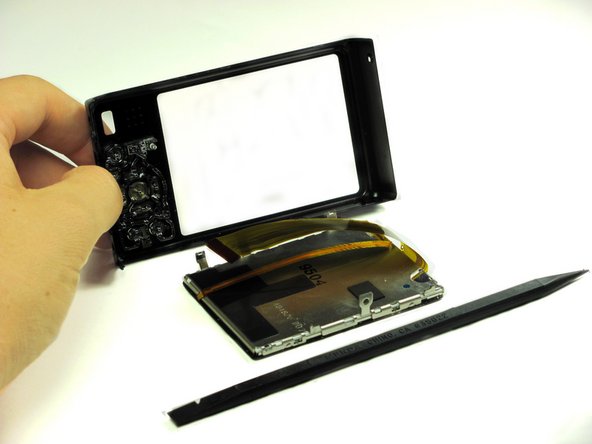
To reassemble your device, follow these instructions in reverse order.

3等其他人完成本指南。

团队

Cal Poly, Team 13-60, Johann Spring 2013 Cal Poly, Team 13-60, Johann Spring 2013 的会员

CPSU-JOHANN-S13S13G60

3 名成员

创作了10篇指南

2条评论

It would be helpful if images of an inoperating screen were included. My screen shows many multi-colored lines - is it a broken screen or a bad board. The camera still shoots pictures.

Steve Bashein - 回复

Really useful guide. However, it's not quite complete: you do have to take the screen assembly apart once you've removed it from the back cover. It's not that difficult to do with the spudger, as all the metal bits around the screen just prise apart, but the 10-15 minutes quoted turned into an hour or so for me once I'd got it all back together again.

Russell Blandamer - 回复

添加评论

浏览统计数据:

过去 24 小时: 2

过去 7 天: 4

过去 30 天: 11

总计 4,647