跳转到主内容

Panasonic DMC-FZ70 Back Frame Replacement

你所需要的

  1. Panasonic DMC-FZ70 Back Frame Replacement, Back Panel: 步骤 1 中的图像 1,2 Panasonic DMC-FZ70 Back Frame Replacement, Back Panel: 步骤 1 中的图像 2,2
    • All screws should be removed using a Phillips #0 screwdriver.

    • Using your screwdriver, unscrew the two 5.0 mm Philips screws to the right of the LCD screen.

  2. Panasonic DMC-FZ70 Back Frame Replacement: 步骤 2 中的图像 1,2 Panasonic DMC-FZ70 Back Frame Replacement: 步骤 2 中的图像 2,2
    • Flip the camera over to the left side of the screen and unscrew the 5mm Phillips screw found there.

  3. Panasonic DMC-FZ70 Back Frame Replacement: 步骤 3 中的图像 1,2 Panasonic DMC-FZ70 Back Frame Replacement: 步骤 3 中的图像 2,2
    • Turn the camera upside down and unscrew the three 5mm screws found on the bottom.

  4. Panasonic DMC-FZ70 Back Frame Replacement: 步骤 4 中的图像 1,2 Panasonic DMC-FZ70 Back Frame Replacement: 步骤 4 中的图像 2,2
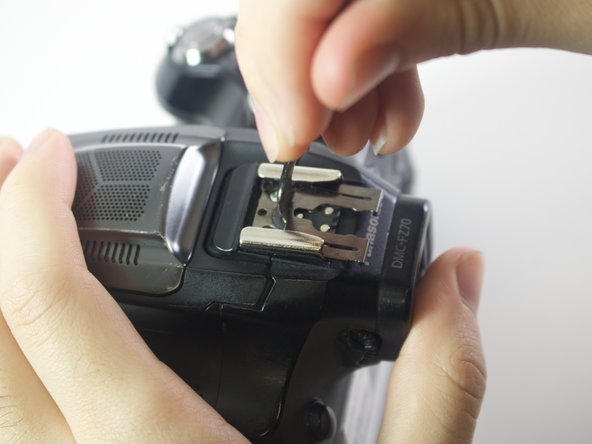
    • On the top of the camera locate the two rails with a thin sheet of metal on the floor between them.

    • With a metal spudger, lift this sheet and push it out of the rail device to detach it from the camera.

  5. Panasonic DMC-FZ70 Back Frame Replacement: 步骤 5 中的图像 1,1
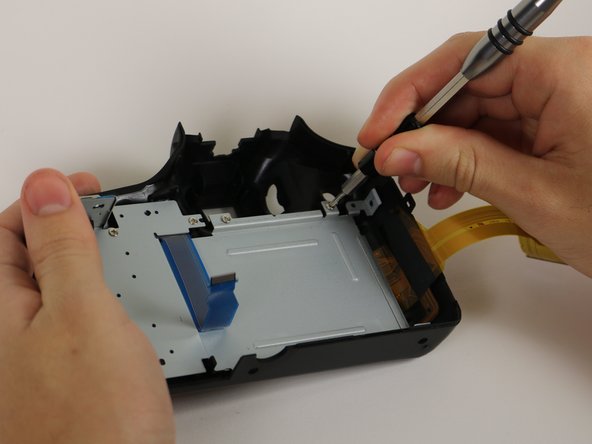
    • Proceed to remove the four 5mm Phillips screws that you just uncovered.

  6. Panasonic DMC-FZ70 Back Frame Replacement: 步骤 6 中的图像 1,1
    • Slowly pull on both side of the camera, until both halves begin to separate from each other.

    • Do not pull too hard, as both halves are held together with ZIF connector cables.

  7. Panasonic DMC-FZ70 Back Frame Replacement: 步骤 7 中的图像 1,3 Panasonic DMC-FZ70 Back Frame Replacement: 步骤 7 中的图像 2,3 Panasonic DMC-FZ70 Back Frame Replacement: 步骤 7 中的图像 3,3
    • Using a plastic opening tool, carefully flip up the small black levers that attach the ribbon cables to the ZIF connectors on the motherboard.

    • Carefully pull the ribbon cables out of the slot once they have been released.

    • Only the two indicated connectors need to be removed to separate the two halves of the camera.

  8. Panasonic DMC-FZ70 Back Frame Replacement, LCD Screen: 步骤 8 中的图像 1,2 Panasonic DMC-FZ70 Back Frame Replacement, LCD Screen: 步骤 8 中的图像 2,2
    • Unscrew the five 5mm screws on the panel that you just removed.

  9. Panasonic DMC-FZ70 Back Frame Replacement: 步骤 9 中的图像 1,2 Panasonic DMC-FZ70 Back Frame Replacement: 步骤 9 中的图像 2,2
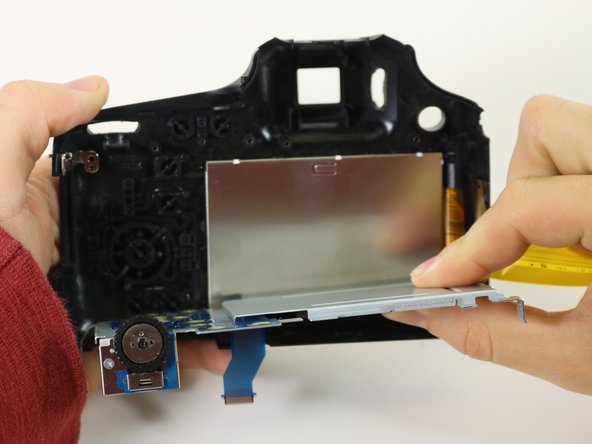
    • Remove the entire silver panel to reveal the back of the LCD screen

  10. Panasonic DMC-FZ70 Back Frame Replacement: 步骤 10 中的图像 1,1
    • Remove the LCD screen.

  11. Panasonic DMC-FZ70 Back Frame Replacement, Back Frame: 步骤 11 中的图像 1,1
    • You can now access the back panel and the buttons on it.

  12. Panasonic DMC-FZ70 Back Frame Replacement: 步骤 12 中的图像 1,1
    • To remove a button, lightly press its front face and it should detach with ease.

    • To put a button back into the camera, press on front its back face until it snaps back on.

结论

To reassemble your device, follow these instructions in reverse order.

2等其他人完成本指南。

Emily Kuzmicky

于01/24/17注册

445 声望

创作了2篇指南

团队

Cal Poly, Team 21-3, Maness Winter 2017 Cal Poly, Team 21-3, Maness Winter 2017 的会员

CPSU-MANESS-W17S21G3

6 名成员

创作了12篇指南

0条评论

添加评论

浏览统计数据:

过去 24 小时: 0

过去 7 天: 5

过去 30 天: 12

总计 948