跳转到主内容

当前版本的文档还未经巡查,您可以查看最新的已查核版本

你所需要的

  1. 这个步骤还没有翻译 帮忙翻译一下

    : 步骤 1 中的图像 1,2 : 步骤 1 中的图像 2,2
    • Press and slide open the battery cover.

  2. 这个步骤还没有翻译 帮忙翻译一下

    : 步骤 2 中的图像 1,1
    • Caution: Turn cell phone off before removing battery!

    • Press battery to the right.

    • Then lift up battery pack to remove.

  3. 这个步骤还没有翻译 帮忙翻译一下

    : 步骤 3 中的图像 1,1
    • Phone with battery removed

  4. 这个步骤还没有翻译 帮忙翻译一下

    : 步骤 4 中的图像 1,1
    • Remove the touchpad pen from the top left corner on the back to reveal the last of 6 screws to be removed.

  5. 这个步骤还没有翻译 帮忙翻译一下

    : 步骤 5 中的图像 1,1
    • Lift the rubber cap at the top right to reveal the sixth screw.

    • Caution: There is a small Palm sticker under the rubber cap. Tampering with or removing this sticker will void your warranty!

    • Remove the six screws using the T5 Torx screwdriver.

  6. 这个步骤还没有翻译 帮忙翻译一下

    : 步骤 6 中的图像 1,2 : 步骤 6 中的图像 2,2
    • Remove the SIM card so housing can be separated.

  7. 这个步骤还没有翻译 帮忙翻译一下

    : 步骤 7 中的图像 1,2 : 步骤 7 中的图像 2,2
    • Use a plastic pry tool to separate the bottom of the case to remove the small plastic insert.

  8. 这个步骤还没有翻译 帮忙翻译一下

    : 步骤 8 中的图像 1,2 : 步骤 8 中的图像 2,2
    • Remove the small plastic insert at the bottom of the phone.

  9. 这个步骤还没有翻译 帮忙翻译一下

    : 步骤 9 中的图像 1,2 : 步骤 9 中的图像 2,2
    • Continue with plastic pry tool all the way around the phone to remove the back housing.

  10. 这个步骤还没有翻译 帮忙翻译一下

    : 步骤 10 中的图像 1,1
    • Carefully peel back the tape holding the speaker (left) and keyboard (right) connection tabs in place.

  11. 这个步骤还没有翻译 帮忙翻译一下

    : 步骤 11 中的图像 1,1
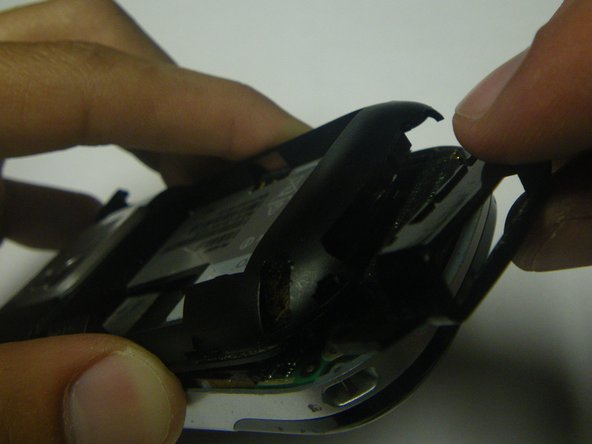
    • Using the plastic prying tool, lift the tabs and carefully pull the contact connections out on both sides.

    • Be very careful, these electronics are delicate!

  12. 这个步骤还没有翻译 帮忙翻译一下

    : 步骤 12 中的图像 1,1
    • Separate the logic board from the case by lifting and pulling out the bottom.

  13. 这个步骤还没有翻译 帮忙翻译一下

    : 步骤 13 中的图像 1,3 : 步骤 13 中的图像 2,3 : 步骤 13 中的图像 3,3
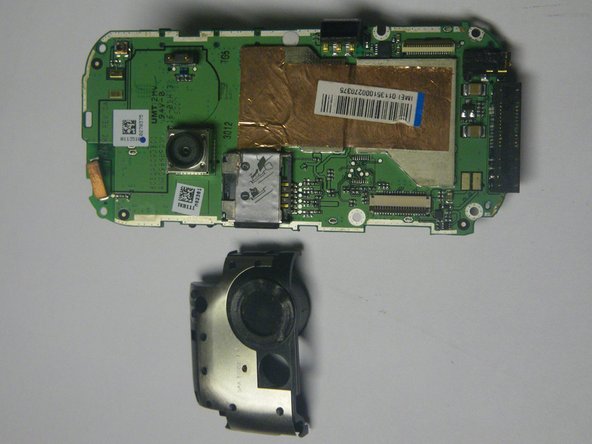
    • Pry the four plastic latches free that connect the antenna to the logic board.

    • Excessive force may damage your logic board!

    • Remove the antenna from the logic board.

  14. 这个步骤还没有翻译 帮忙翻译一下

    : 步骤 14 中的图像 1,1
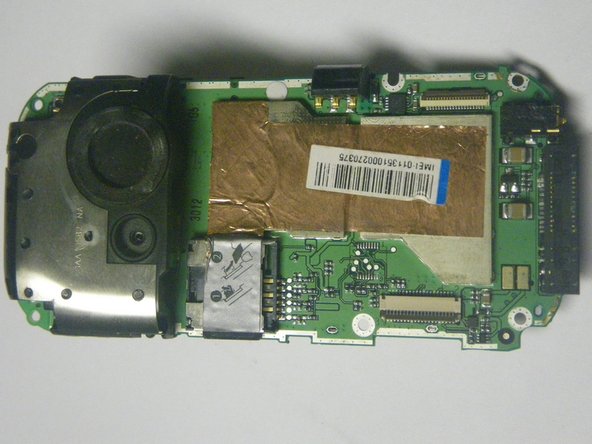
    • The internal speaker is attached to the antenna. To remove it, pry the speaker from the antenna using the tip of your screwdriver.

    • The speaker should be placed back into its spot in the correct position. Take notice of the gold connectors

终点

另外一个人完成了本指南。

Kevin

于04/12/10注册

31 声望

撰写一个指南

团队

Cal Poly, Team 15-49, Garner Spring 2010 Cal Poly, Team 15-49, Garner Spring 2010 的会员

CPSU-GARNER-S10S15G49

5 名成员

创作了12篇指南

0条评论

添加评论

浏览统计数据:

过去 24 小时: 1

过去 7 天: 8

过去 30 天: 9

总计 1,479