跳转到主内容

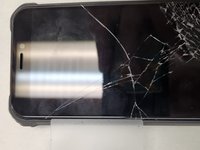
Oukitel WP5 Pro Screen Replacement

你所需要的

  1. Oukitel WP5 Pro Screen Replacement, Remove the Left Side Support Panel: 步骤 1 中的图像 1,3 Oukitel WP5 Pro Screen Replacement, Remove the Left Side Support Panel: 步骤 1 中的图像 2,3 Oukitel WP5 Pro Screen Replacement, Remove the Left Side Support Panel: 步骤 1 中的图像 3,3
    在这个步骤中使用的工具:
    T5 Torx Screwdriver
    $5.49
    购买
    • Using your Torx T5 Screwdriver, unscrew the three screws in the left side support panel.

    • Remove the left side support panel.

    • The side button is now only held in by a small amount of friction and will likely fall out. To avoid losing it, remove it as well.

  2. Oukitel WP5 Pro Screen Replacement, Remove the Right Side Support Panel: 步骤 2 中的图像 1,3 Oukitel WP5 Pro Screen Replacement, Remove the Right Side Support Panel: 步骤 2 中的图像 2,3 Oukitel WP5 Pro Screen Replacement, Remove the Right Side Support Panel: 步骤 2 中的图像 3,3
    在这个步骤中使用的工具:
    T5 Torx Screwdriver
    $5.49
    购买
    • Using your Torx T5 Screwdriver, unscrew the three screws in the right side support panel.

    • Remove the right side support panel.

    • The power and volume buttons are now only held in by a small amount of friction and will likely fall out. To avoid losing them, remove them as well.

  3. Oukitel WP5 Pro Screen Replacement, Begin Prying the Screen: 步骤 3 中的图像 1,3 Oukitel WP5 Pro Screen Replacement, Begin Prying the Screen: 步骤 3 中的图像 2,3 Oukitel WP5 Pro Screen Replacement, Begin Prying the Screen: 步骤 3 中的图像 3,3
    在这个步骤中使用的工具:
    iFixit Opening Tool
    $1.99
    购买
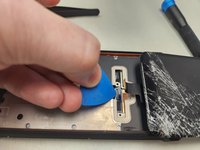
    • With the side support panels removed, you should have enough flexibility in the rubberized sides of the built-in case to safely pry the screen out.

    • Begin prying at either side, and when you have a gap big enough, slide in a plastic card and remove your pry tool.

    • Avoid inserting your plastic card more than 1/2", in order to not damage the delicate ribbon cable holding the screen on.

  4. Oukitel WP5 Pro Screen Replacement, Work Your Plastic Card Around: 步骤 4 中的图像 1,3 Oukitel WP5 Pro Screen Replacement, Work Your Plastic Card Around: 步骤 4 中的图像 2,3 Oukitel WP5 Pro Screen Replacement, Work Your Plastic Card Around: 步骤 4 中的图像 3,3
    在这个步骤中使用的工具:
    Plastic Cards
    $2.99
    购买
    • From the side you inserted it, work your plastic card around the top.

    • Continue along the other side towards the bottom.

    • Stop before reaching the bottom. The ribbon cable attaches to the screen here and it can be damaged with the plastic card on the very bottom.

  5. Oukitel WP5 Pro Screen Replacement, Gently Lift the Screen Up: 步骤 5 中的图像 1,2 Oukitel WP5 Pro Screen Replacement, Gently Lift the Screen Up: 步骤 5 中的图像 2,2
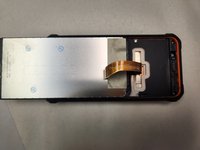
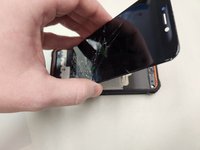
    • When the screen comes loose, gently lift it up.

    • Fold it over onto itself to access the connection point.

    • If the screen is not loose enough to lift yet, work your plastic card back over the top and to the other side again as necessary. Remember to keep the plastic card minimally inserted and avoid the bottom of the screen.

  6. Oukitel WP5 Pro Screen Replacement: 步骤 6 中的图像 1,3 Oukitel WP5 Pro Screen Replacement: 步骤 6 中的图像 2,3 Oukitel WP5 Pro Screen Replacement: 步骤 6 中的图像 3,3
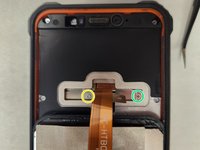
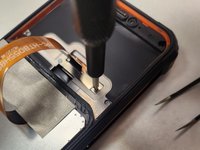
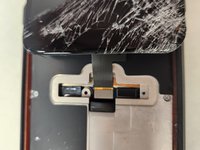
    • Using your PH0 Screwdriver, remove the long screw from the bracket securing the LCD cable in place.

    • Using your PH0 Screwriver, remove the short screw from the bracket securing the LCD cable in place.

    • It is important that these screws be kept separate, as inserting the long screw into the shorter hole could cause internal damages.

    • It has been reported that some builds of this same phone model have an additional metal clip over the bracket secured down by glue. That will also need to be removed if you find this on yours.

  7. Oukitel WP5 Pro Screen Replacement, Remove the Securing Bracket: 步骤 7 中的图像 1,2 Oukitel WP5 Pro Screen Replacement, Remove the Securing Bracket: 步骤 7 中的图像 2,2
    在这个步骤中使用的工具:
    Tweezers
    $4.99
    购买
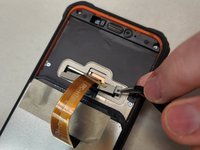
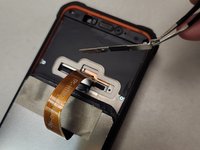
    • Using your tweezers, gently remove the bracket securing the LCD ribbon cable in place.

  8. Oukitel WP5 Pro Screen Replacement, Disconnect the Battery and LCD: 步骤 8 中的图像 1,3 Oukitel WP5 Pro Screen Replacement, Disconnect the Battery and LCD: 步骤 8 中的图像 2,3 Oukitel WP5 Pro Screen Replacement, Disconnect the Battery and LCD: 步骤 8 中的图像 3,3
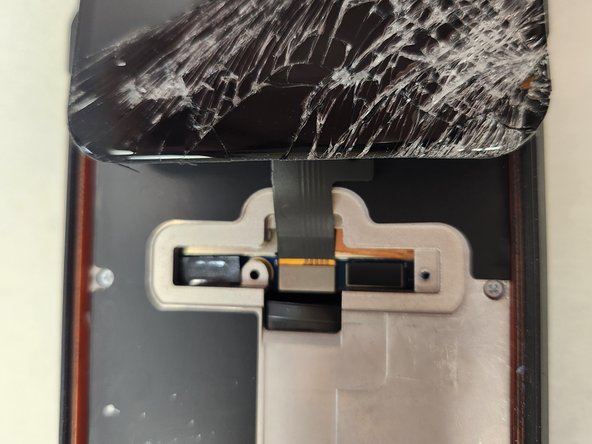
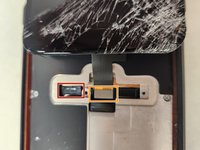
    • Gently flip the screen over the other direction to get better access to the ribbon cable connectors.

    • Using your opening pick, gently disconnect the battery connector.

    • Using your opening pick, gently disconnect the LCD connector.

  9. Oukitel WP5 Pro Screen Replacement, Cleanup: 步骤 9 中的图像 1,1
    • Take special care that any glass shards are removed from the edges of the screen fitting. The WP5 Pro fits it's screen with pressure, not adhesive, so a small shard of glass could damage the new screen if it is in the groove the new screen must go into.

    • Take extra care when installing the new screen to flex the rubber side panels out to give the screen room to slip into it's spot.

    • Even with both sides, top, and bottom properly seated, the corners may be hard to get right. Take it very slow and gently, going back and forth over the problem corner(s), with slightly increasing amounts of pressure, to ensure the new screen is not cracked on any corner.

结论

To reassemble your device, follow these instructions in reverse order. When pushing the new screen into place, take it slow and pay attention to the corners, as a bit too much pressure can destroy the new screen.

2等其他人完成本指南。
Justin Castle

于11/05/20注册

3,526 声望

创作了8篇指南

团队

Eagle River Electronics Eagle River Electronics 的会员

Business

1 名成员

创作了8篇指南

0条评论

添加评论

浏览统计数据:

过去 24 小时: 0

过去 7 天: 25

过去 30 天: 92

总计 1,064